It’s been about a week and a half since The Drive’s dynamic 3D-printing duo embarked on a competition to build the wackiest, wildest, and genuinely useful custom printed accessories for the 2022 Ford Maverick. Ford gave our staffers Peter Holderith and Rob Stumpf a pair of base-trim Mavericks so they can explore the limits of the Ford Integrated Tether System, or FITS for short—and boy, have they ever.
Though 3D printing has been around for a while now, Ford’s compact pickup is the first mainstream vehicle to make it a central part of the ownership experience. These FITS slots, essentially little modular mounts where you can attach anything you dream up and print, have the potential to radically upgrade the Maverick’s utility—though in the truck’s first year on the market, there haven’t been any major DIY breakthroughs emerging. And that’s where we come in.

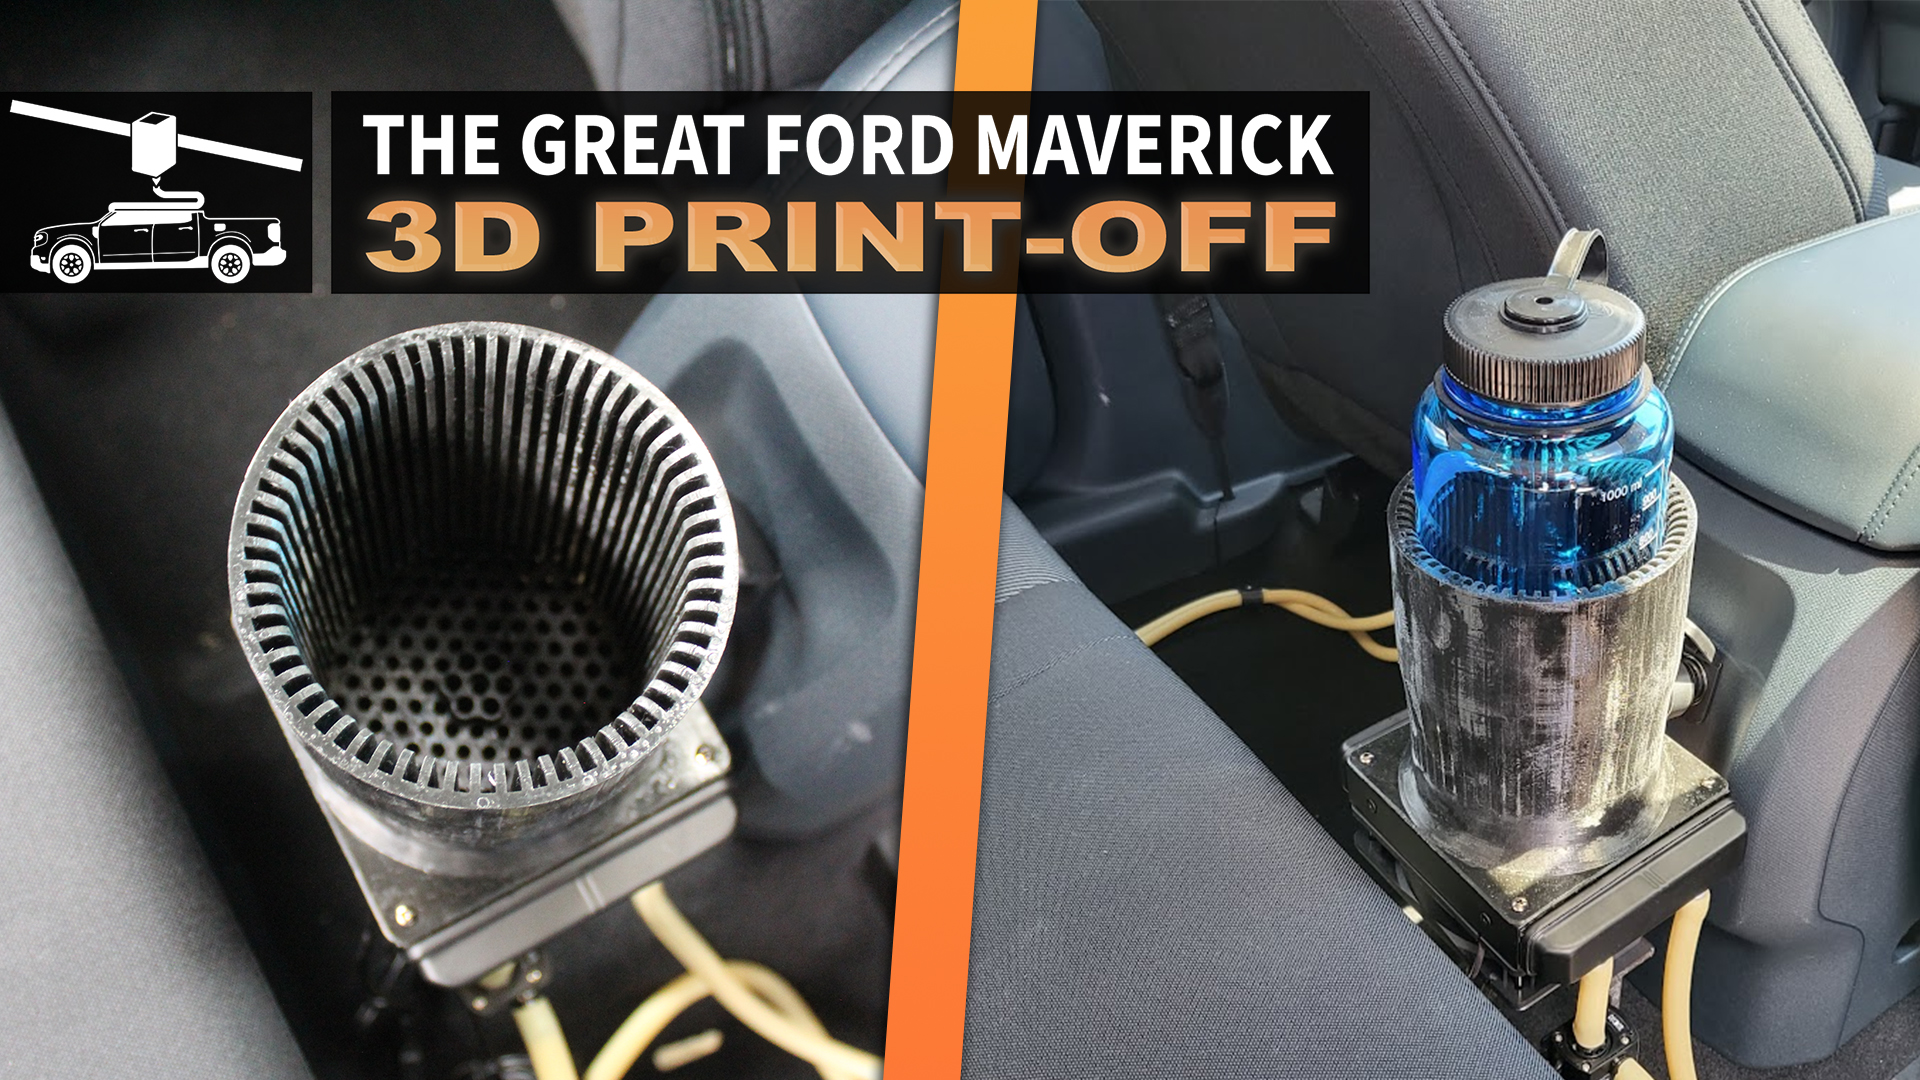
We started this quest by taking some suggestions from our observant readers, following that up with a story last week detailing our first new product trials—in particular, Peter’s attempt to turn the underseat storage bin into a cooler, and Rob’s design for a gyroscopic water bowl for dogs. This week, we’ve got some more exciting updates, including Rob’s successful drive to add more FITS slots to the Maverick’s cabin (and the opportunities those unlock), and Peter’s new heated and cooled cupholder running off the HVAC system.
[This is The Drive‘s Great Ford Maverick 3D Print-Off. Peter Holderith and Rob Stumpf are in a competition to see who can 3D print the best accessory for the truck. We’ll announce a winner in mid-July, but for now, follow along with their progress on The Drive‘s Twitter, Instagram, and Facebook accounts with #maverick3dprintoff. Happy printing!]
Peter’s Update
Rob is definitely on the right path adding FITS slots to more places inside the interior. You may ask—why add a FITS slot when you can direct-mount an accessory? It’s a matter of compatibility. Now instead of a dedicated part, any FITS gizmo can go there. My latest accessory, which I should be able to test in a short while, plays off that concept in a different way.
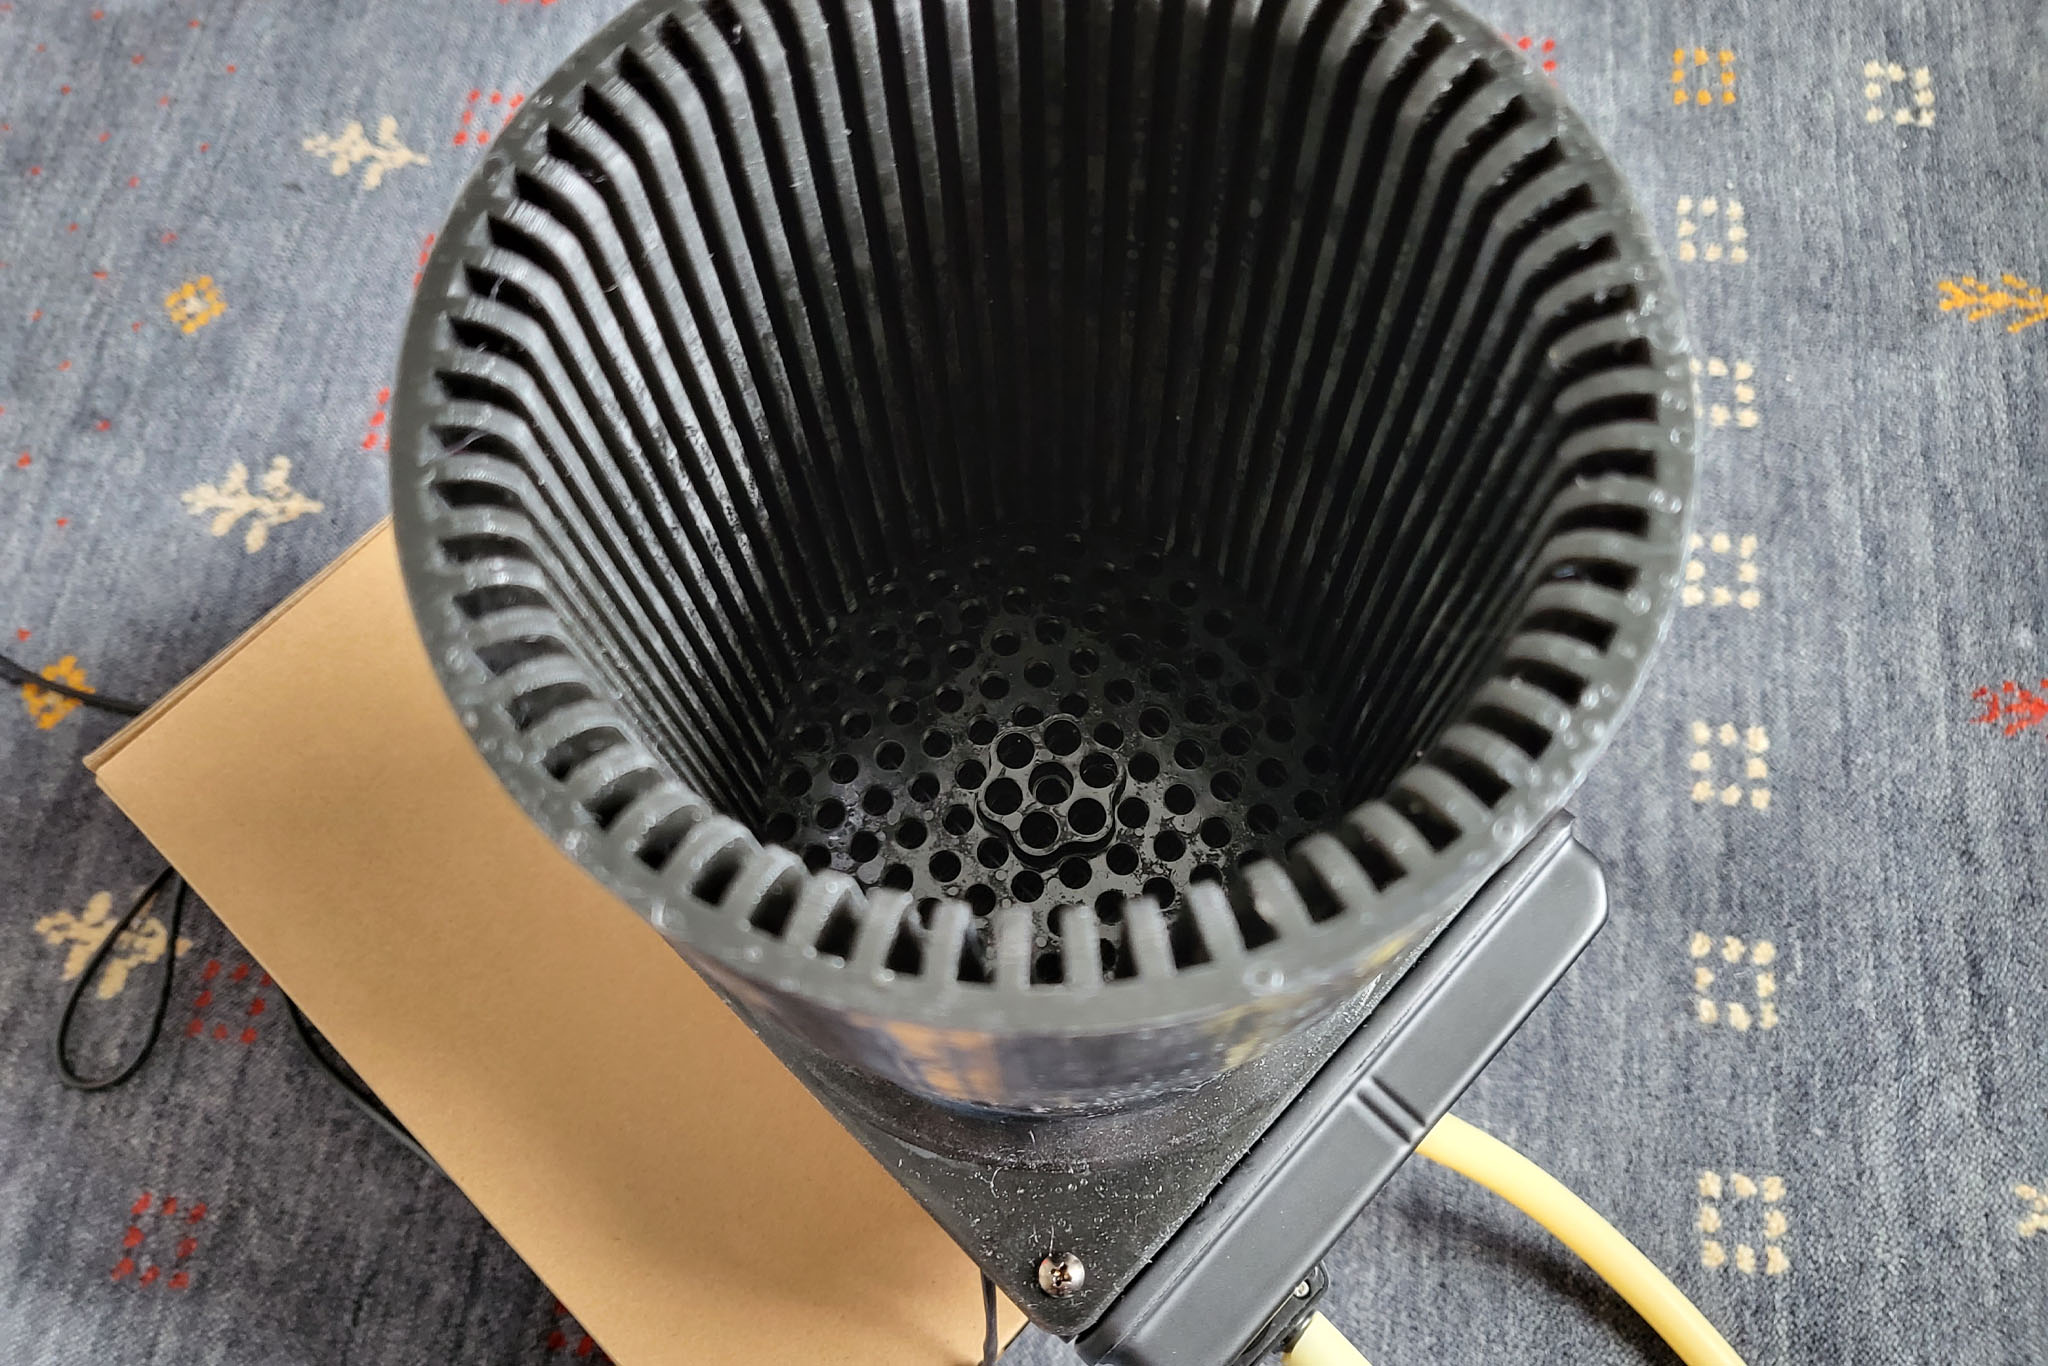
It’s a heated/cooled cupholder tied into the HVAC system with a similar setup to the underseat cooler. It’s big enough to fit any bottle smaller than 3.7 inches. All about compatibility. If you use a Nalgene or a similarly-sized Hydroflask, it will fit both, and it can keep whatever you have in them colder/warmer for much longer than usual.

I just finished my prototype not long ago and I’m still testing the basics. As with my other gadgets, this one is just a proof of concept. It is, however, working pretty well. For those who are curious, yes, I am making an insert so it can fit regular fast food-type cups as well.
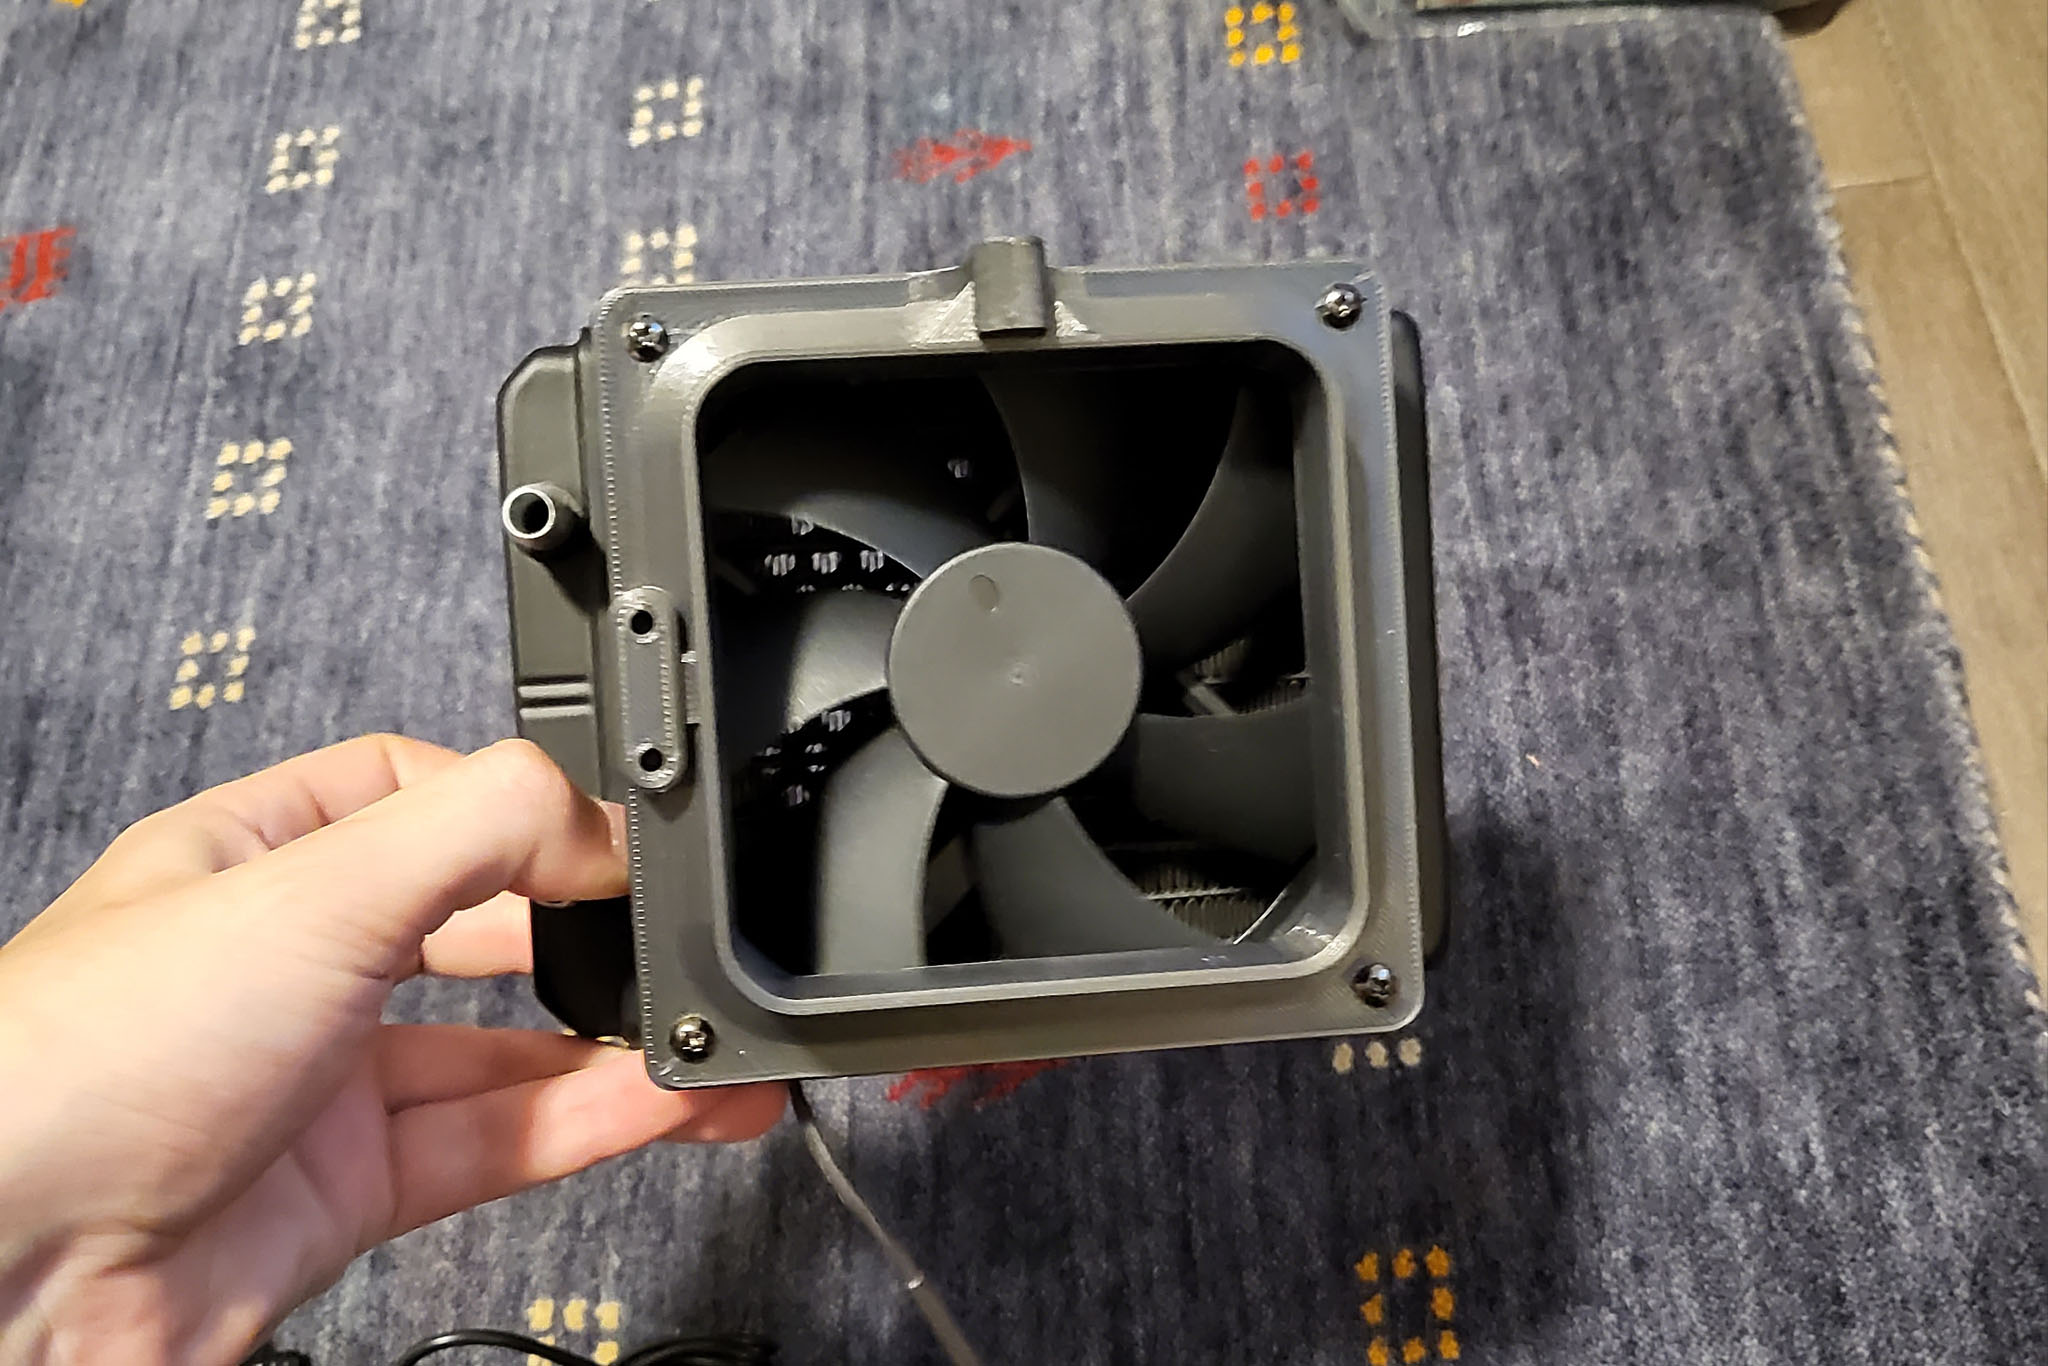
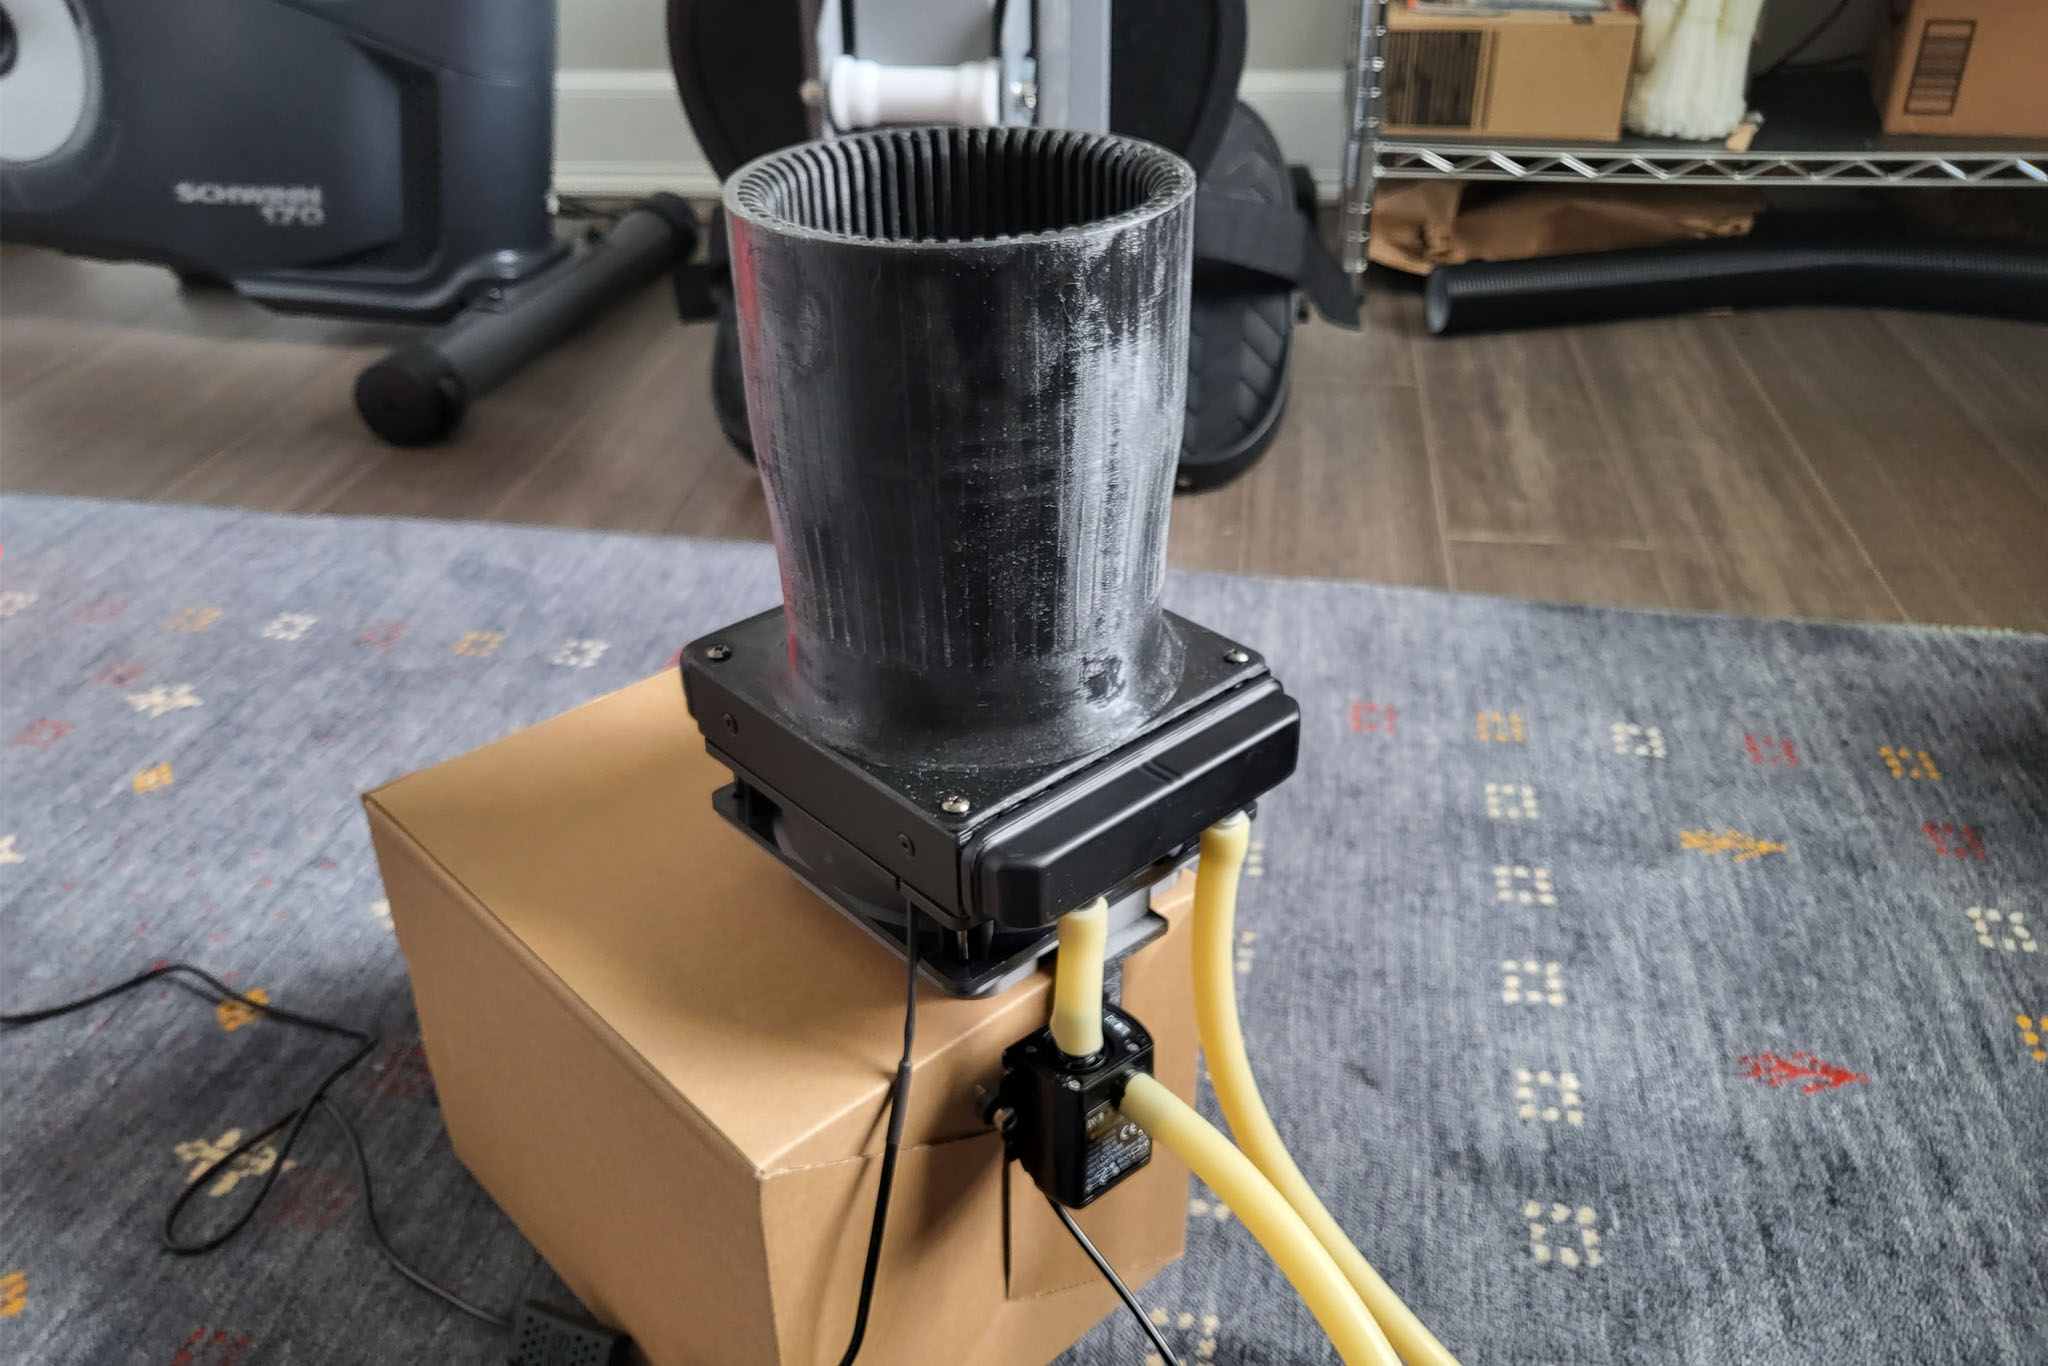
As I mentioned, this system works similarly to the underseat cooler. It uses an aquarium pump to send water down to a radiator located at the HVAC vent. Once it arrives at the lower radiator, heat is either pumped into the water if the car’s heat is on, or pumped out (the water gets cold) with the air conditioning on. The water is then sent to another radiator where the desired temperature is transferred out of the liquid and back into the air.
This heated/cooled cupholder shares several parts with the cooler system because they’re basically the same thing. The big difference is the cupholder portion itself. The bottle sits slightly above the bottom of the cupholder to ensure air flows around the bottom as well as the sides. Fins protrude from the inner diameter of the cupholder to provide an unobstructed space for air to flow around the sides of the bottle. This particular part came out a bit scrappy because I printed it on my resin-based machine and I didn’t have my settings quite tuned up yet.

On my filament-based printer, this component would’ve taken 48 hours to complete. On my resin machine, it took just four and a half. I’ll have to write a separate post explaining how this is possible, but for now, all you need to know is that resin-based printers are probably gonna be big in the automotive prototyping world. In this instance, the result is a little rough around the edges, but I could create the same thing but better If I just modified a few key parameters in the printing software.
My second prototype is another one that moves air, although it’s not quite as complex as the others. It’s still being designed, but I can tell you that it’s a FITS-mounted winter glove drier. This thing would be used after or during ski trips, or perhaps other snowy scenarios. I’m not sure how long it would take to dry a glove, but it would definitely help. You could also use it for socks I guess, but it would absolutely stink up the inside of your truck.
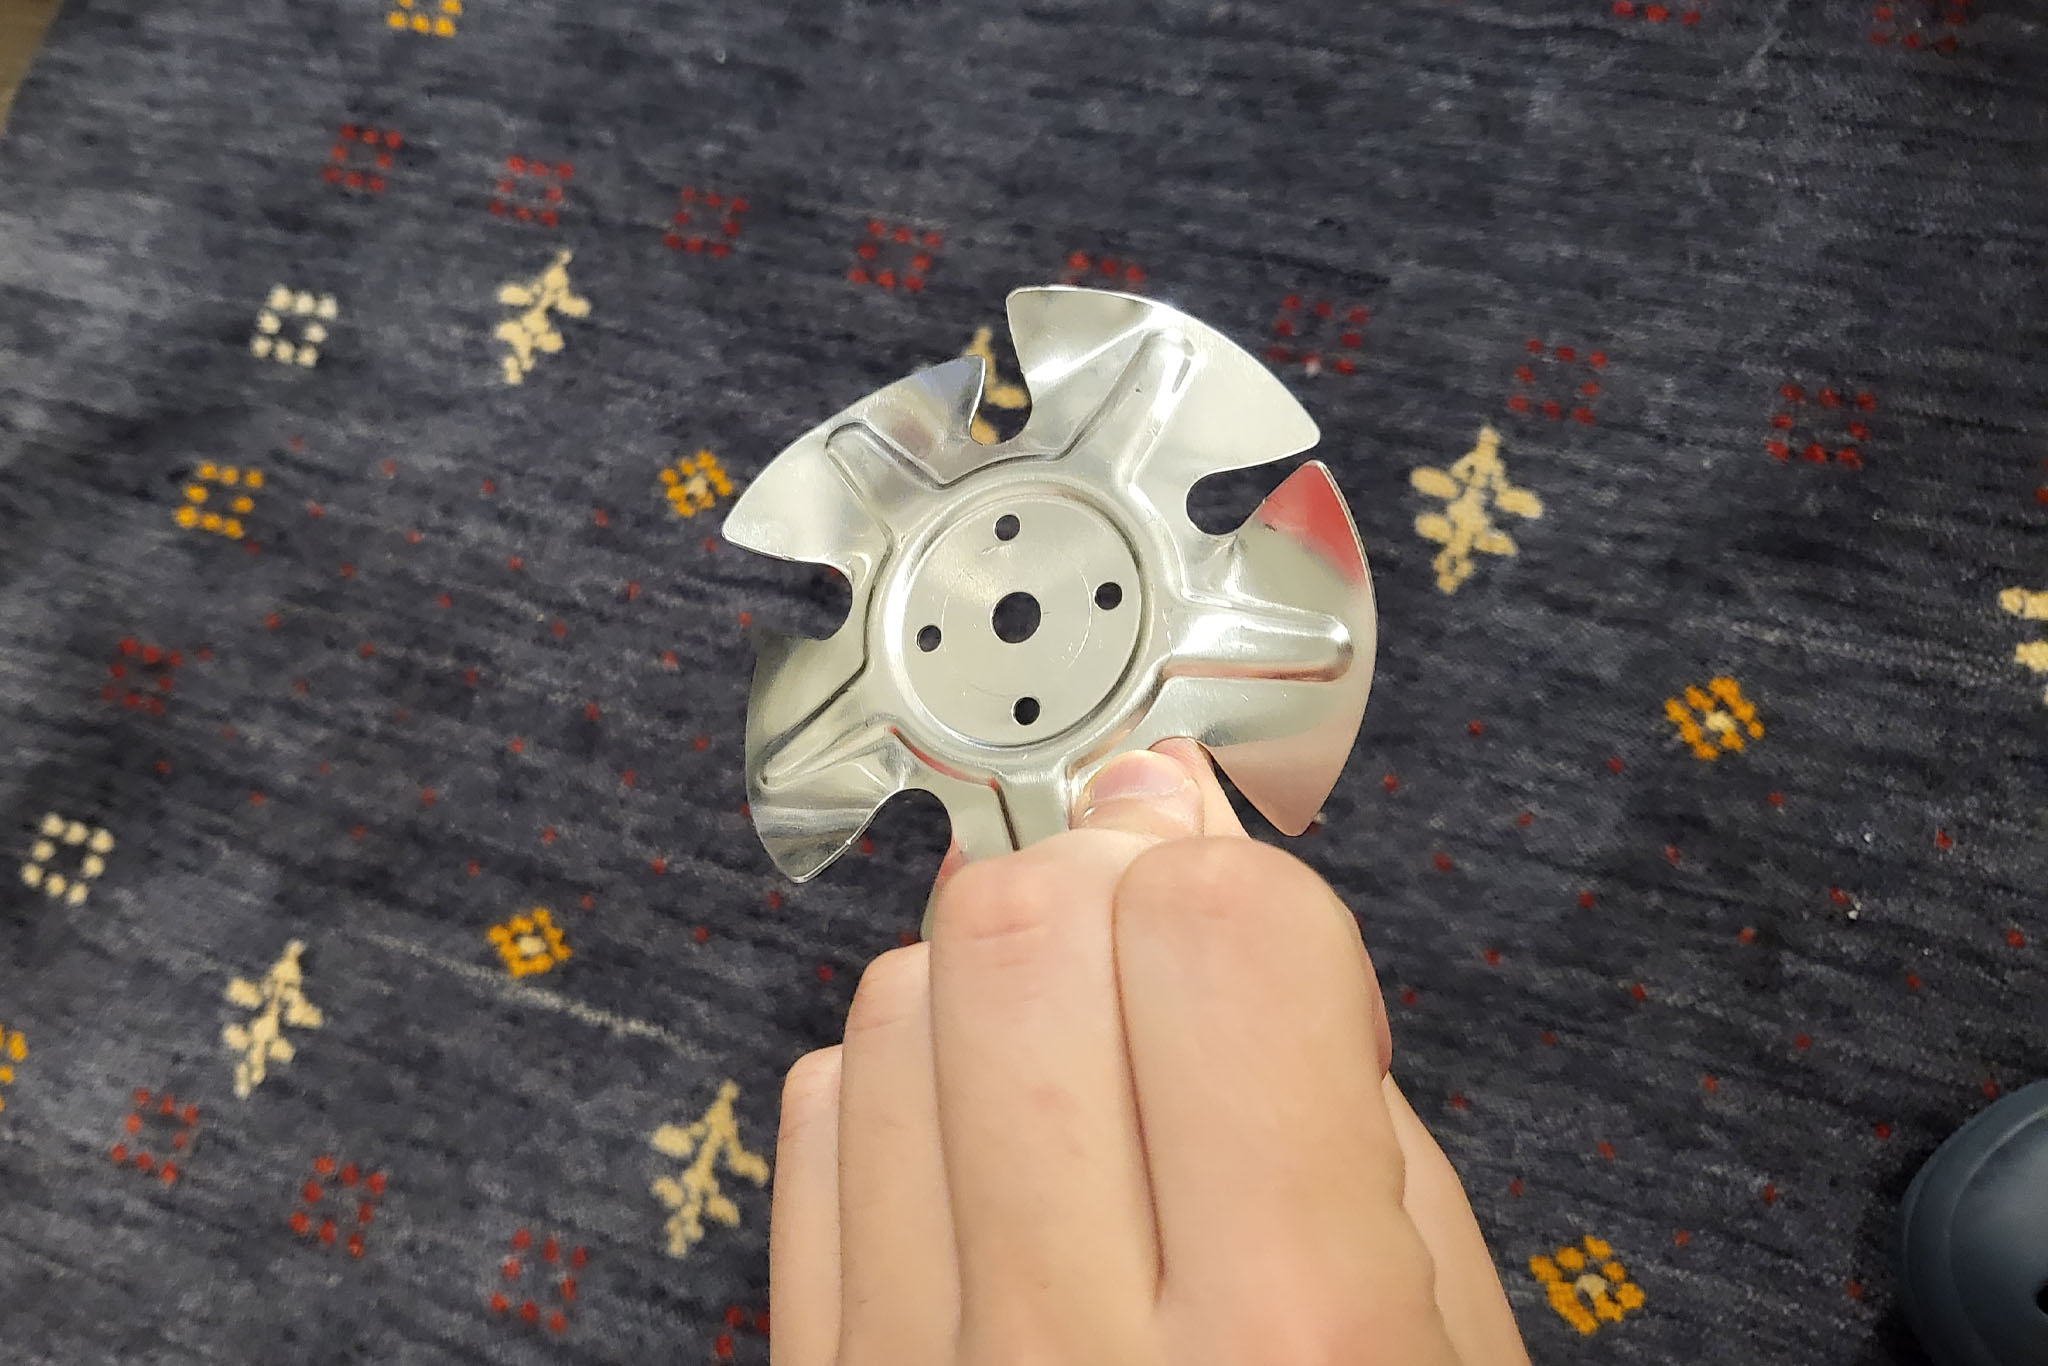
PC fans definitely wouldn’t cut it this time, so I bought a 120-volt, three-inch duct booster to get the job done. So far, I’ve only designed a new fan for it, because the one that came with it was really bad. I have no way to measure it, but I’ve confidently improved this duct booster’s performance by designing a new resin-printed fan for it to replace the old pressed metal one.
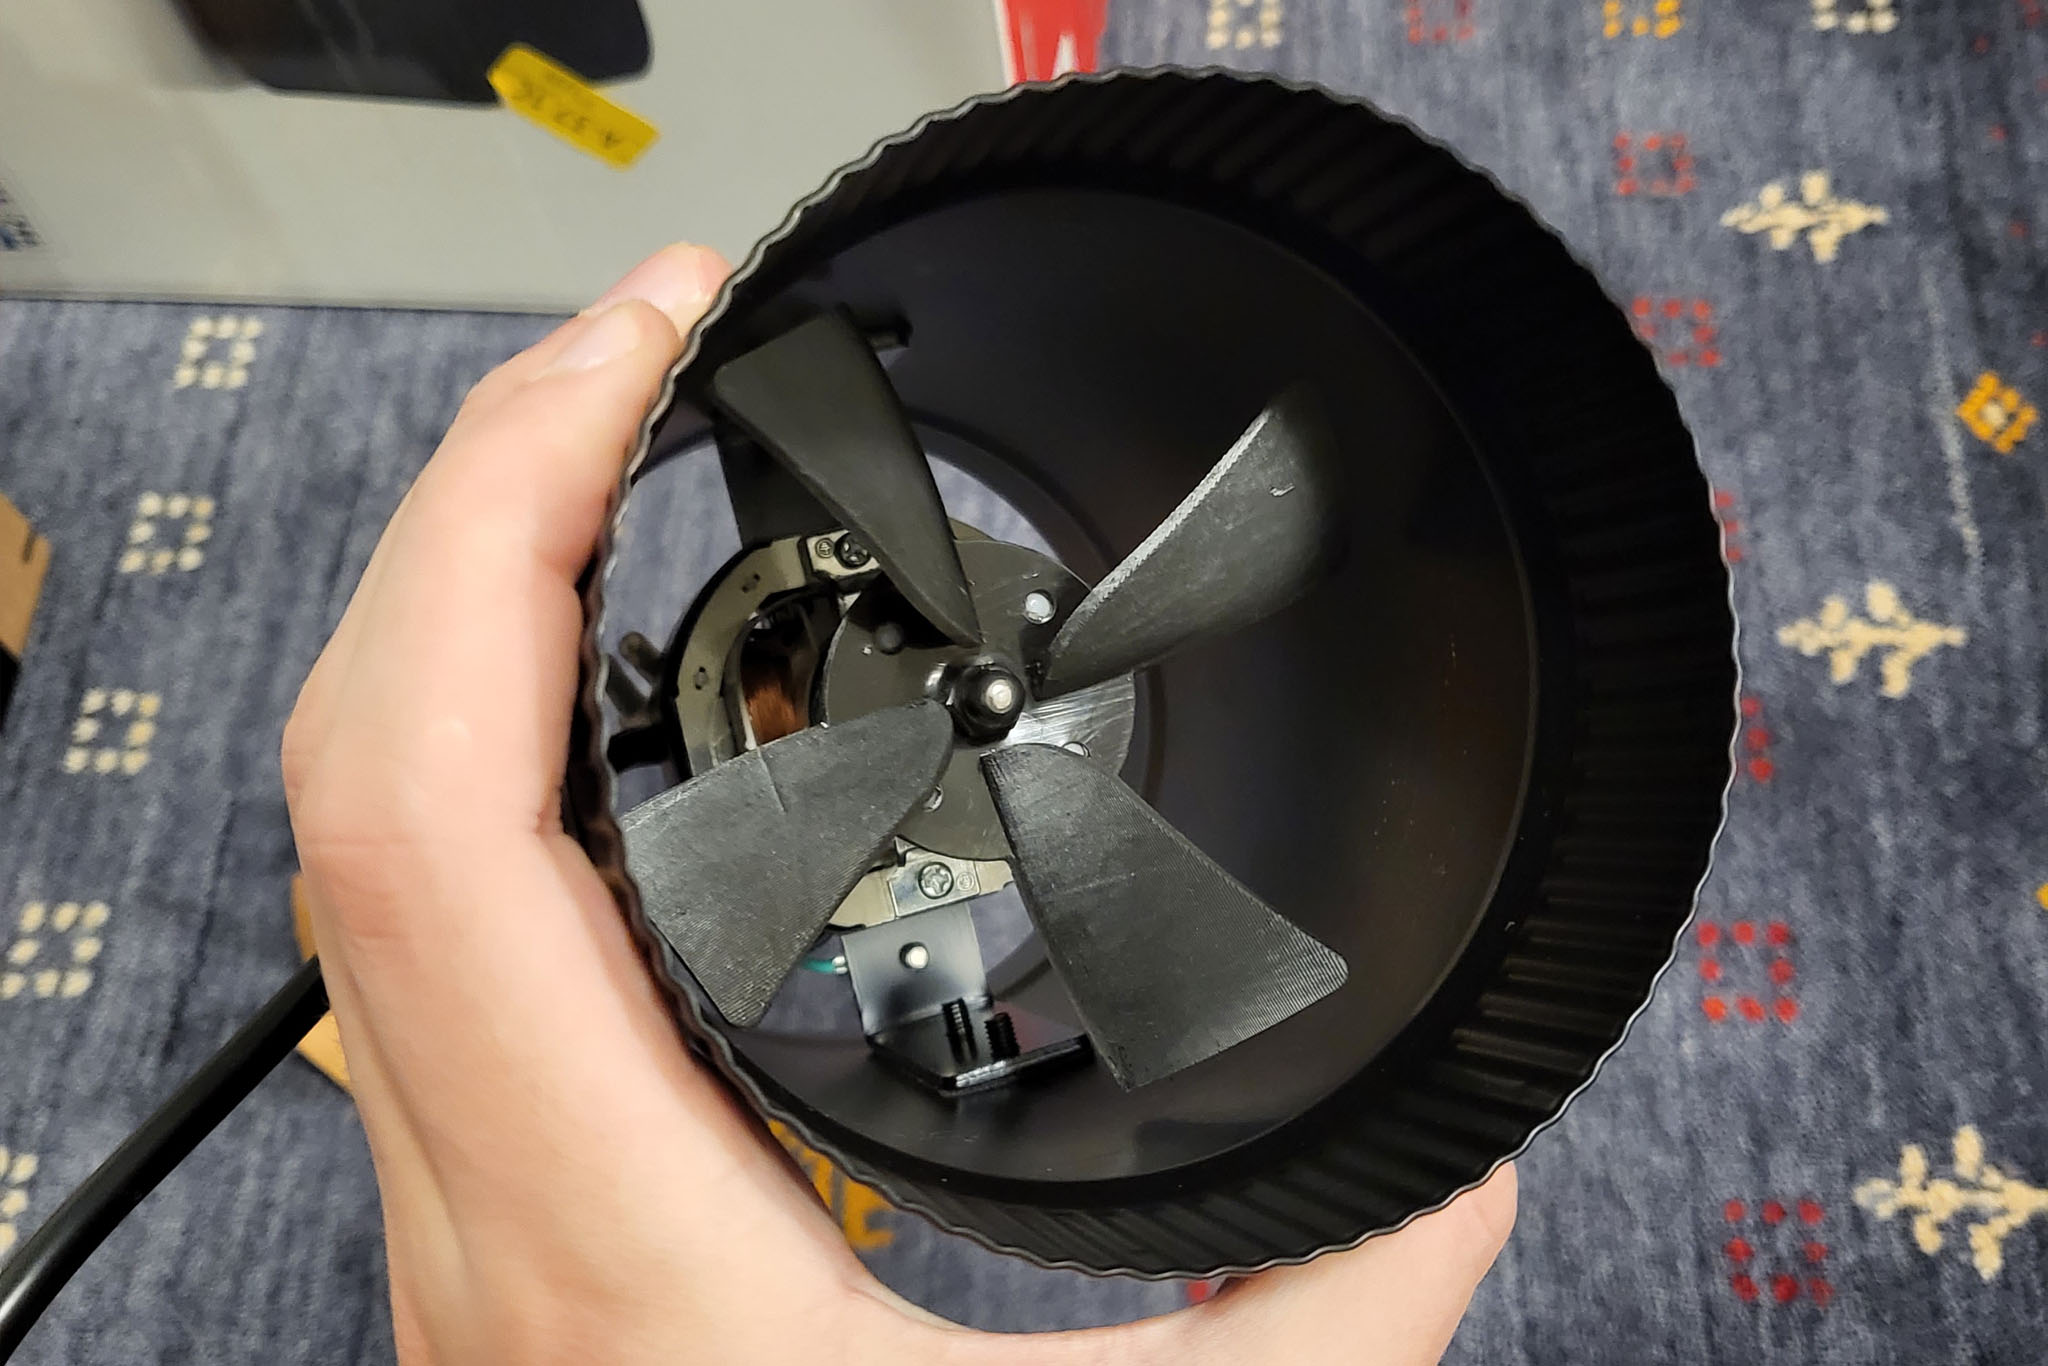
Now that I have my airflow, all I have to do is figure out how to mount the booster to a FITS slot and make a manifold to hold at least one pair of gloves, preferably two. I decided not to heat the airflow at all this time with help from the HVAC system. I’ve used other stationary glove driers and they don’t heat the air, so I think it’s sort of an added bonus if they do, but not essential.
All of these ideas I’m making proof of concepts for could definitely be improved a bit now that I’ve gone through and built them, and I’ll probably pick one to iterate on for our final update in a few week’s time. Let me know which accessories you’ve liked the most so far in the comments, and I’ll go forward with it into a second, more polished prototype. I can also integrate any changes anyone thinks are necessary, which might be in order.
Rob’s Update
In our last update, one of the biggest takeaways Peter and I agreed on is that Ford missed a rather big opportunity by putting so few FITS slots in usable areas around the cabin. In fact, despite the hype there’s just one outside the storage bins under the back seat, on the back of the center console. The placement means there’s just seven inches of room between the slot and the leading edge of the back seat cushion. So this week, I made it my armchair engineer mission to explore the limits of where FITS slots can go.
To better understand the potential of FITS, I made it a point to use the Maverick to complete all of my routine driving for the past week and a half, including commuting, shopping, driving back-and-forth to hobbies, and whatever other task I would normally take on during the week.
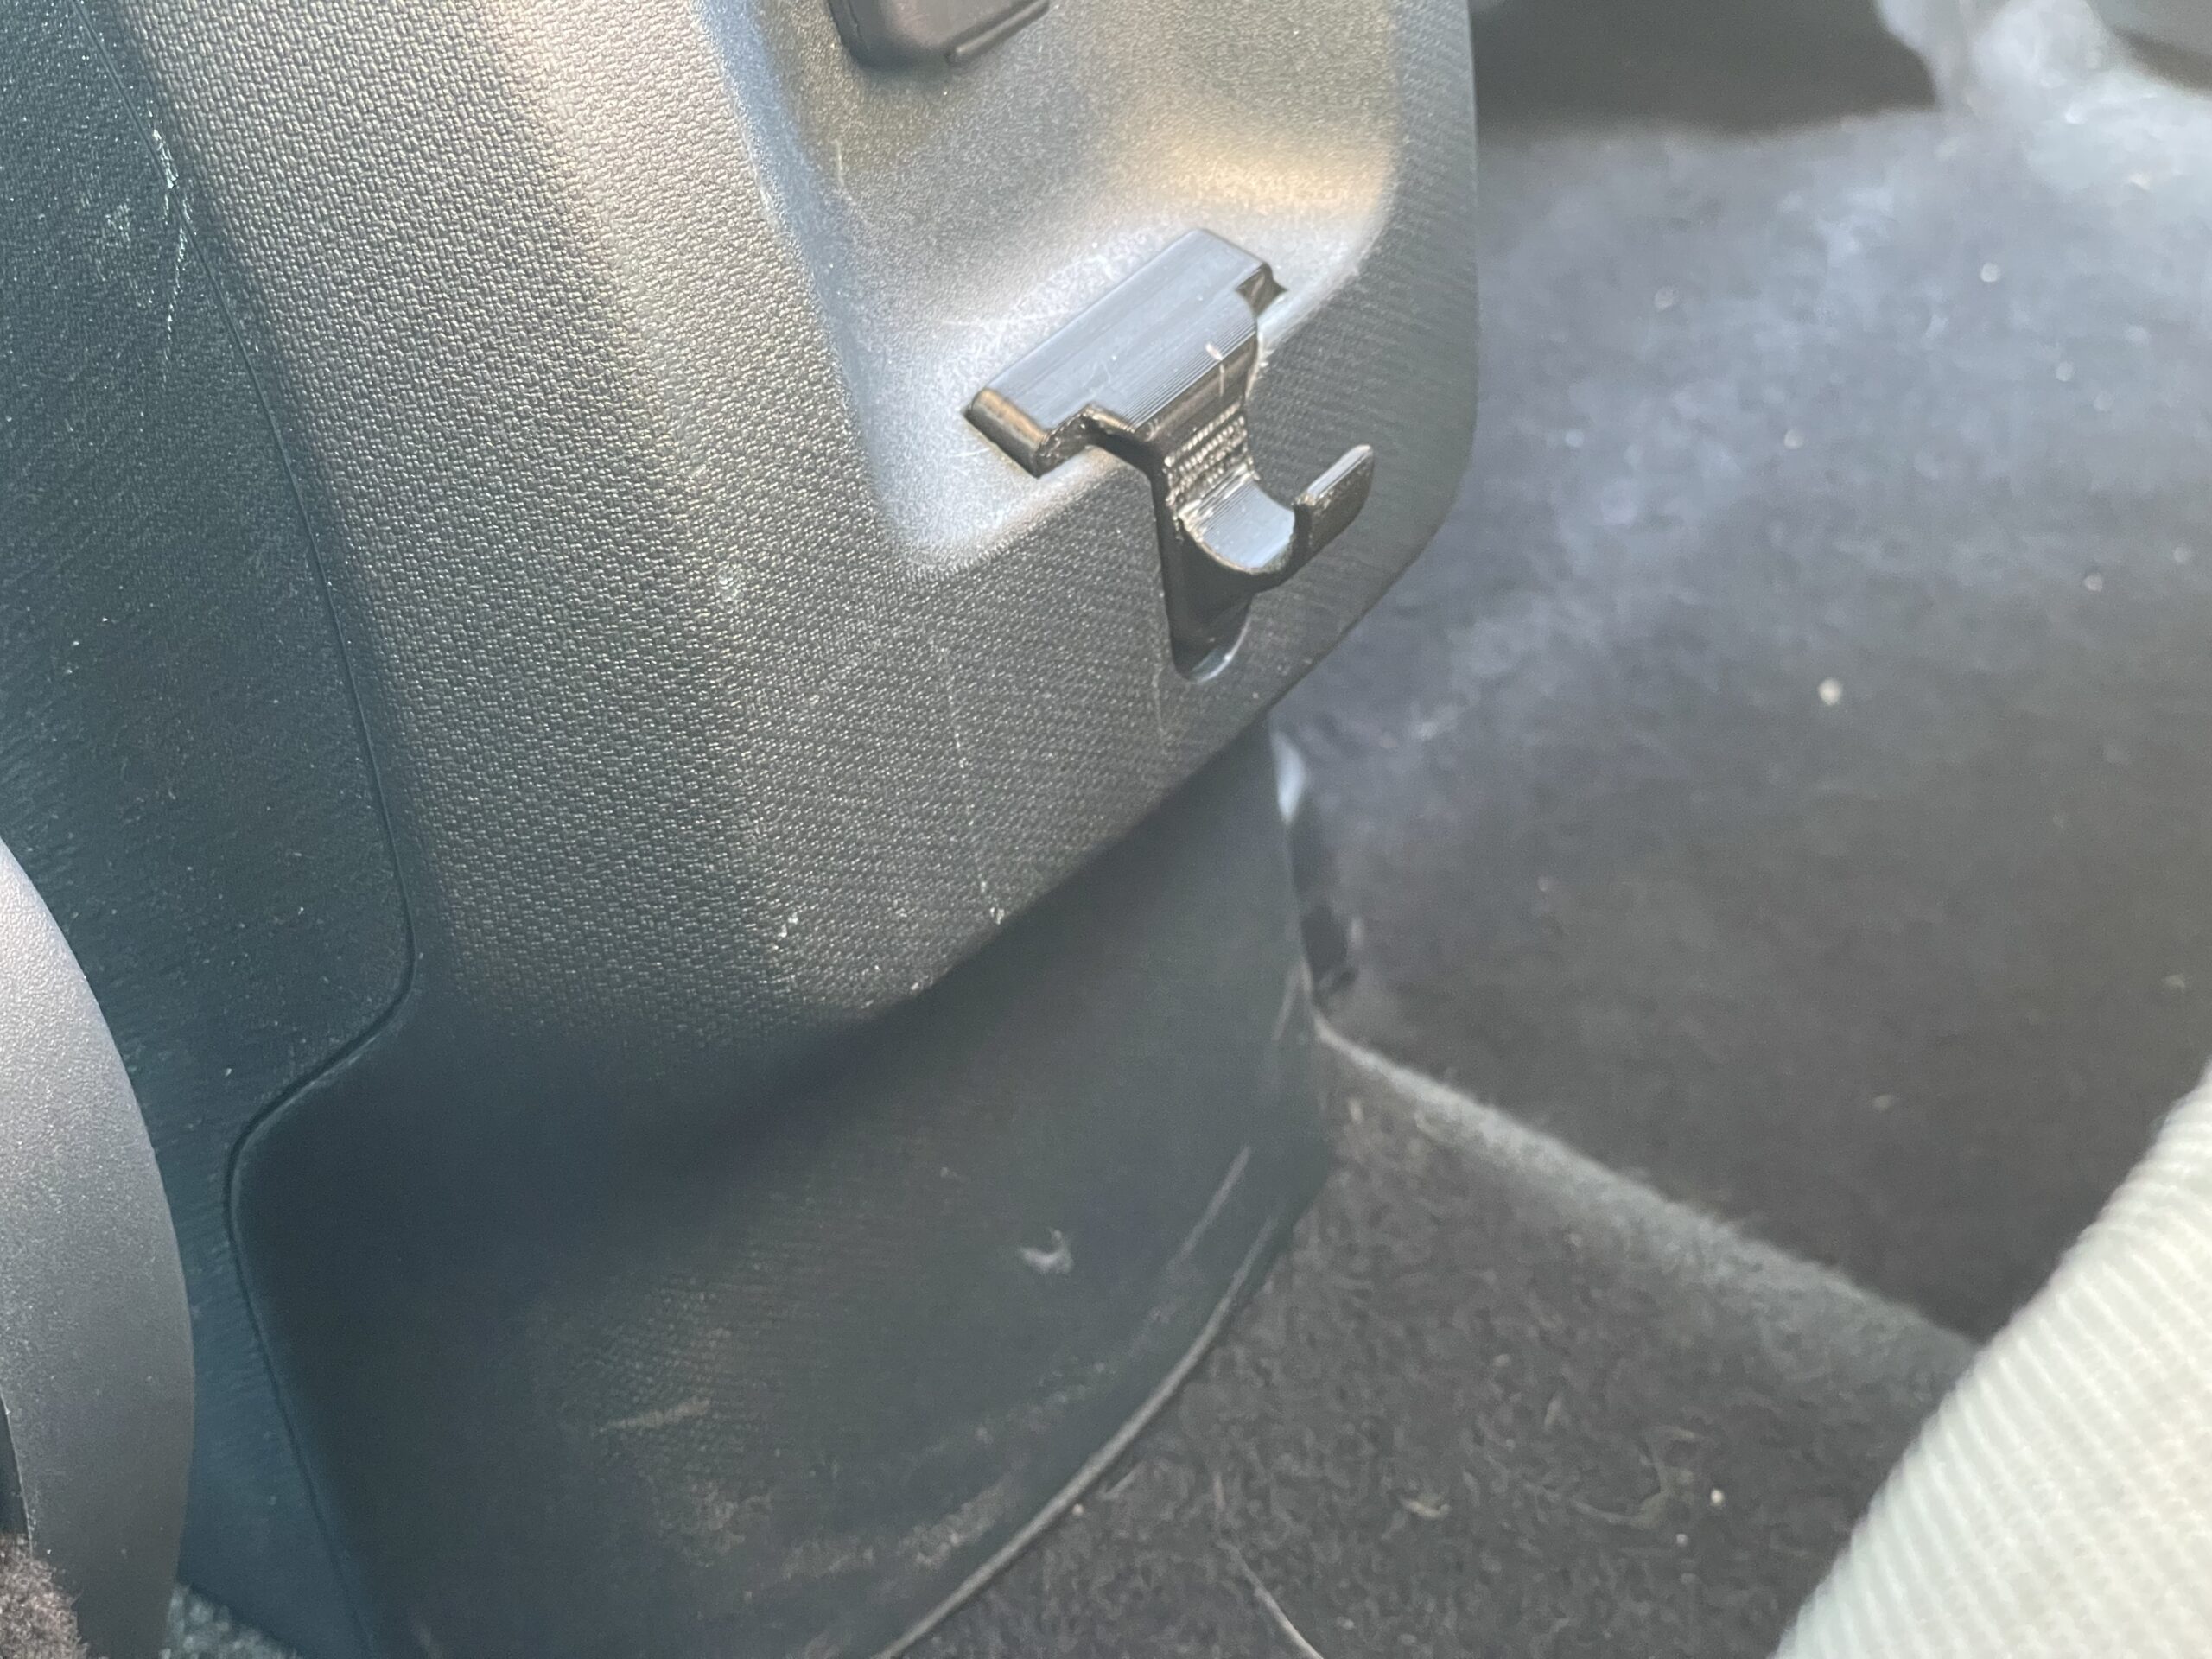

While shopping, I thought that it would be a great idea to have a hook in the existing slot on the back of the center console. There were a number of times that I stashed bags under the back seat to keep things from rolling around, but having a small hook there would allow me to keep my cargo secure without jamming it into the storage bin. So, I designed one. And that immediately got me thinking about the best use for slot: back seat organization.
For starters, I built a small wire cleat to keep charging cables tidy while not in use. Useful if someone is routinely in the back seat and leaves their chargers dangling. That wasn’t a huge problem for me since the base model Mavericks don’t have rear USB ports, but I’m sure it will be for someone. I also designed a mount to keep an eight-ounce bottle of hand sanitizer in place.

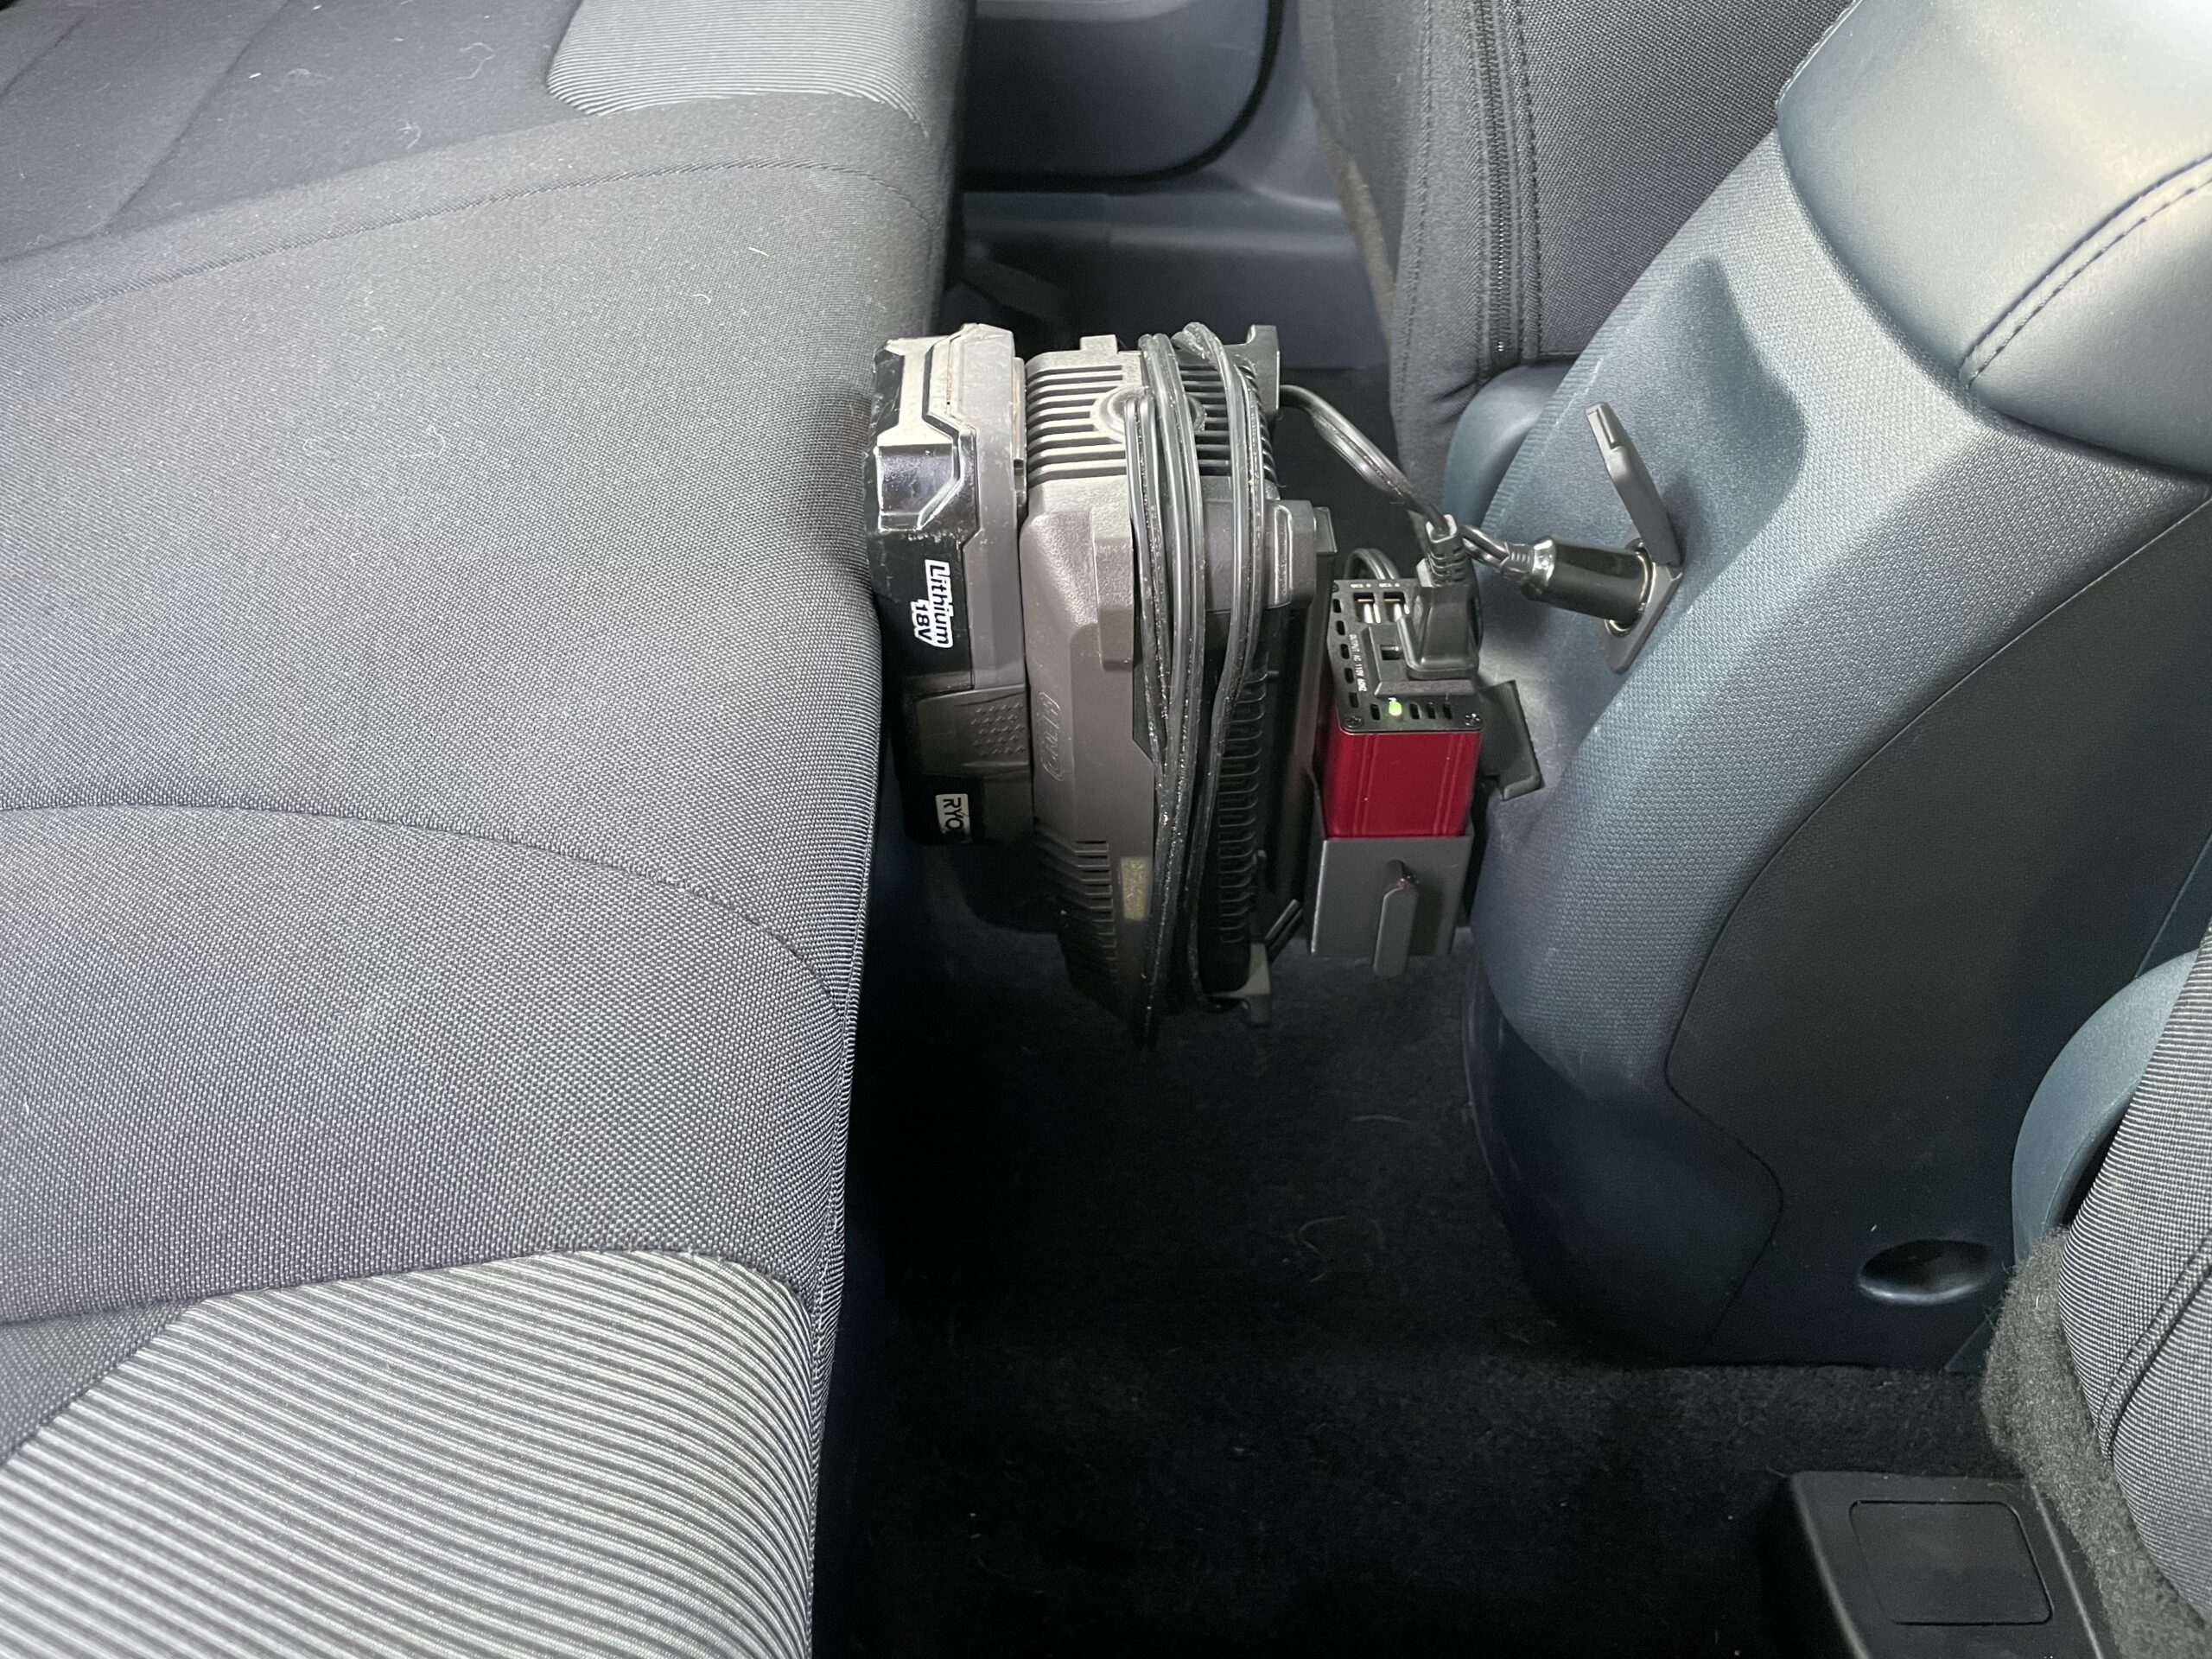

For those who plan to use their truck for work, let it be known that mounting tools are a useful good option for these slots, weight permitting. I created an accessory to hold my Ryobi charger and a battery in place while I was driving. Again, with my Maverick XL loaner being a base-spec, I don’t have a 120-volt outlet like some of the higher trims, but it does have a 12-volt barrel adapter. I opted to order a cheap DC-to-AC power inverter on Amazon and designed my mount to hold both the power inverter and the battery charger. This essentially created a plug-and-play apparatus to keep my tools charged on the go, but it was a fairly tight fit between the center console and rear seat—I’ve mentioned this before when piloting a gyroscopic water bowl last week.
Work is cool, but what about play? After all, this is a people hauler meant for the urban-dwelling family who wants the utility of a pickup but the convenience of a crossover. So I built two more mounts: one for an iPad, and another for a Nintendo Switch… that should keep the attention of kids on a road trip. But putting either one of those on the existing rear slot meant a ton of neck strain to look down, and perhaps even worse consequences for people who get motion sickness.
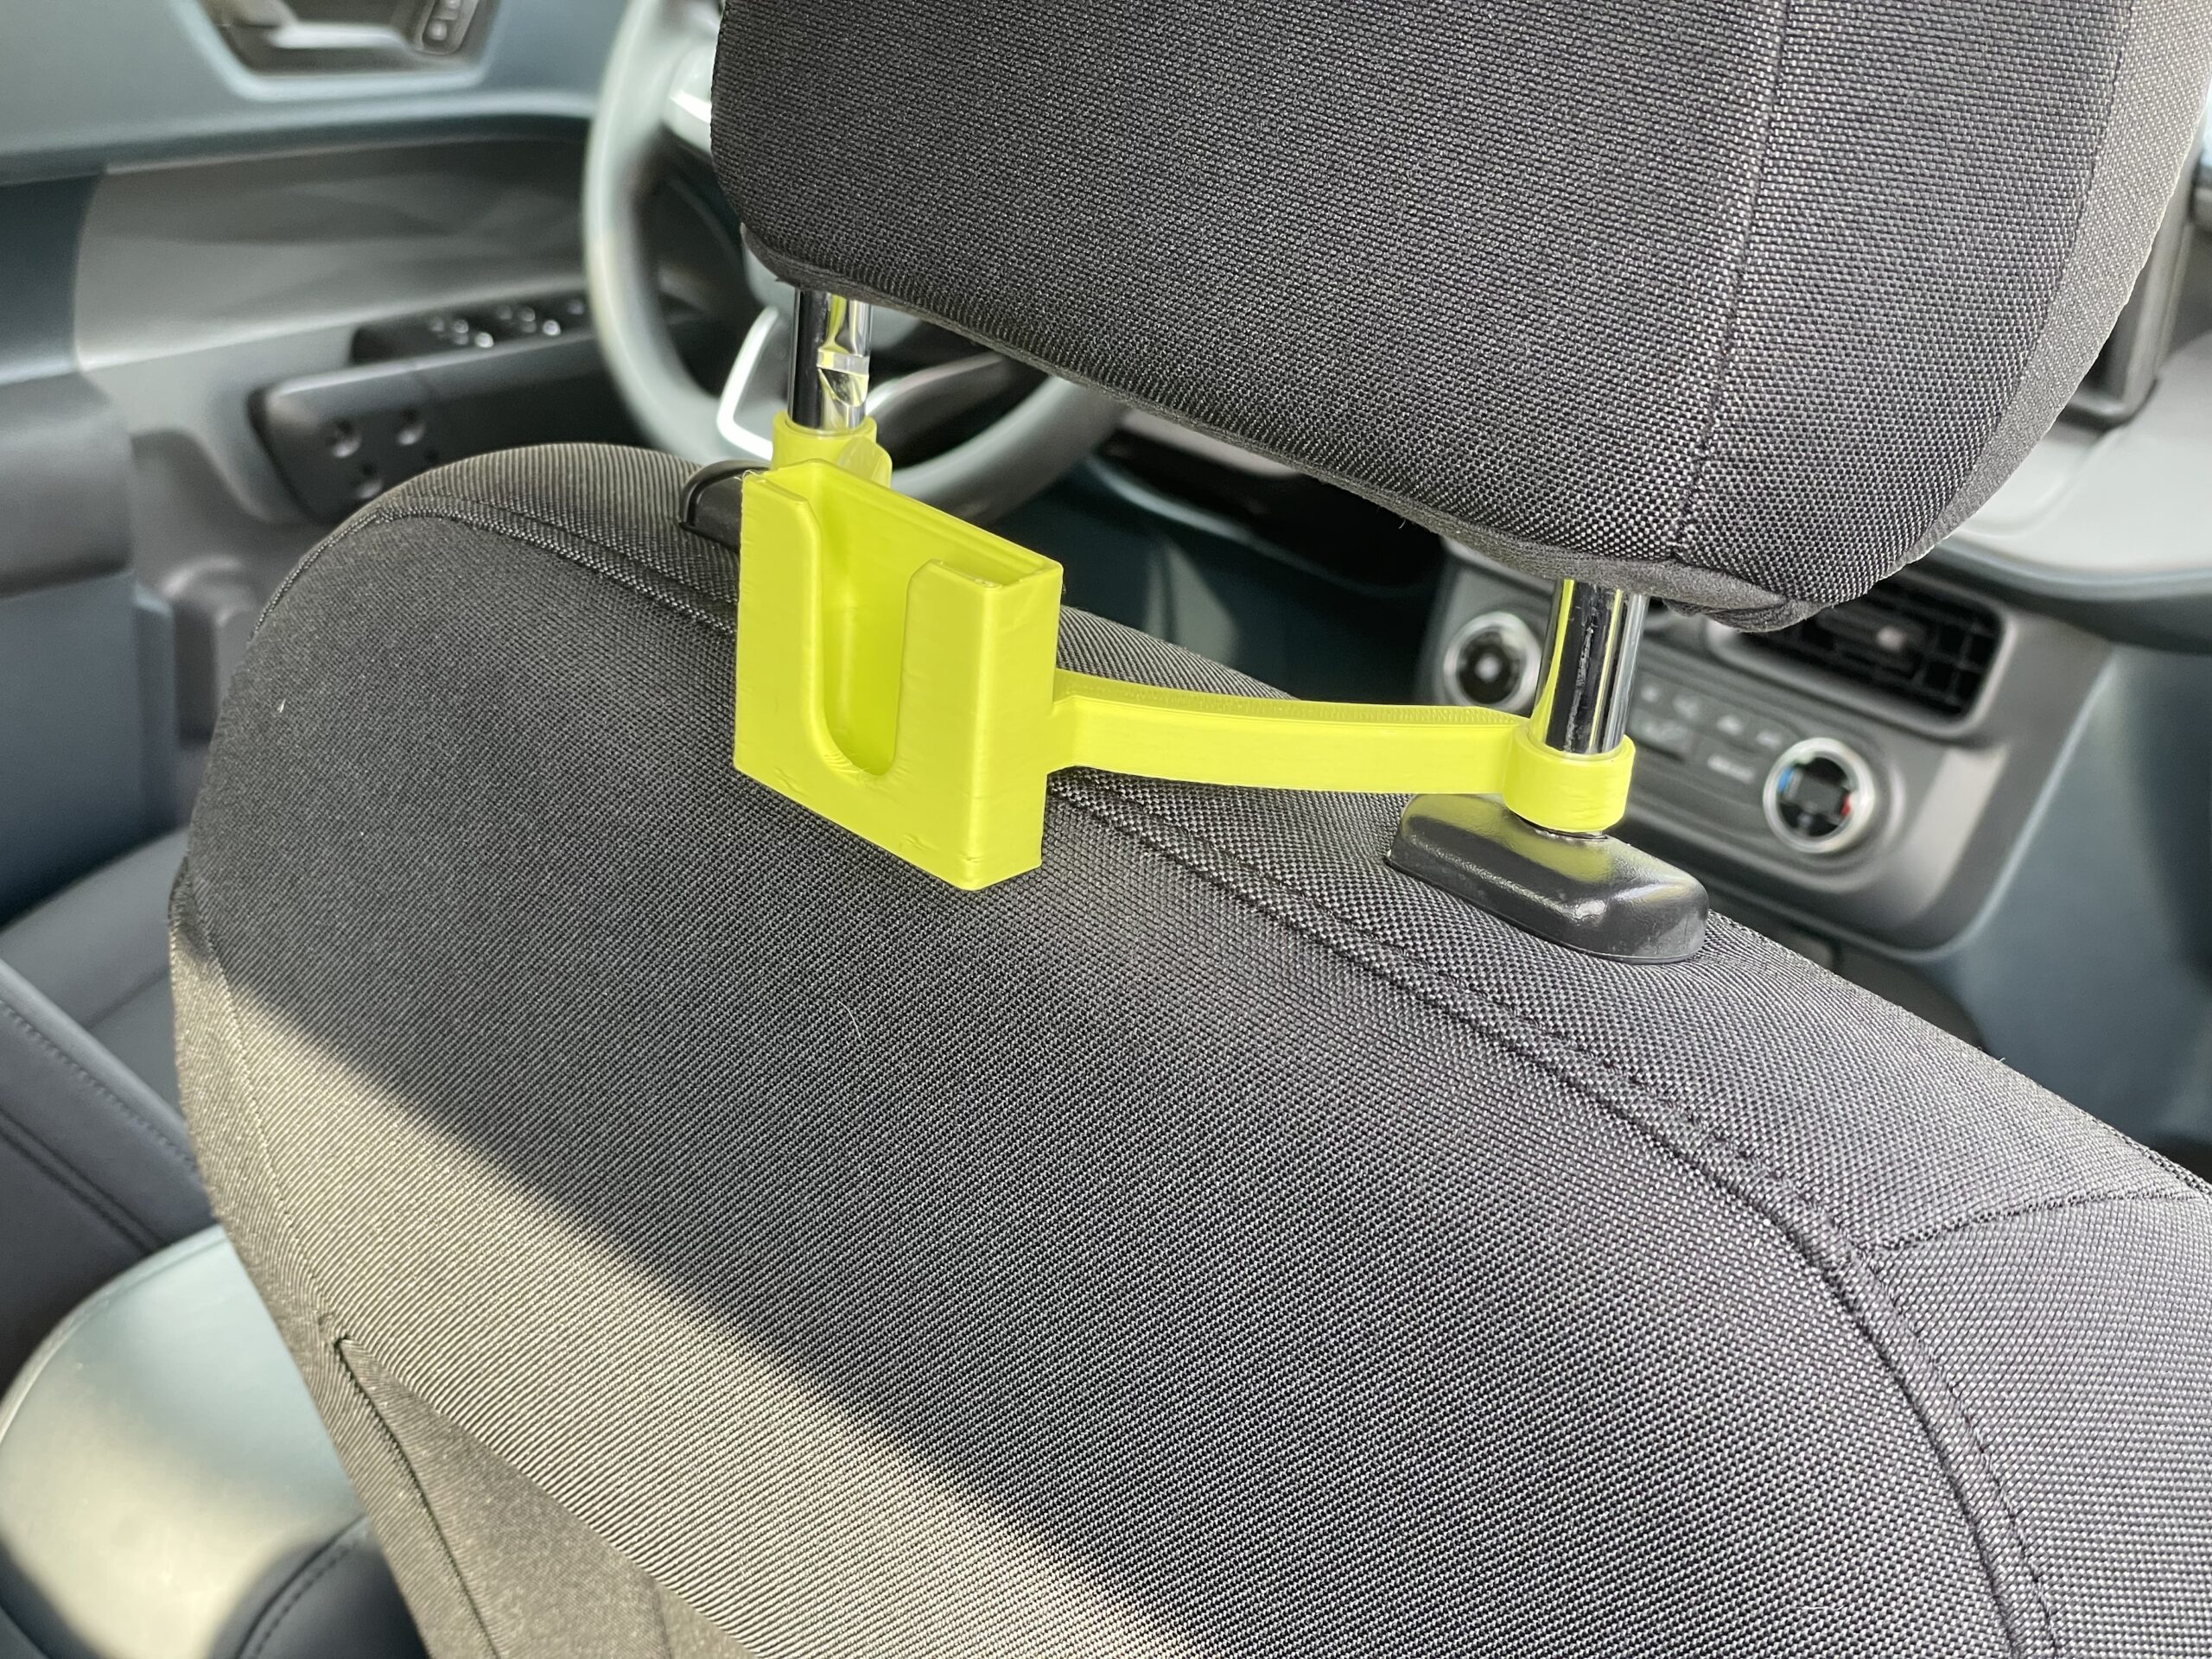
It became abundantly clear to me that the rear slot was intended mainly for utility purposes. The slot is fine for simple items that a passenger might need to passively grab but not focus on, but it’s simply mounted too low to be useful for anything interactive. To fix that problem, I designed a small FITS-compatible mount for the front seat headrest. This mount faces the rear passenger and sits eye-level, making it the perfect placement for a device with a screen.

Likewise, I thought that this kind of placement could be useful for the front seat passenger as well. Ford has three exposed screws that hold the trim on front of the dashboard, and I was able to remove one, measure it, and use it as a pattern for another FITS mount that sat below the passenger airbag, meaning that a screen-based device could be mounted in front of the passenger with ease. Or, if they prefer, a cup holder or nearly any other type of accessory. I’m not showing pics of it here because I honestly don’t know whether the placement is totally airbag safe—but know that it’s an option should you want to make that choice for yourself.
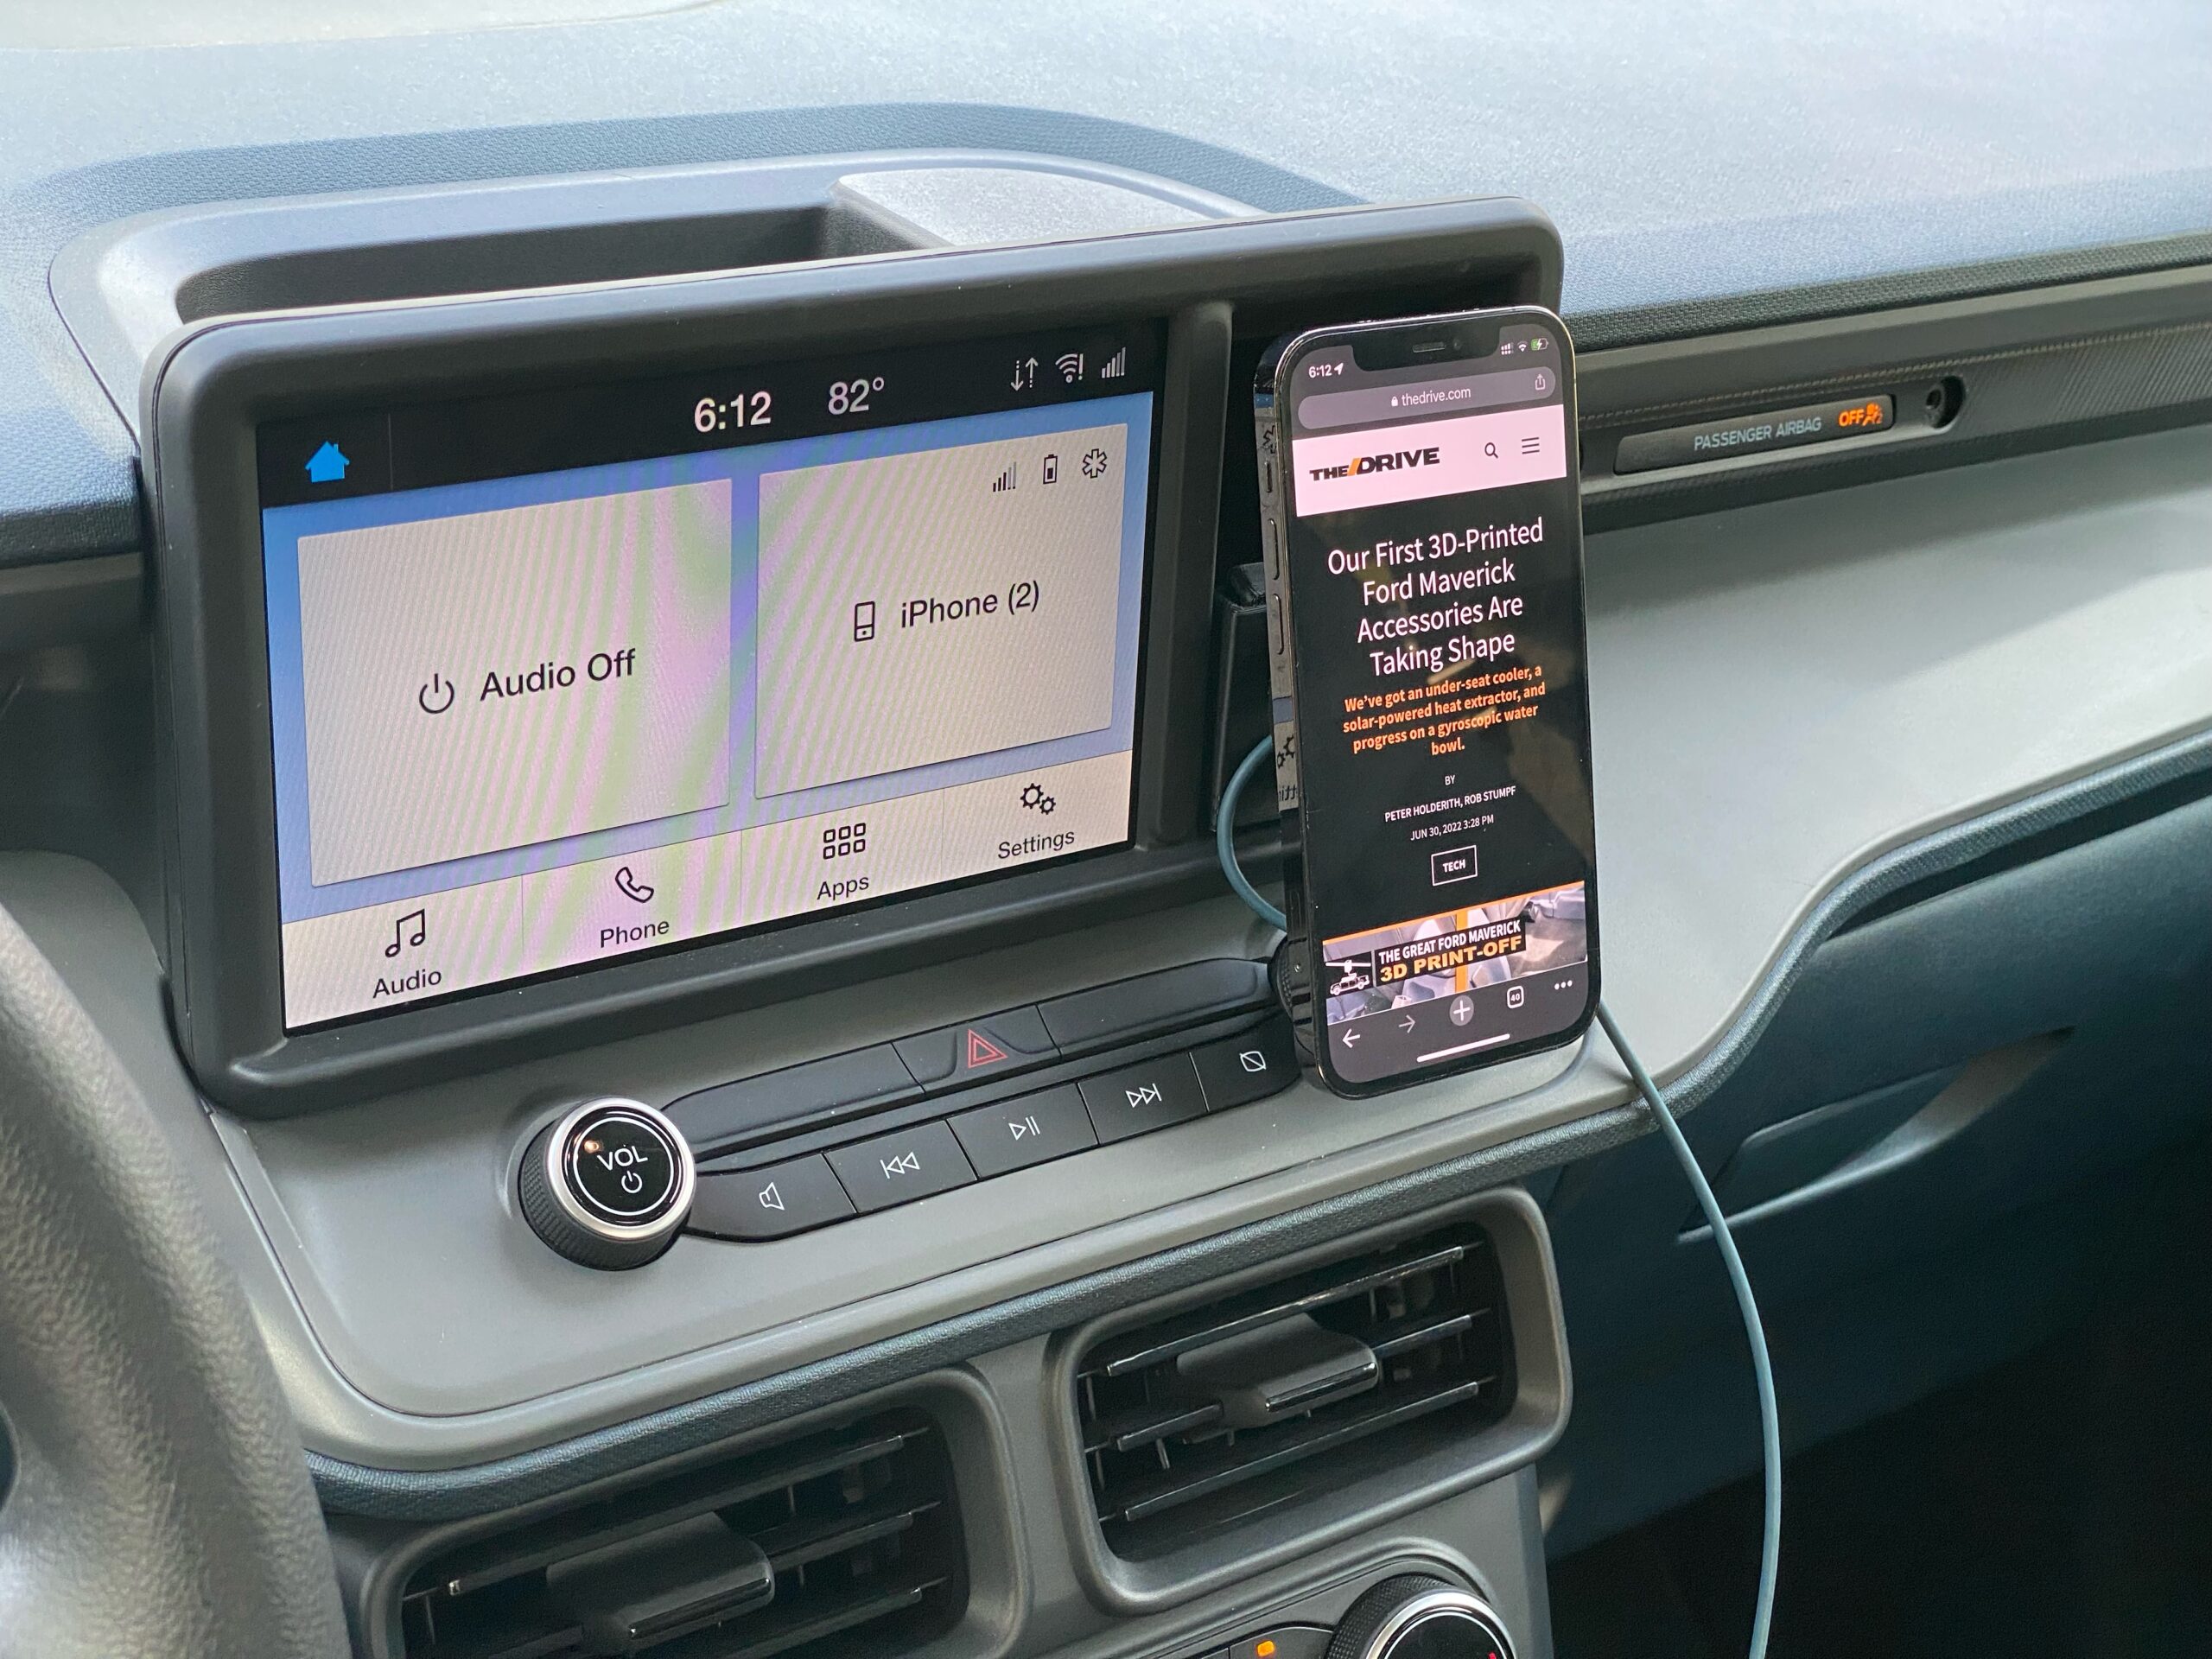
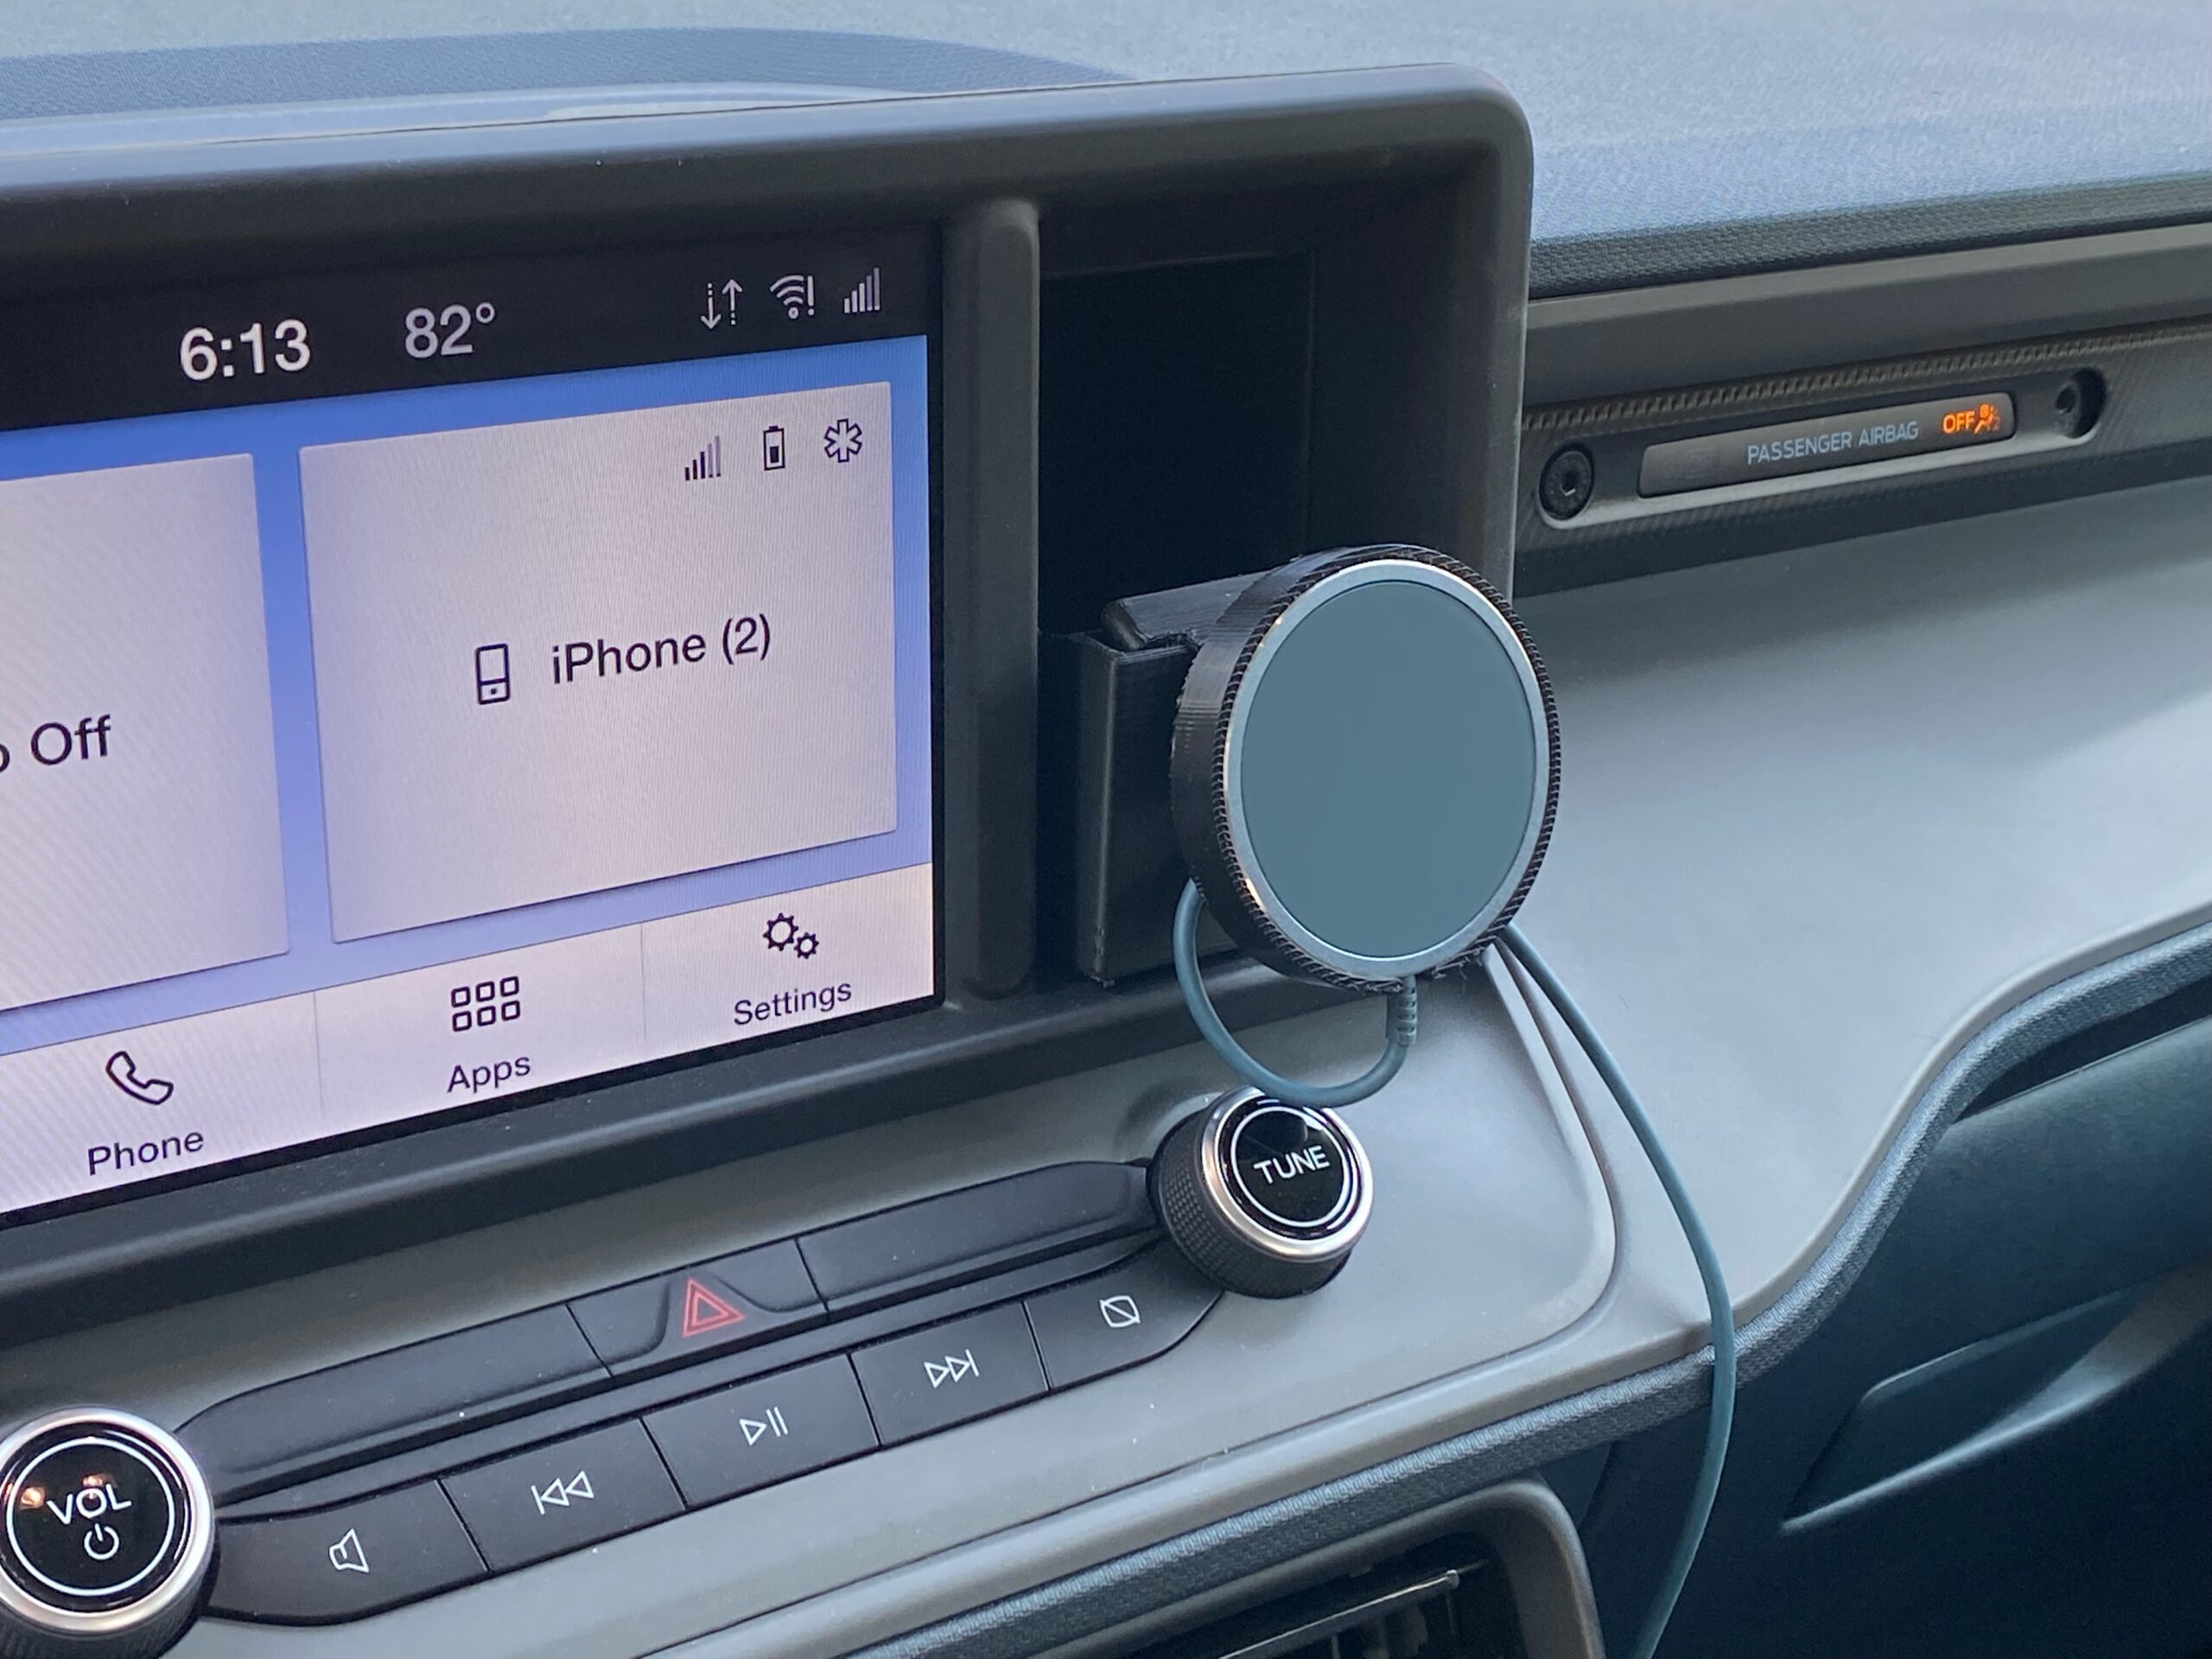
The dash cubby I designed last week has also become kind of a staple to the interior for me. The most useful accessory I was able to build here was a MagSafe phone charger for my iPhone. It makes mounting any MagSafe-compatible phone incredibly easy and places the device in the center of the cockpit for easy use by a passenger, or by the driver when the vehicle isn’t in motion.
The FITS system is just a really simple and effective mounting system. In fact, one of our readers even chimed in to share the FITS-compatible phone and cup holder he built for his 1976 BMW 2002.
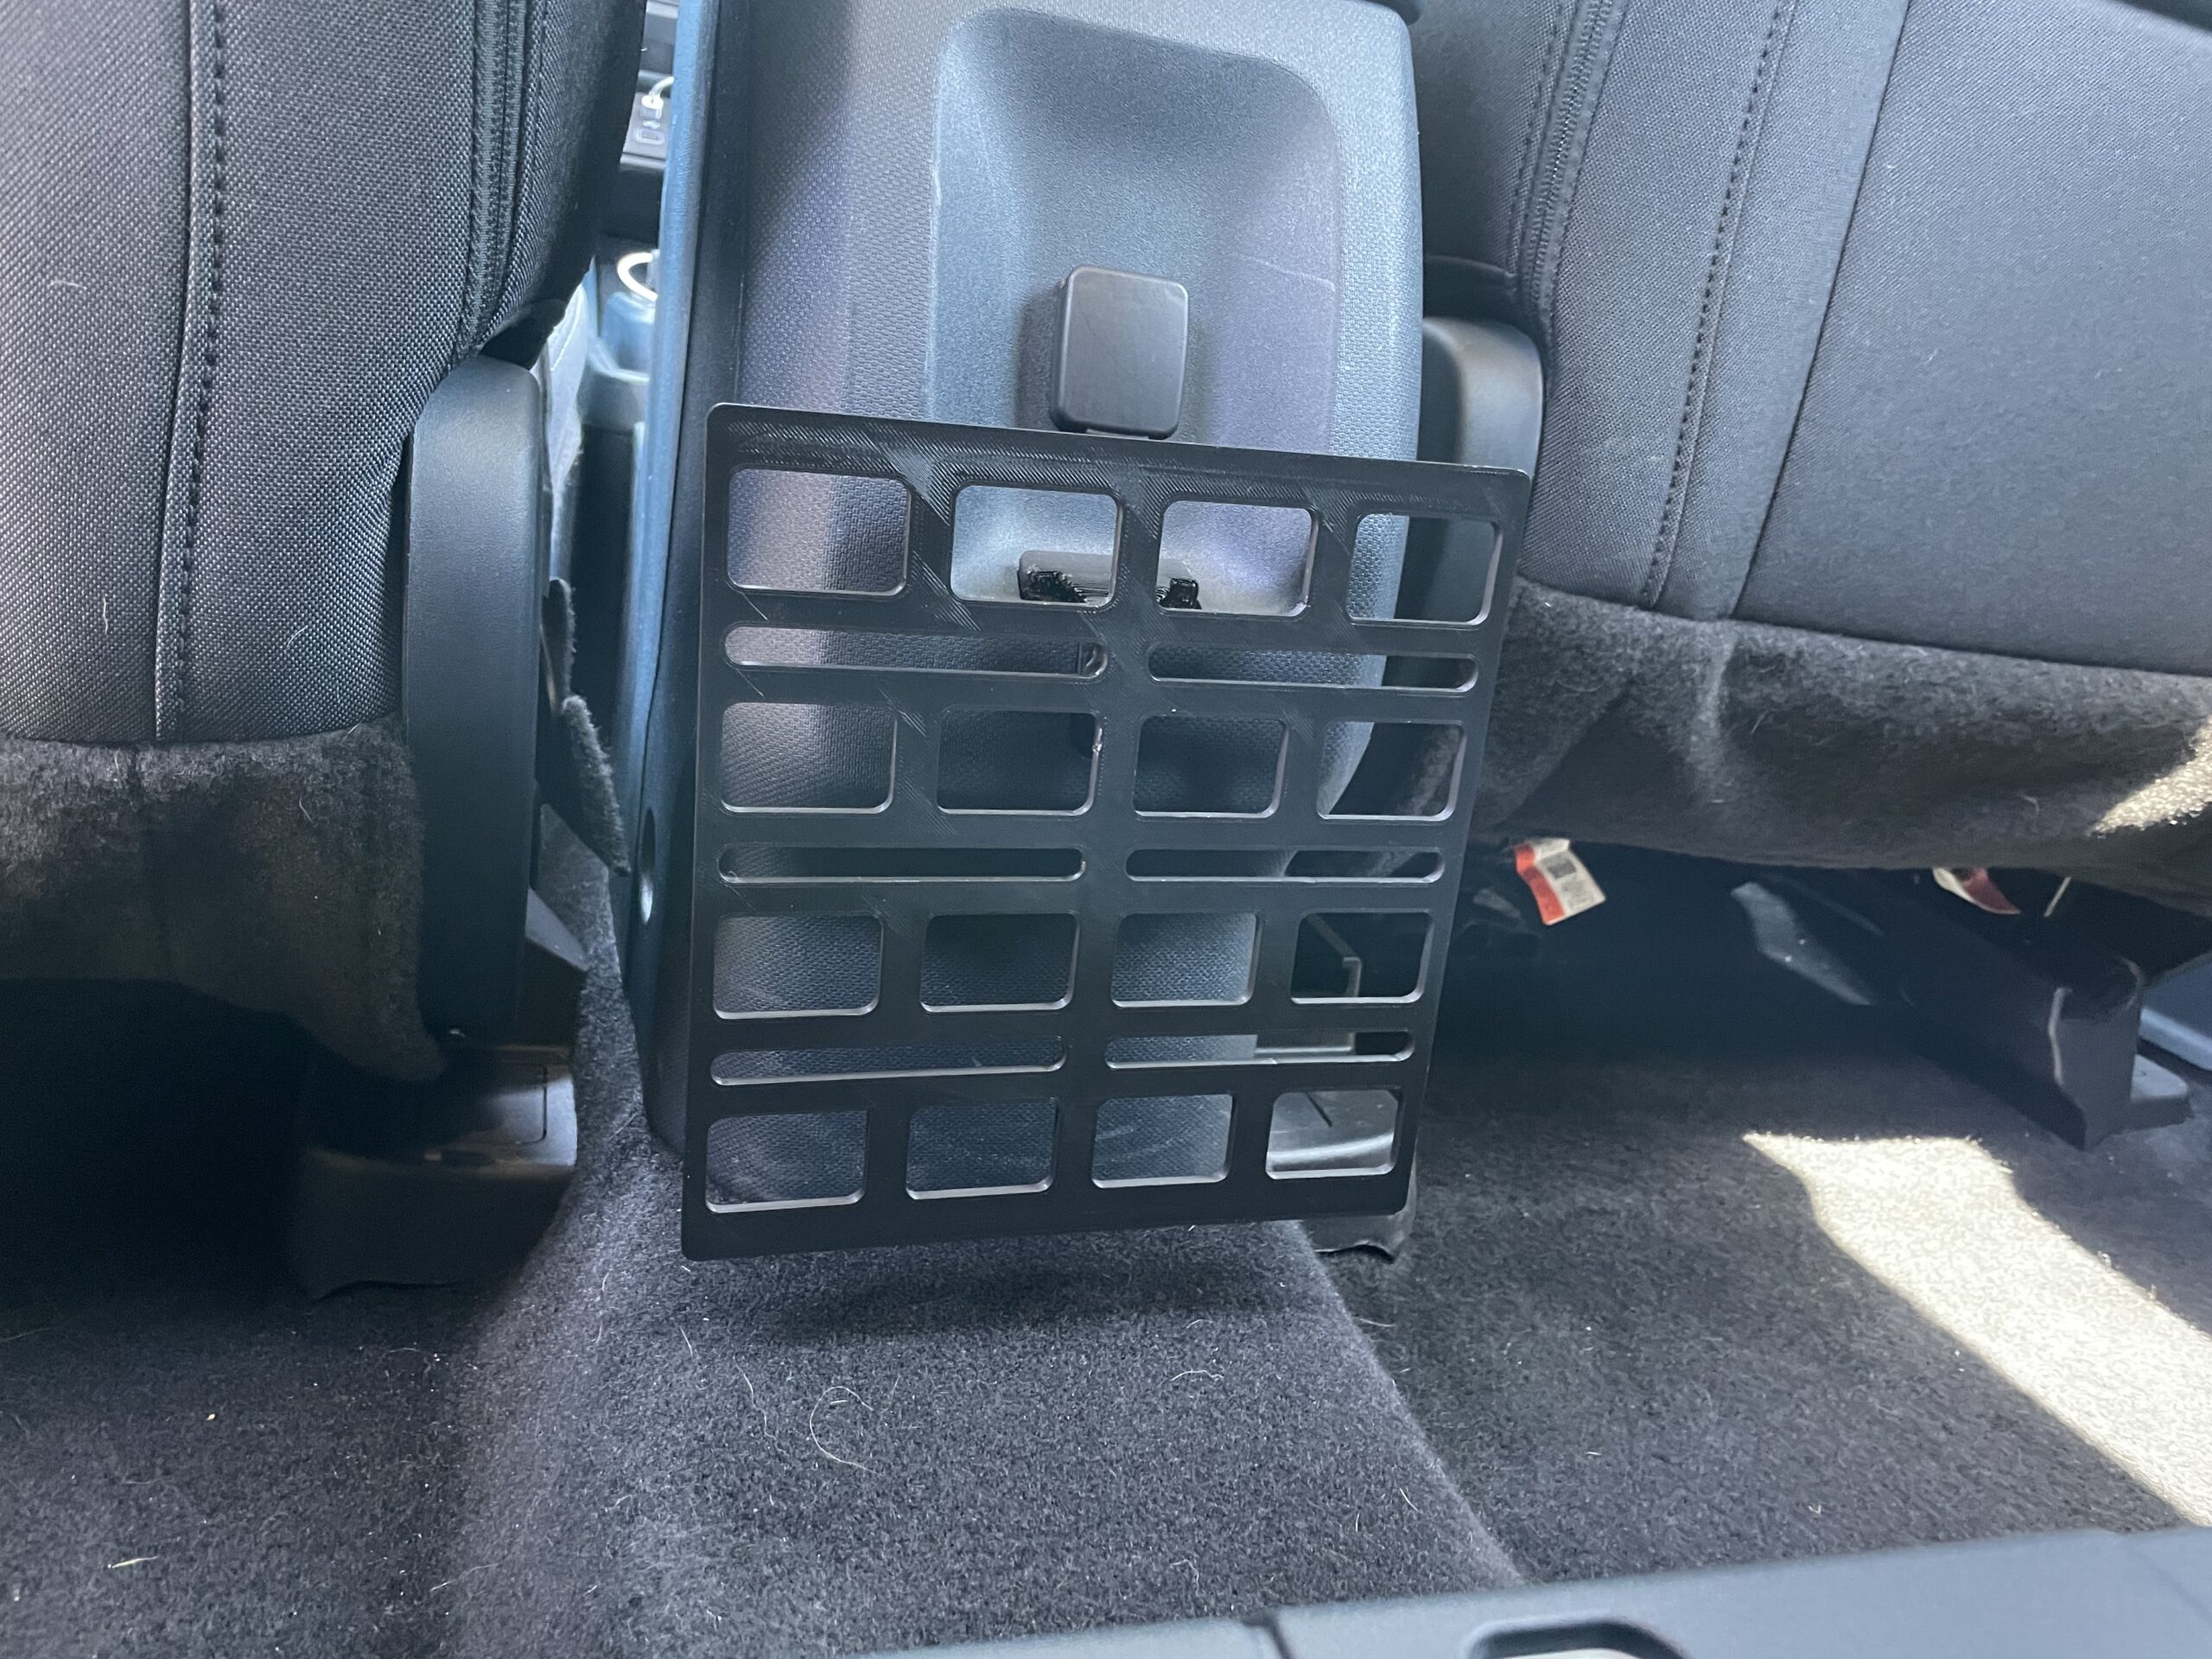
I used this (along with several other reader comments) for inspiration. In fact, one of you suggested that we use a FITS slot to mount a MOLLE panel. Now, if you’re not familiar with that acronym, it stands for Modular Lightweight Load-carrying Equipment. Essentially, it’s a grid that is compatible with a whole slew of useful and tacticool accessories. This was incredibly easy to build, and actually one of the more useful suggestions given how widely available MOLLE accessories are, and how easy it is to homebrew your own. Unfortunately, the biggest downside here is the size limitation of the printer bed. I did build this panel to be modular though, so if you’re willing to strap a few together, you could build your own to-spec grid. If not, let it be known that these perfectly sit from the mount to the floor on both the center console mount and two of the under-seat mounts. You can also hang one from the rear headrest mount.

I still have a few fun ideas up my sleeve planned for next week. I am really hoping that this gives not just Ford’s employees, but the entire auto industry’s engineers some insight into how useful these types of slots are and how innovative its customers can be when given the right tools from the factory.
Got a tip? Send us a note: tips@thedrive.com