About a week has passed since we announced the competition between Rob Stumpf and me to print the best accessories for the Ford Maverick. On Monday, our trucks arrived, and we’ve been busy since. Plastic has been extruded, electronics have been purchased, and now it’s time to reveal some of our ideas and present our progress towards realizing the gizmos we’ve thought up.
There has already been a bump in the road: our Mavericks only have a single 12-volt cigarette-lighter style outlet for the rear seats, as opposed to the USB and 120-volt ones we were expecting. It’s not a big deal, but the accessories we’ve designed have had to work around that. One can, of course, get an adapter or inverter, but it’s worth noting that these devices we’ve built will now work with even the cheapest Mavericks.
[Welcome to The Drive‘s Great Ford Maverick 3D Print-Off. Peter Holderith and Rob Stumpf are in a competition to see who can 3D print the best accessory for the truck. We’ll announce a winner in mid-July, but for now, follow along with their progress on The Drive‘s Twitter, Instagram, and Facebook accounts with #maverick3dprintoff. Happy printing!]
Peter’s Progress 1: Under-Seat Cooler
Most, if not all, of the devices I have in mind move air or heat from one place to another. The first thing I thought hard about was utilizing the rear under-seat storage in an interesting way. Ford and others have designed shelves and dividers, but I decided to get a little more ambitious.
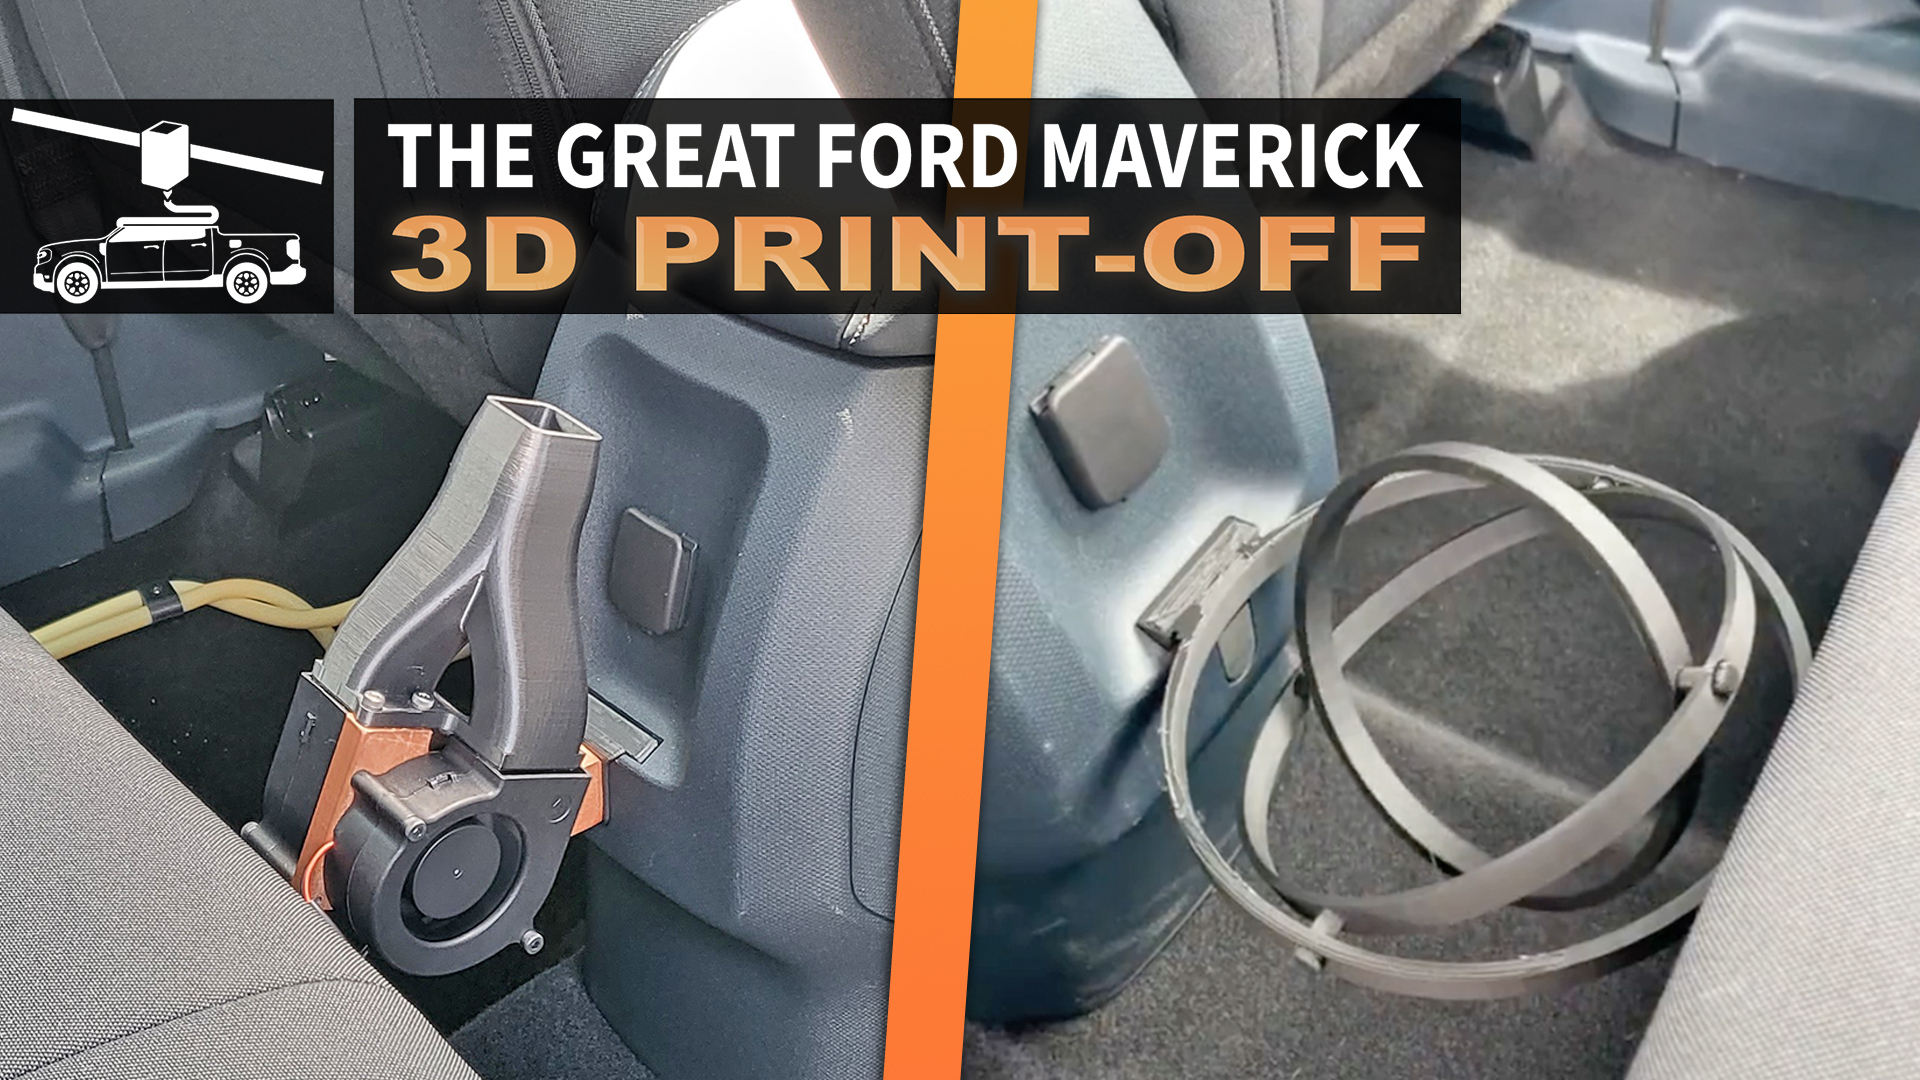
The first device I completed—and keep in mind these are proof of concept prototypes—was a FITS-mounted heat exchanger to turn the rear under-seat area into a big cooler. The Maverick has relatively weak HVAC vents under the driver and front passenger’s seats in order to provide cooling/heating for the people sitting in the back. The vents themselves are about the size of a cassette tape. If I could get this cooling air that usually blows on the rear passenger’s legs under their seats, well, I would have a cooler. I measured them up, made a few test pieces, and then designed a full-fledged shroud to fit around the vent to provide as much air as possible to a standard-sized PC radiator. The radiator absorbs the cold air and when the water passes through it and the liquid gets cooled as well.


From there, I designed the central cooling unit that sits in the under-seat FITS slot. It’s basically just a PC fan and another radiator mounted up to a plastic shroud. There’s also an aquarium pump on a bracket to the side. The pump circulates the water through surgical tubing to the under-seat HVAC radiator, which cools it and sends it back to the second radiator under the seats. The PC fan pulls the cold air from that radiator—or pulls the heat out of the under-seat area, depending on how you look at it—and it all runs off of five volts via USB.
In practice, this was all pretty simple, but there were some minor problems to overcome. The space in the back, especially in the passenger footwell, isn’t as big as I thought it would be. As a result, I had to design some plastic pieces to velcro to the carpet and keep the tubing off to the side so people don’t step on it. The aquarium pump I got is also of the non-self-priming variety. That means it can only pump water, not air. I had to put the lower radiator in a bowl of water in the footwell and suck liquid through the entire system until almost all the air was gone. If the pump self-primed, it could pull a mixture of water and air through the system, which would make filling it much easier. But I digress.
After I did all that, the results were pretty good. The pump is quiet if there’s no air in the system, and I got the under-seat area down to 58 degrees after some waiting.
A small, unsolvable problem is that you cannot turn the rear HVAC vents on independently. Basically, the blower for the front passengers must always be on if the rears are active, and full-blast AC is necessary to keep a good amount of cold air flowing through the radiator. As I mentioned before, the blowers under the seats aren’t very powerful, and to maintain even the modest differential I did under there, max AC is the only real option. It gets very noisy, at least when parked, which is a definite downside. If only just the rear vents could be turned on, you could have the cooler running silently in the background, no problem.
This thing worked for what it was, though. With a more powerful PC fan to blow cold air off the radiator and maybe a better pump, I think this device could work very effectively. Some minor fitment changes need to be made, but as a proof of concept, it’s all there. And, yeah, I considered just straight up routing this small cassette-sized vent into the under-seat area using some two-inch tubing, but there really isn’t enough space for that. As it sits, this device can be active, the rear passenger still gets some AC, and their legroom isn’t impeded. An air-handling duct would take up considerable space and the passenger would get zero air conditioning to themselves. I think a duct is definitely a simpler option, but not the best option.
Peter’s Progress 2: Solar-Powered Heat Extractor
This second gizmo is a bit simpler and I think the easiest to expand upon. It’s a FITS-mounted interior heat extractor, powered by a few solar panels I got on Amazon. It simply takes air from the interior and spits it out the sunroof. It does this with two blowers powered by the solar panels, which sit on the dash.


The first thing you need to know about this device is that I think it has a ton of potential as a concept. The second thing you need to know is that the fan/panel setup I used isn’t ideal. In a nutshell, everything is too small. I need bigger blowers, a larger nozzle to direct air out of the sunroof, and a bigger panel array. A bigger panel would not only provide more power, but shade the dash better. Likewise, more powerful fans would help extract more heat from the interior and provide greater circulation.
As I write this, the Maverick is out in the sun and I just left this thing plugged in to do its business. It’s definitely better than nothing: It’s actively moving air around the interior and preventing hot spots, at the very least. However, the simplicity of the changes necessary to make it work a lot better might lead me to create a second iteration. A folding, camping-style array seems to be in order. Larger blowers above five volts would also be great. If I’m going to make a final, printable version of any of these, it’s probably this one.
Rob’s Progress: Gyroscopic Water Bowl
While Peter has decided to go the typical engineer route and make his FITS-compatible inventions overly complex, I’ve decided to go a different route and shoot for quantity and openness. Specifically, I explored how the cabin can be improved by using the existing FITS slots, as well as finding some additional places where Ford could (and should) have added some additional slot geometry.
Specifically, the most useful place I’ve found for an additional FITS slot is in the dash cubby. It’s a bit of wasted space and not particularly useful for anything on its own. Phones are too large to fit without falling when you mash the gas (though you won’t really be doing that with the hybrid, or at least I wasn’t tempted to in my loaner), and the surface is too flat to keep other widgets in place. Why Ford opted not to put a FITS slot front and center is kind of a mystery, and definitely a missed opportunity.
That being said, I went to work to revamp this cavernous disaster by adding a small removable cubby with a FITS slot on the front.


There’s actually a small hole at the bottom cubby that I used as an anchoring point to keep the insert from flopping out. However, I had to use a bit of hook-and-loop tape to make sure everything was solid and to avoid rattling.
That being said, there are now a ton of things I can put here. A phone mount, a magsafe charger for my iPhone, a chicken nugget holder—whatever I want. For those using their truck for work, I could envision a place for handheld radios, cup holders, flashlights, and more.
Where else can I add these FITS slots? How about the seat headrests? Or the visors? Maybe the rear-view mirror? I’m working on options for all of these and hope that the maker community will end up using these to make their own cool tools down the road.
Ford’s placement of the slot at the rear of the center console was a great idea. Remember that the Maverick is supposed to be the urban commuting truck for people who will use all four doors for the family. It’s easy to add some cool accessories in the back to occupy the kids (an iPad or Nintendo Switch holder, for starters), or to be useful in the real world (hand sanitizer holder, and mounts for paper towels and tissues).
Pet parents can also rejoice, because that slot can be fido’s best friend, too. One reader suggested that we make a treat dispenser to mount at the rear FITS slot, and that got me thinking—one of my dogs, a Sheltie, loves water and ice cubs like they’re a treat in themselves. So I decided to also try my hand at creating a gyroscopic water bowl mounted in that location.
Being that I’ve only had the car for 48 hours and additive manufacturing isn’t really speedy, the bowl is still printing, but I’m confident that it will work to keep my girl hydrated. I’ll pay the dog tax in the next update.
There was a hiccup that I ran into when building this invention, though—there’s not a ton of space between the center console and the seat. The outer ring of the bowl was less than seven inches around and it was already bridging all of the empty space between the console and the seat. That being said, there’s not much room to actually play. The slot placement feels much more like an area for set-it-and-forget-it items than it is for things you will actually use while in the truck. Another concern is the clearance between the 12-volt barrel plug and whatever goes in the FITS slot. Like Peter mentioned, both of our loaners have no 120-volt outlet or rear USB slots, so this space is pretty valuable when trying to make any sort of powered accessory.
Rob and Peter in Agreement
A tip on making these accessories: the “male” end of the FITS slot is not a publicly available piece. We’re not sure why. I (Peter) reverse-engineered a version based on the files Ford gave out and that will be available to download at the end of this saga. And yes, I shared it with Rob. My slot is designed to be printed independently and then screwed to another part using two M4 fasteners spaced 20mm apart. It fits very nicely, and I suggest printing your parts separately from the FITS slot itself. You pretty much have to use support material if you don’t, and I really don’t like support material. It does harm to a print’s surface finish and it’s annoying to remove. When the accessory is inserted, you don’t see the fasteners either, so it’s a win-win.
The second thing—and I think Rob will agree—is the FITS slot works well, but the truck needs more of them. We want FITS slots near HVAC vents, a FITS slot to replace the little bin next to the infotainment screen, and more. Really, the fact that one near the driver isn’t included to mount a phone is kind of a big miss. I have seen such a FITS slot in the new Transit Van. If a van has it, so should this.
I will be designing a few more accessories you’ll get a peek of soon. They both involve the HVAC system. Stay tuned.
Got an idea for us? Email peter@thedrive.com or rob@thedrive.com