We may earn revenue from the products available on this page and participate in affiliate programs. Learn more ›
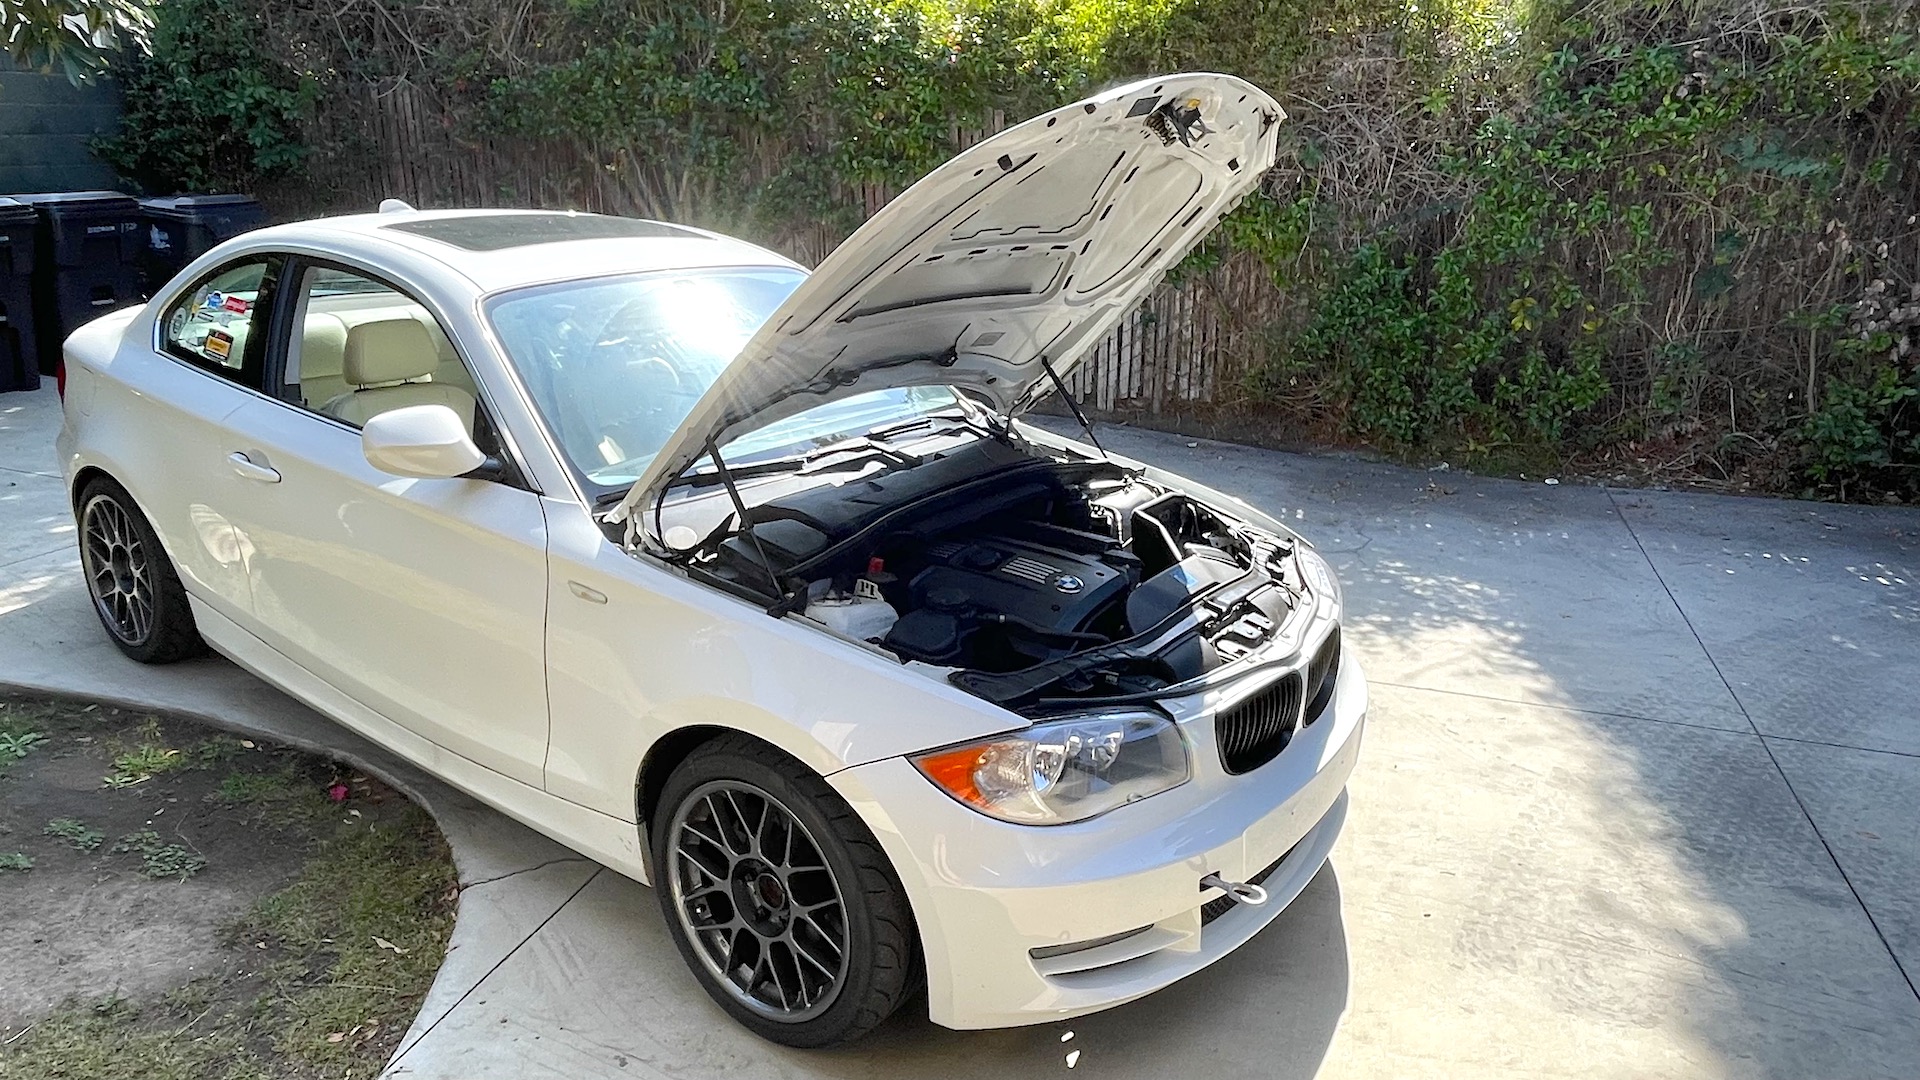
Long before I bought my 2011 BMW 128i, I’d heard of a factory-sourced modification called the three-stage intake manifold. It’s quite possibly the most talked-about modification among those who proudly rock an N52-equipped car from 2007 to 2013, it’s thoroughly documented, and is immensely popular. It can also be accomplished for very cheap. Like, less than $300 cheap. Here’s how I performed this relatively easy and straightforward modification on my own car, and why it’s an absolute must-do for anyone in a similar situation.
The Benefit
All BMWs sold in the USA with a badge ending in 30i (330i, 530i, 630i, etc.) between 2006 and 2011 came with the Bavarian brand’s three-stage intake manifold (TSIM), which utilizes two DISA (DIfferenzierte Sauganlage, or Differential Air Intake in English) valves to direct air in different ways to make more power. N51-equipped BMWs did, too, and just require a tune to unlock their potential. From the factory, the E82 two-door 128i coupe made 230 horsepower at the crank, whereas the E87 130i five-door hatchback—which was never sold here—made 260 or so. The US market 330i made 252 from the factory—I’ll probably err more on the side of that figure. Regardless, this is a big jump for doing something as simple as altering non-forced air induction.
Interestingly, my BMW’s engine is DISA-less, though it already has some of the components that are required to install them and reap their benefits.

Finding One and Preparing For Installation
When I say some of, it’s truly wild that BMW put the DISAs’ connectors capped-off on the side of my intake manifold, ready to be removed and plugged into their respective DISA homes. All I needed was the right manifold and two DISAs to do it.
There’s never a shortage of TSIM-equipped cars in Southern California’s junkyards, and a visit one morning netted two in very good shape for just $42 after tax, each. I pulled the old DISAs out and gave their homes a good, thorough cleaning, and after promptly selling one on eBay for $109 after fees and shipping, I was $25 in the black.
Plus, despite the guarantee of getting covered in grime and mud in the hot SoCal sun, I’m always stoked to get away from the computer screen for a fun and therapeutic junkyard session. I almost want to go back just to see if there’s anything else pulling off of X28i and X30i cars.
I then bought a new crankcase breather hose, new mounting hardware, intake manifold gaskets, and big DISA—I decided to use one of the small DISAs that came out of one of the junkyard TSIMs as it felt and appeared to be in good shape. All of this cost a little over $264 after tax, making my total parts and materials cost $239. Not bad! I’ll probably buy a new small DISA to have on-hand just in case the old one wears out sooner than later, and if the big one fails, it’s got FCP Euro’s famous warranty behind it.


Zero Hour
After watching this video several times, I finally summoned the courage when I had a free weekend and dove right in. I already got a solid idea of what kind of tools would be needed after pulling the two junkyard examples, and it’s a surprisingly small collection of some common small sockets and Torx bits.
The hardest part of the job was removing the BMW’s infernal cowling without snapping any clips or fasteners, and you guessed it, I broke a couple. I then moved the positive jump-point cable (after disconnecting the negative cable at the battery itself), wiring harness loom (via bungee cord), engine cover, and power steering reservoir out of the way, removed the entire intake system and throttle body, and unplugged every connector that was in the way.
Removing the old crankcase ventilation (CCV) hose was a fool’s errand considering I had a new one on-hand—I absolutely despise BMW’s decision to use nearly-impossible-to-disconnect, squeeze-and-pull connectors here. I snapped it off with a flat head screwdriver, and continued on freeing the junction box from the bottom of the manifold, which was possibly the next-hardest task since it lives in very tight quarters.
I then unbolted the manifold, made sure everything was disconnected, and pulled it off! I had to wiggle it out of the bay at a weird angle, but otherwise I now had six fresh-looking intake ports staring up at me showing off why port injection is such a beautiful thing.

Re-Installation
Normally, it seems like removal is easier than re-installation, however this time the opposite was true. Once I had the new manifold dressed with DISAs, a new CCV hose, and the old manifold’s sensors, wiggling it into place and plugging everything back in was a snap. I felt like it took half the time to reinstall everything. I lost the Torx screws that bolt up to the bottom of the intake—I’ll take care of them sometime in the not-too-distant future.
After everything important was bolted up, I test-started the car before adding back the stupid cowling and engine cover—the car fired up without issue, ran smoothly, and didn’t throw any codes! I then dressed up the rest and took it for a test drive.

Smooth Sailing
After 60 miles of driving and no weird new drivability issues, it was safe to say that I didn’t mess anything up. The engine seemed happier, too—folks say that the manifold sans tune will wake the engine up slightly, even if it hasn’t had the proper factory 130i tune flashed into the DME (what BMW calls an ECU) yet. Or, it could’ve been the fresh CCV hose clearing some of its congestion. Regardless, the car had a noticeable amount of added pep in its step.
The whole job took about five hours, and that was me moving at my normal elderly snail’s pace, as well as performing certain tasks harder rather than smarter. Like removing the junction box while the manifold was still bolted in the car, rather than detaching/reattaching it while it wasn’t. If I were to do this again, it’d probably take far less time.
This is also proof that if I—a slow-poke-simple-minded simpleton—can do this, anyone with some basic tools and patience can.
However, the next step will be to tune it appropriately so that I can take full advantage of the DISAs’ magical air-circulating witchcraftery, and hopefully gain 20-30 horsepower. The car makes 202 horsepower and 188 lb ft of torque at the wheels—I’d be chuffed to bits if it makes 225 and 200 post-tune, especially considering the fact that its UK cousin the 130i threw down as much as 260 and 229 at the crank.
The good news is flashing the OEM 130i tune is free with the help of Bimmerlabs.com — stay tuned for a future blog on how that went.
More From The Drive
- Caleb Jacobs dug up some sweet deals for even more tools
- Nico DeMattia dove deep into this vactrain fever dream
- Kristen Lee drove and reviewed a 2022 Kia Sorento plug-in hybrid
- Jerry Perez talked to Honda’s head honcho about Type R EVs