We may earn revenue from the products available on this page and participate in affiliate programs. Learn more ›
There are few automotive gremlins as pervasive as a leaky radiator. Nearly everyone and their mothers have stories about waking up one fine autumn morning, going out to the car, and finding a massive pool of green liquid where a clean floor should be. We’ve all been there, it’s not fun.
A coolant or antifreeze leak can be caused by a number of things, ranging from poorly tightened hose clamps, worn hoses, or a box of rogue highway nails that turned your radiator into Swiss cheese. All of these can quickly turn your grocery run into a popped hood, steam belching, tow-truck necessitating day. You can, however, save yourself some time and money if you catch the issue early and repair it yourself.
Given that your car’s cooling is somewhat important to its overall health (Just kidding, it’s vitally important!), The Drive put together this guide on how to fix a coolant or antifreeze leak and answered all your burning questions along the way. Ready?
What Is Coolant and Antifreeze?
Antifreeze and coolant are engine fluids designed to keep your engine running at an efficient operating temperature, whether that’s keeping it from freezing or overheating.
Antifreeze is concentrated is commonly made up of ethylene glycol and silica which, when combined with a predetermined mix of regular H2O, makes coolant and keeps your car’s engine cool and warm enough for most temperatures around the world. For those places with extreme cold, such as at the Earth’s poles, they use propylene glycol which will only freeze if the temperature drops to -74.2 degrees Fahrenheit.
What Is A Coolant/Antifreeze Leak?
A coolant/antifreeze leak can occur for a variety of reasons, including a blown radiator hose, a bad hose clamp, warped head gasket, or the most common reason, a foreign object kicked up by the truck in front of you penetrating the radiator itself. The resulting cascade of fluid can overheat your engine, warp your heads, contaminate your oil, and leave you stranded on some lonesome highway. None of those options are good for your health or your car’s. It’s time to fix that.

Basics for Coolant/Antifreeze Leaks
Estimated Time Needed: One to two hours
Skill Level: Intermediate
Vehicle System: Heating/Cooling
Safety for Repairing a Coolant/Antifreeze Leak
Working on your car can be dangerous and messy, so here’s exactly what you’ll need to ensure you don’t die, get maimed, or lose a finger and that you keep your jeans, shirt, and skin spotless—hopefully.
Everything You’ll Need To Repairing a Coolant/Antifreeze Leak
We’re not snooping around your toolbox, nor rummaging through your garage, meaning we don’t know what you have in the way of tools and parts. So here’s a list of what you’ll need to repair a coolant/antifreeze leak.
Tool List
- Screwdriver
- Selection of wrenches
- Metal shears
- Receptacle/bucket for old coolant/antifreeze
Parts List
- Coolant/antifreeze
- Hose clamps
- Radiator hoses
- New radiator
- Eggs
- Painter’s tape
- New thermostat
Organizing your tools and gear so everything is easily reachable will save precious minutes waiting for your handy-dandy child or four-legged helper to bring you the sandpaper or blowtorch. (You won’t need a blowtorch for this job. Please don’t have your kid hand you a blowtorch—Ed.)
You’ll also need a flat workspace, such as a garage floor, driveway, or street parking that’s also well-ventilated. Check your local laws to make sure you’re not violating any codes when using the street because we aren’t getting your ride out of the clink.

Here’s How To Repair a Coolant/Antifreeze Leak
Now that you’ve safetied up and have all your tools ready to go, let’s do this!
The Egg Fix
So you’ve found yourself in the middle of Montana. Every which way you gaze, there’s nothing but desolation which is unfortunate because your radiator just sprung a leak and has morphed into a colander. What you do have, however, and we have no idea why, are a dozen fresh eggs in your back seat. You’re in luck, friends, as those unfertilized chicken products can help! Here’s what you do.
- Let the car rest and cool for 5-10 minutes.
- Pop the hood and unscrew the radiator cap.
- Crack and drop two eggs into the radiator reservoir.
- Check to see if the leak stopped. If it did, you’re golden. If it didn’t, crack a few more eggs into the radiator until it stops.
This old trick works as the heated coolant/antifreeze cooks the eggs and the pressure of the leak attempts to force out the cooked eggs, thereby stopping the leak until you can get it replaced. Science!
Replacing Damaged or Old Hose Clamps
A car’s hoses are clamped down by hose clamps, little metal circles that feature some type of screw or other device to sinch them tight. And as the car ages or is used in a locale where rust is all but assured by yearly road salting, the hose clamps can fail and release coolant everywhere. Here’s how you can replace them when they do.
- Let the car rest and cool for 5-10 minutes.
- Pop the hood and unscrew the radiator cap.
- Locate the damaged or worn hose clamp, if it’s still there.
- Depending on where the hose clamp is, you may need to drain some coolant/antifreeze. Place the bucket underneath the hose and drain as much fluid as needed to access the hose and clamp.
- Unscrew the damaged or old hose clamp if you can, you may also need to cut it.
- Slide the new hose clamp onto the freed hose.
- Tighten the hose clamp down.
- Fill the radiator with new fluid and retighten the radiator cap.
- Turn on the car and let it come up to operating temperature. You can now inspect the new clamp for leaks. If everything looks good, you’re done!
Replacing a Radiator Hose
As a car ages, the plastic and rubber hoses that feed the engine its vital fluids can snap, crackle, and pop, just like Rice Krispies. You’ll likely notice a few drops of coolant on the ground but that can quickly turn into a flood. When that occurs, you’ll need to replace them.
- Let the car rest and cool for 5-10 minutes.
- Pop the hood and unscrew the radiator cap.
- Locate the damaged hose.
- Depending on where the hose is, you may need to drain some coolant/antifreeze. Place the bucket underneath the hose and drain as much fluid as needed to access the hose.
- Unscrew the hose clamps on either side of the hose. Inspect the clamps to see if they need replacing.
- Slide the two hose clamps onto the new hose and to both sides to their respective spots.
- Tighten the two hose clamps down.
- Fill the radiator with new fluid and retighten the radiator cap.
- Turn on the car and let it come up to operating temperature. You can now inspect the new hose for leaks. If everything looks good, you’re done!
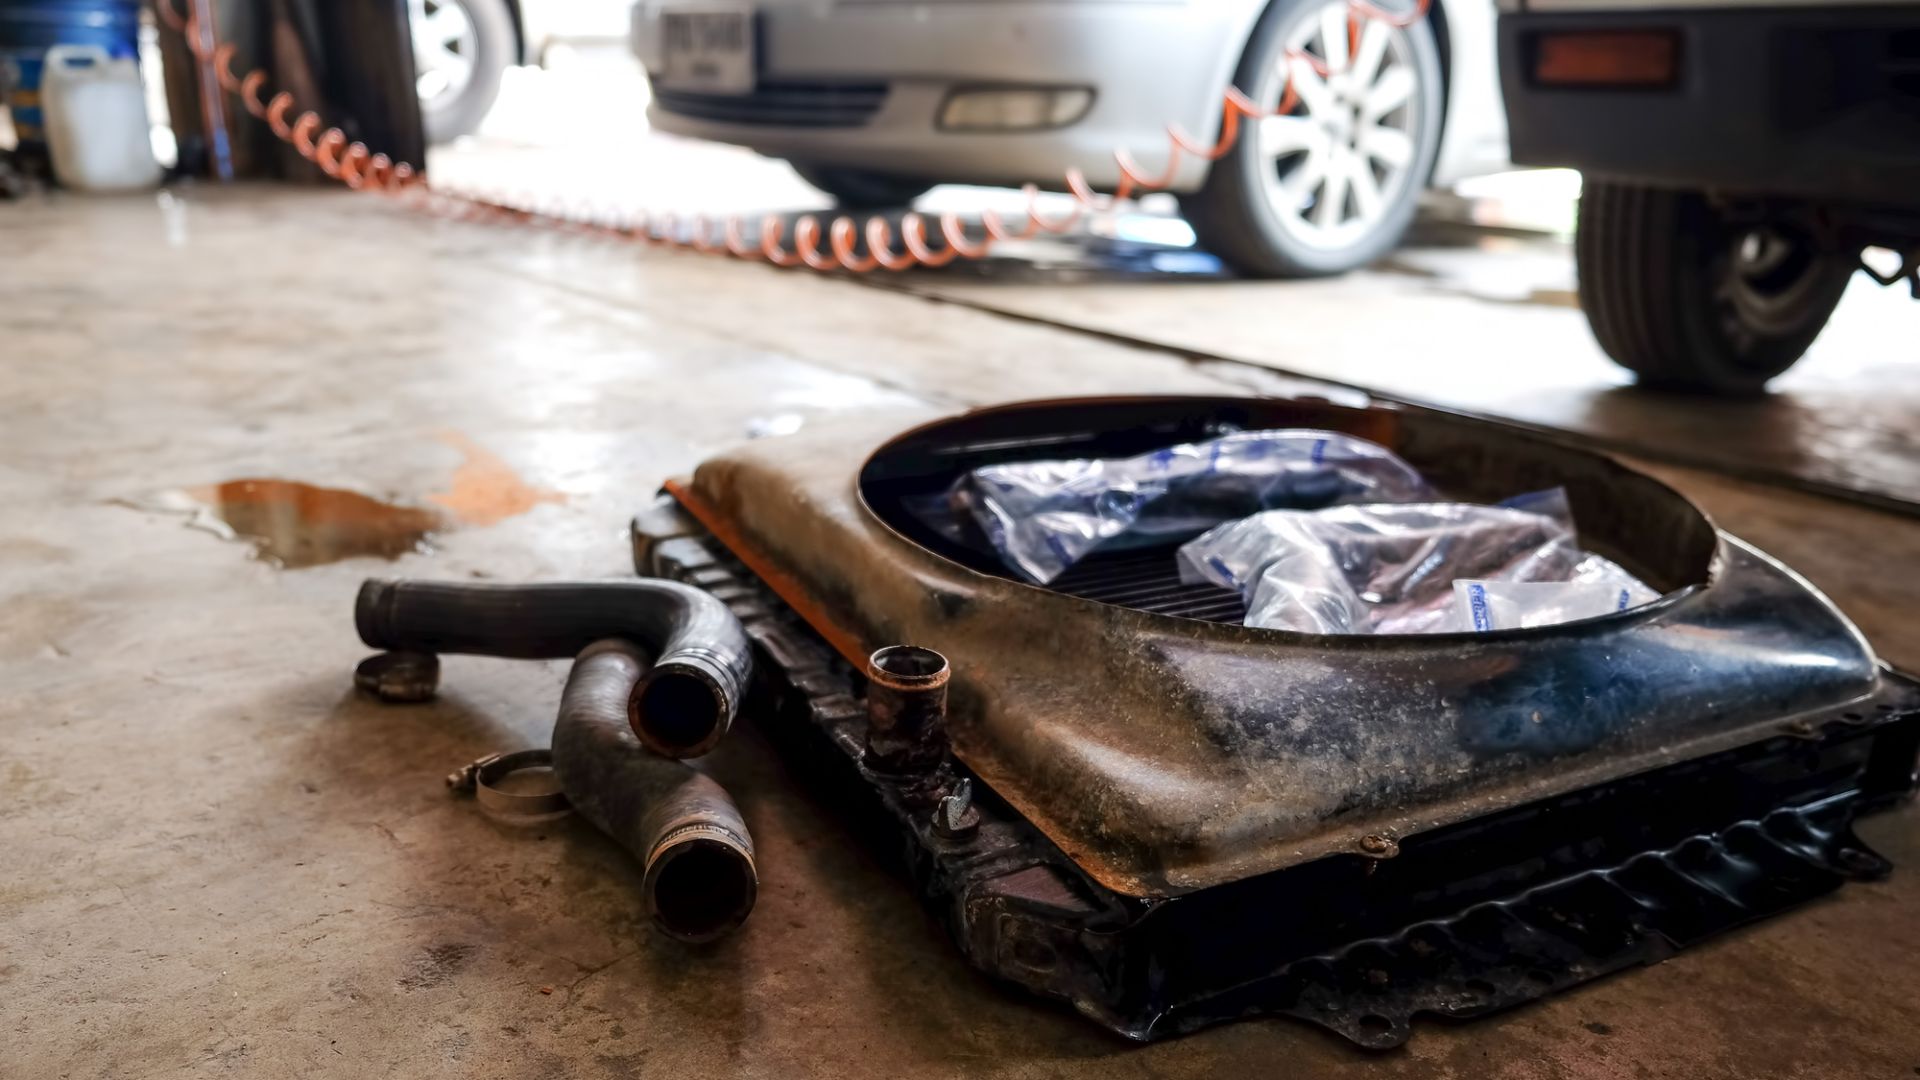
Replacing a Radiator
As different automotive manufacturers have different locations and bracketry for radiators, The Drive picked the most common style (up front, mounted behind the car’s bumper) as our example. You’ll need to consult your handy-dandy, and likely dusty, owner’s manual to determine exactly how you can replace your specific radiator.
- Let the car rest and cool for 5-10 minutes.
- Pop the hood and locate your radiator.
- Disconnect the battery.
- Drain what’s left of the coolant from the radiator into a bucket by loosening the hose clamp near the base of the radiator or unscrewing the drain plug.
- Once drained, remove the remaining hoses connecting the radiator to the rest of the engine.
- Remove the old thermostat.
- Plug the holes by taping over the outlets.
- Some cars have fans mounted to the radiator, so you’ll need to disconnect the fans.
- Find the bracketry holding the blown radiator in place and remove the bottom nuts and bolts first.
- Holding the top of the radiator, remove the top nuts and bolts holding it in.
- Remove the fan bracketry from the old radiator.
- Install the fan bracketry on the new radiator.
- Insert the new radiator and bolt it back into place.
- Reinstall the fans.
- Remove the tape from the hose that housed the old thermostat and replace it with the new one.
- Reconnect all the hoses to the new radiator.
- Fill the new radiator with fluid.
- Reconnect the battery.
- Start the car with the radiator cap still off. You’ll likely need to squeeze and release the hoses to remove any trapped air bubbles in the hoses as the car cycles the new fluid through the engine and radiator.
- Once the bubbles stop, check to see if there are any leaks and take the car for a test drive. Be careful, as the fluid can become extremely hot to the touch.
- If everything looks good and your car’s temperature stays even, congrats, you did it!

Get Help With Repairing a Coolant/ Antifreeze Leak From a Mechanic On JustAnswer (H2)
Although The Drive’s detailed how-to guides are easy to follow, a rusty bolt, an engine component not in the correct position, or a messy oil leak can derail a project. That’s why we’ve partnered with JustAnswer, which connects you to certified mechanics around the globe, to get you through even the toughest jobs.
So if you have a question or are stuck, click here and talk to a mechanic near you.
Pro Tips For Repairing a Coolant/Antifreeze Leak
Over the years, The Drive’s editors have seen murky pools of green liquid underneath our cars more times than we care to share. There was, however, one cross-country trip where a rock pierced our radiator and went air-cooled for about 1,000 miles—luckily it was the dead of winter and the outside temps hovered around 15-degrees.
Here are our favorite tips, tricks, and hacks for repairing a coolant/antifreeze leak.
- Check your radiator fluid level from time to time, as it can tell you if your car is leaking coolant more visibly than a slow leak.
- If a radiator hose has a small leak, something like Flex Seal can be used to patch it for long enough to purchase a new hose and do the job right.
- If your radiator evacuates its fluids and the surrounding air is below 30 degrees Fahrenheit, you can drive for a short distance without damaging the engine. This is for worst-case scenarios, nothing else. We still recommend getting a tow, however.
FAQs About Coolant, Antifreeze, and Busted Radiators
You’ve got questions, The Drive has answers!
Q. Can I Drive My Car With a Coolant/Antifreeze Leak?
A. You can, the author proved it, but you don’t want to make a habit of doing so. A small leak is manageable but can quickly become a serious problem, one that will cost far more than just replacing or repairing your radiator.
Q. Ok, Why Is My Car Leaking Antifreeze but Not Overheating?
A. That may be because it’s leaking from the radiator cap’s stem. At the top of the engine, there’s the radiator cap. Just below the cap is the step, the spot where you pour coolant/antifreeze in to. If that stem cracks, as the temperature of the coolant/antifreeze increases, it can bubble up and leak out of the stem, causing small leak. This wouldn’t be enough of a leak to cause your ride to overheat.
Q. I’m Nervous To Ask, But What Are the Signs Of a Blown Head Gasket?
A. Don’t worry, asking is always ok here at The Drive. Here are a few symptoms of a blown head gasket, pay close attention to the last one.
Overheating
If a head gasket blows, even slightly, the engine might overheat and damage several components. One thing you should never do when your car is overheating: Remove the radiator cap and check the coolant. That’s how you get a one-way ticket to the ER for a scalded face.
Milky Oil
If you notice milky colors in your oil, you might have a blown gasket—the underside of your car’s oil reservoir cap will likely become splattered with the milky oil. This happens when coolant comes in contact with and contaminates the oil.
Bubbling Inside Radiator
If you notice bubbling inside the radiator or coolant reservoir, it’s an indication your system has air in it, which could be caused by a leaking or blown head gasket.
Q. If That’s It, Can I Fix a Blown Head Gasket?
A. Hahaha, no. A blown head gasket causes all sorts of issues downstream of the original issue and essentially means you need a new engine. You can try to prolong the car’s death, but it won’t change the, you know, deadly outcome.
Q. How Much Does It Cost To Fix a Blown Head Gasket?
A. As you’re replacing an engine, it can cost anywhere between $1,000 for a junkyard four-cylinder to $22,000 as the author was quoted for a new engine for his 2004 Volkswagen Passat W8. Now imagine what a Bently would cost. Yikes.
Q. What About the Cost For a Leaky Radiator?
A. Do you want to do it right or just get by for the time being? Because if you purchase one of the quick-fixes, you’re out about $20-$50. To properly fix the radiator, which means replacing the unit, a new radiator can cost between $300-$1,200 depending on the car, location of the radiator, and labor.
Q. I See Steam, Can a Coolant Leak Cause a Fire?
A. It can, but it’s unlikely given most coolant/antifreeze is mixed with water. So there’s some silver lining!
Let’s Talk, Comment Below To Talk With The Drive’s Editors!
We’re here to be expert guides in everything How-To related. Use us, compliment us, yell at us. Comment below and let’s talk! You can also shout at us on Twitter or Instagram, here are our profiles.
Jonathon Klein: Twitter (@jonathon.klein), Instagram (@jonathon_klein)
Tony Markovich: Twitter (@T_Marko), Instagram (@t_marko)
Chris Teague: Twitter (@TeagueDrives), Instagram (@TeagueDrives)
Featured Products
Custom Leathercraft Work Gloves
Big Red Torin Steel Jack Stands
Got a question? Got a pro tip? Send us a note: guidesandgear@thedrive.com