Ever since picking up my 2011 BMW 128i back in March, I’ve had incremental performance upgrades on the brain. Planning out what’s next has been daunting at times because I’m not used to owning a car that has so much modification potential, but I’m taking it one step at a time. My latest addition is on the cheaper end, carries a solid improvement, and is easy to install: braided stainless steel brake lines.
The braking system can be one of the easiest systems to work on (caveat: in a rust-free environment), and it is also one of its most crucial. Doing brakes on my Bimmer—and many other cars—is easy thanks to a single-piston floating caliper design, and as I recently found out, so is replacing the rubber brake lines for sturdier stainless steel units. Here’s how it went, what I had to look out for, and why I installed them.
The Benefits of Braided Steel Brake Lines

I’ve always considered braided stainless steel brake lines a no-brainer modification. Brake fluid flows more efficiently through them in all scenarios because they don’t expand or flex like rubber lines. The line is thicker, tougher, more constricted, and the channel that the fluid travels through is made of Teflon (PTFE, to be exact); it provides a mildly improved pedal feel right off the bat. Furthermore, as heat becomes a significant factor while driving ten-tenths at a track day, the lines don’t expand and soften up, which sustains that improved pedal feel, ensures good modulation, and boosts overall confidence in the system.
Braided stainless steel is stronger than rubber, too, so any form of track debris has less of a chance of damaging it. While the rubber used in brake lines is usually high quality, it’s still not as tough as Teflon covered in stainless steel, covered in a plastic outer shell to protect it against a broken splitter, rock, chunk of the track itself (I’ve seen it), wrecked GoPro case, or anything else you don’t want getting kicked up in your wheel well on track.
The Negatives

Still, there are some things that might deter you from installing braided lines. Sometimes it could be easy to twist them while you’ve got the caliper removed, and they put more stress on the fittings. Certain climates can also corrode the outer plastic layer often found on stainless lines, though it seems more like a quality issue than a design issue.
Regarding twisting the lines during a standard brake job, I agree that some cars’ line routing can make this easy, so it’s important to take your time and pay close attention. I think it’s a matter of rubber lines being far more obvious when they’re twisted, and therefore harder to mix up.
The most crucial negative is that stainless lines can put more stress on the fittings because of the lines’ inherent resistance to flex. Less flex means more pressure on the fittings that screw into the caliper and hard line. If they aren’t installed correctly, this could prove catastrophic in the event of a failure. It’s important to take one’s time during installation to avoid any binding in the system, wonky threading, or other mix-up.
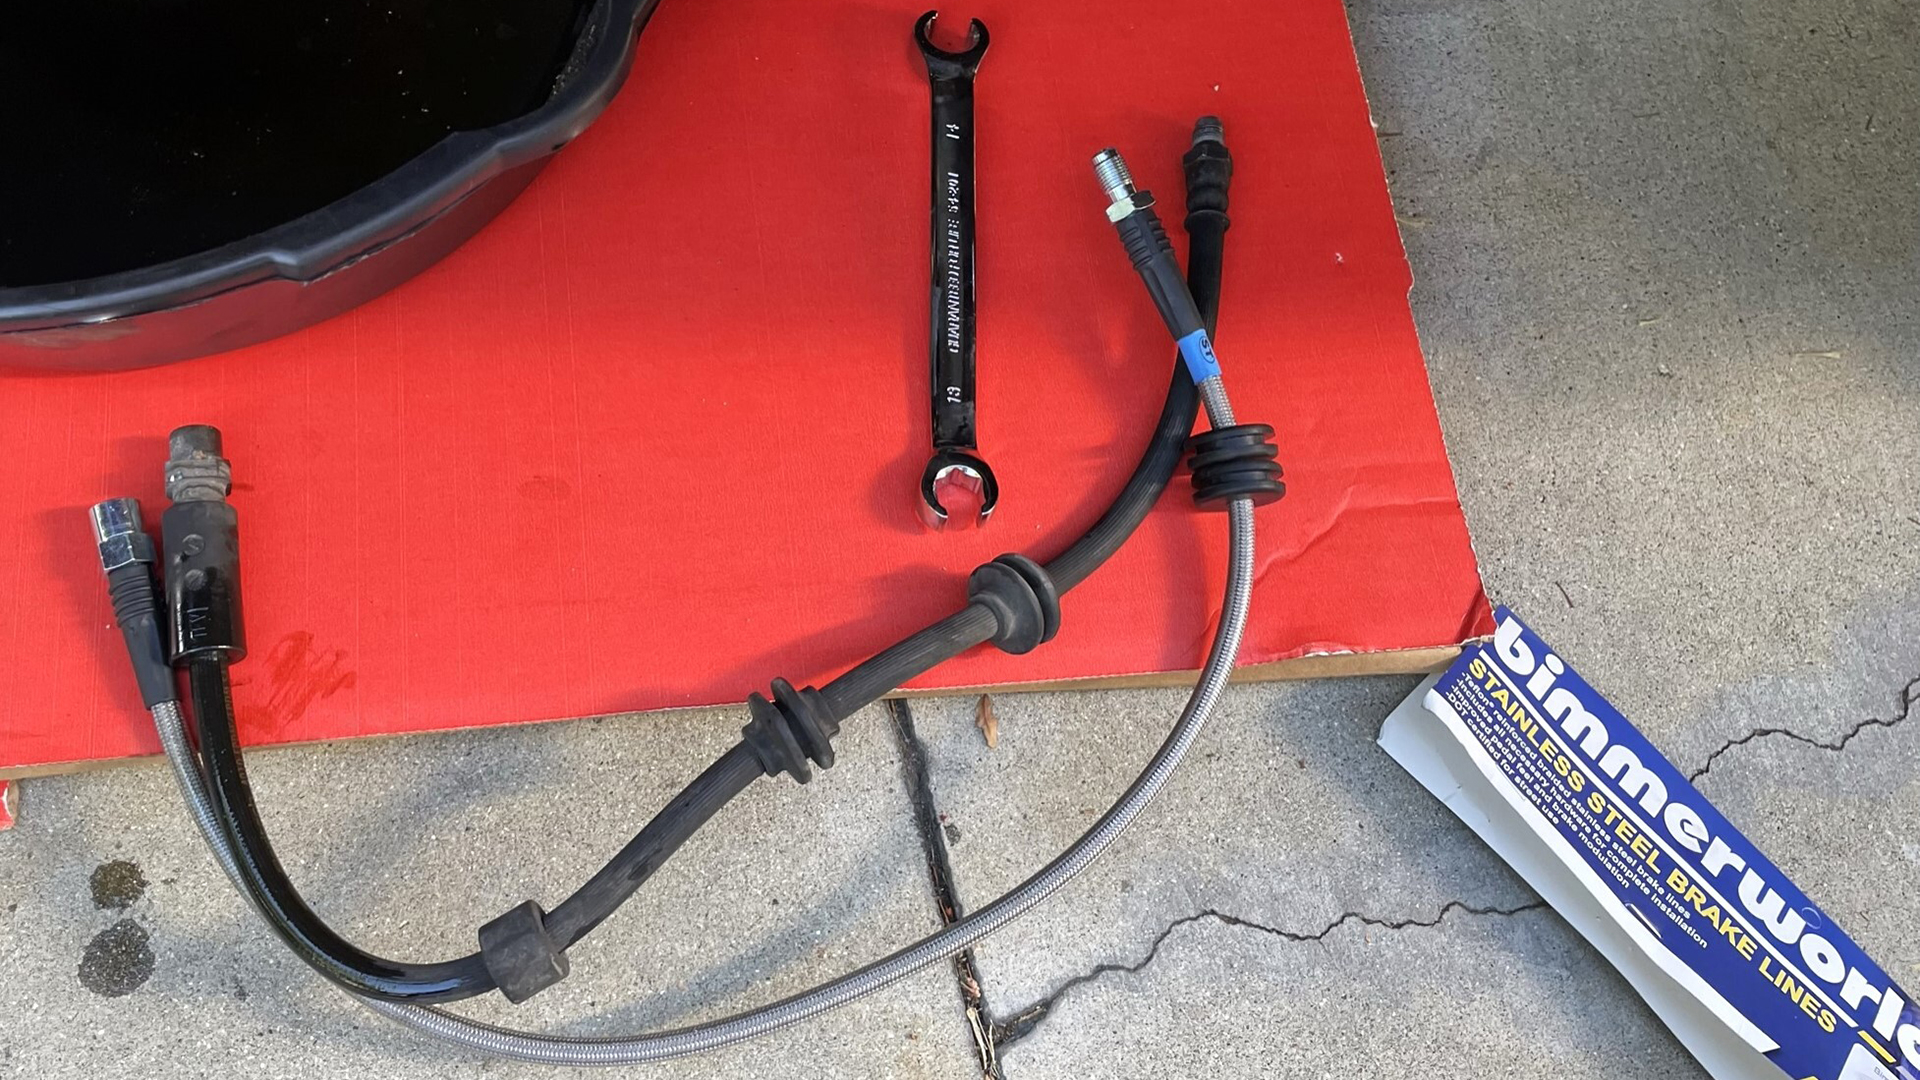
Installation on a BMW 128i

I swapped my rubber lines for stainless lines just this past weekend. To describe the process in a word, it was easy. I love wrenching on something that only requires a few tools, in this case a jack, jack stand, some wheel chocks, flare nut wrenches, a brake bleeder, drip pan, breaker bar, socket, impact, and torque wrench. The latter four are for removing and reinstalling the wheel, and the first three are for safely supporting the vehicle.
On the BMW 128i, the first step is to top up the fluid reservoir and then screw the cap down. Next, remove the rubber line’s rubber grommets from their mounts (which is probably the hardest part, to be honest), unscrew the fitting at the hard line, and then unscrew the fitting from the caliper. Install the new lines in reverse order, copy and paste at the other corners, then bleed the calipers with either a vacuum bleeder, pneumatic bleeder, power bleeder, or have a friend push the brake pedal in and out with the right loosening and tightening sequence.
Cracking the fittings ever-so-slightly loose before starting isn’t a bad idea to ensure they’ll indeed come off once you’re underway. Then, flare nut wrenches are clutch, as they completely prevent you from rounding off the nuts that fasten the fittings down. Be sure to put a pan underneath, too.

It’s also paramount to know the exact order that your lines must be tightened down. In the case of the 128i’s front brakes, the entire line twists while loosening or tightening the fitting at the caliper, thus it shouldn’t be tightened down at the hard line until after tightening it down at the caliper. Without doing so, it not only would be impossible to get it tight enough, but it’d also twist and risk binding that would increase its chance of failure.
It’s also important not to over-tighten. You don’t want to lunge at the fitting with all of your might, just ensure it’s good and snug and indeed all the way down. This could be a pain in the butt with my BMW: If you don’t tighten it down enough and fluid leaks out once you’re bleeding it, you have to go a few steps back and remove it from the hard line, and then tighten it all down in the proper order again, making sure not to twist the line in the process, and bleed it again.
The faster you swap the line, the less brake fluid will leak out. But brake fluid is cheap, so just have plenty on hand, make sure it’s not polluting the environment, and take as much time as you need. Keep an eye on the reservoir to ensure it’s not losing too much fluid and in risk of drying out. Thankfully, keeping the reservoir cap twisted on slows down the flow—even though I worked at a snail’s pace on my front calipers, the system barely lost any fluid.
Would I Recommend Them?

Braided stainless steel brake lines from a quality manufacturer are generally cheap in the grand scheme of track modifications and offer a noticeable performance improvement lap after lap. They don’t necessarily reduce stopping distance, at least not nearly as much as better brake pads and higher-boiling-point brake fluid would.
But they do ensure a more efficient system that will stand up to heat better and maintain sturdiness in the pedal—sponginess be gone! This improves confidence, ensures good pedal modulation, and protects against on-track debris as a nice bonus. I loved having them on my Mazda 2 for nearly 80,000-or-so miles and 30-plus track days, and look forward to the improved feel on track behind the wheel of my BMW 128i.
I’ve blabbered all-blog-long about the performance benefits on track, but what about on the street? They still offer a slightly more confident pedal feel, but a swap might not be worth the cost or risks during installation for typical A-to-B driving, or even more spirited country road driving. They should also be inspected regularly for leaks, particularly at the fittings—again, all that extra stress is no joke.
Keep in mind that if you’re considering this modification, you need to do your own research and figure out exactly how it must be done on your car. If you’re uncomfortable with it, have a shop perform it for you. Stainless steel lines require more attention during installation and over the course of their life than rubber lines, too.