We may earn revenue from the products available on this page and participate in affiliate programs. Learn more ›
Depending on the automotive part, air is crucial or crucially harmful. Whereas an engine needs air to function properly, the opposite is true for a car’s braking system. To operate effectively and efficiently, the braking system cannot have any air within its modules and lines, or else the brake pedal will feel squishy or the brakes won’t work at all. This is why you need to bleed your brakes to remove air from the system any time the circuit is opened.
In the past, bleeding brakes was a bit of a pain because it meant needing a second person to repetitively pump the brake system, but vacuum pumps eliminate the need for another body. Vacuum pumps are available with manual hand-operated triggers or with connectors designed to attach to an air compressor, which makes the job much simpler. I recently bled my brakes with one of these pneumatic vacuum pumps, and I documented the process to show you how it’s done. Let’s get to it.
Why You Need To Change Brake Fluid
Brake fluid is hygroscopic, which means it is attracted to water. Normally, a car’s hydraulic braking system is a closed system, but moisture and dirt will inevitably get into the fluid. Water has a much lower boiling point than brake fluid, so under hard braking, the water in the brake fluid can boil and severely reduce braking power.
Separately, foreign contaminants in brake fluid can be hell on rubber seals. My old 2012 Sonic never had a brake fluid flush until early 2020 at more than 200,000 miles. The fluid was gnarly and had destroyed the seals in my Sonic’s master cylinder, so it was rendered useless. Instead of just needing a bottle or two of replacement fluid, I had to pay about $100 for a new master cylinder.
A Vacuum Pump Eliminates a Lot of Trouble
I completely understand how annoying it can be using the two-person pedal-pump method. I have horrible memories as a 10-year-old sitting in the driver’s seat of a Ford Tempo or Chevy Monte Carlo, while my dad or older brother yelled at me to press the brakes with all my might as my brother collected dirty fluid in a jar. My little 10-year-old leg strength wasn’t always enough to press the pedal down to the floor and hold it.
Bleeding the brakes used to be a two-man job, and that was a pain. Heck, that’s why I never did the brake fluid on my Sonic. But technology has come a long way, and we don’t have to enlist the help of prepubescent children to change the brake fluid. Recently, I made quick work of a brake fluid flush with the help of an air-compressor-powered vacuum pump.
Brake Bleeding Basics
Estimated Time Needed: Less than an hour
Skill Level: Beginner
Vehicle System: Brakes
Bleeding Brake Fluid Safely
Brake Fluid isn’t great for skin, or cars. If left on paint, it can seriously damage the finish. Shop towels, a funnel, safety glasses, and gloves are pretty smart ideas.
Everything You’ll Need To Flush Brake Fluid With a Vacuum Pump
As far as car maintenance goes, brake fluid flushes are fairly simple. You’ll need the following.
Tool List
- Floor jack
- Jack stands
- A vacuum brake bleeder
- An air compressor
- A line wrench set, wrench set, or proper socket set to loosen the bleeder valve on the brake caliper. (The Fiat 500 Abarth’s front caliper bleeder valves use 8 mm, whereas the rear caliper bleeder valves use 12 mm.
Product List
- A couple of bottles of whatever brake fluid your vehicle takes. It should be listed in the owner’s manual, or on the brake fluid reservoir cap. My Fiat 500 Abarth uses DOT 3 specification.
- Brake parts cleaner
Here’s How To Bleed Brakes With a Pneumatic Vacuum Pump
Prep your workspace, then follow these steps.
1. Lift the Vehicle, Insert Jack Stands, and Remove the Wheel(s)

Position the vehicle on a level surface, then use a floor jack to lift the car. You can lift one corner at a time, just the front or back, or all four corners.
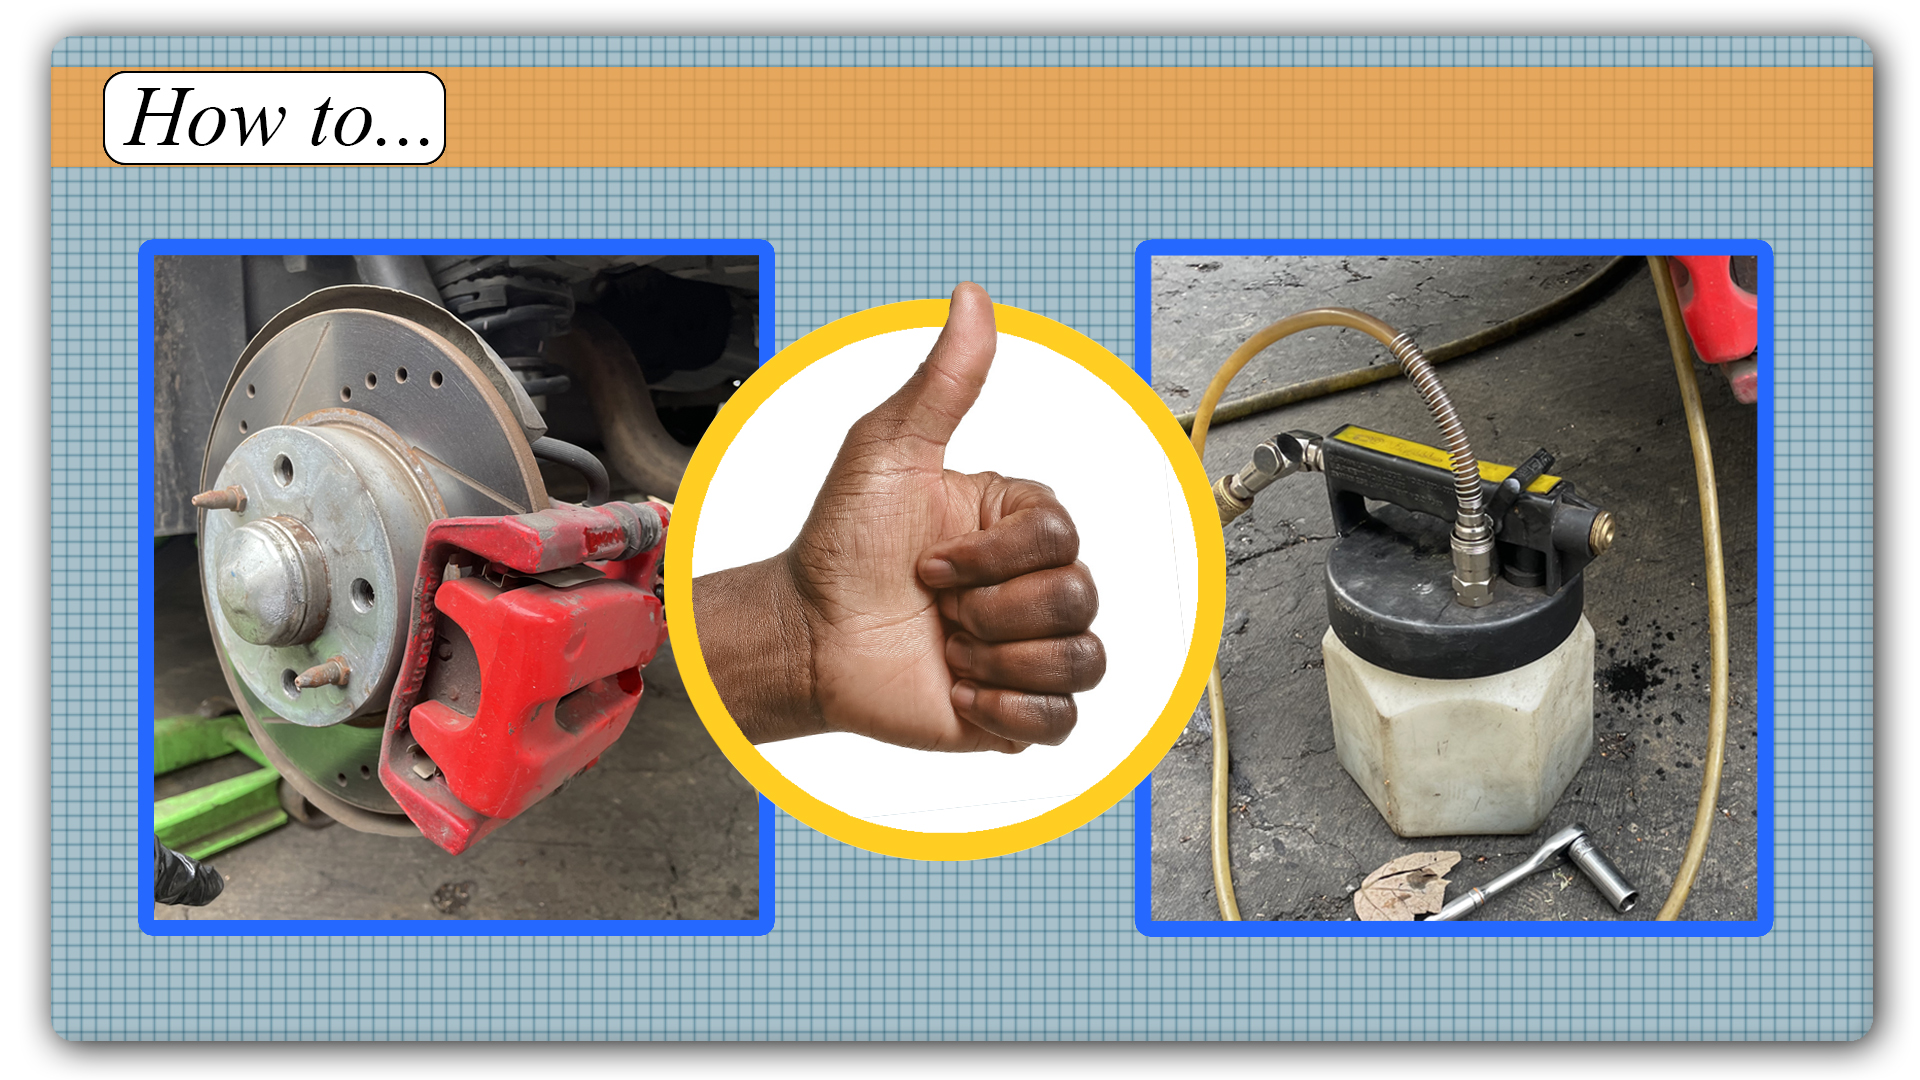
2. Assemble the Vacuum Bleeder Kit and Find the Bleeder Ports
Attach the hose to the vacuum pump and the vacuum pump to the air compressor hose, then turn the air compressor on. Once that’s ready, locate the bleeder port (it should be on the rear side of the caliper) and remove the dust cap/sleeve.
3. Connect the Vacuum Hose to the Bleeder Port

Start with the wheel furthest away from the master cylinder. In my case, the master cylinder is on the front driver’s side of the car, meaning the rear passenger side wheel should be bled first.
Connect the air hose to the port. Make sure the catch canister is screwed on tight to ensure a proper airtight vacuum seal.
4. Drain and Replace Fluid From the Main Brake Fluid Reservoir

Locate your primary brake fluid reservoir within the engine bay. The vacuum can be used here, but some prefer to use other tools, like a handheld fluid extractor or turkey baster. Either way, crack it open and get all that dirty, yucky fluid out of the reservoir and replace it with all new fluid. Keep the cap loose to allow airflow, but keep it on top of the reservoir to prevent contamination.
While you are removing the fluid from your brake lines, keep an eye on the reservoir and add fluid as it goes down. You do not want to allow the main brake reservoir to go dry because it allows new air into the system, which defeats the purpose of this process.
5. Flush the Brakes

Using your wrench or socket, loosen the bleeder screw on the brake caliper about a quarter of a turn. WIth the vacuum attached to the bleeder valve, turn the vacuum on, and suck the fluid out.
Again, be sure to check the brake fluid reservoir. It will go down as new fluid is sucked down and passed through the system. Top off the brake fluid as needed, and do not allow the fluid level to drop below the minimum.
It’s a little tricky to judge when a wheel cylinder is done using this method, but you’ll want to drain (and replenish) until the fluid being sucked out changes from yucky and dark to OEM light yellow or clear.
6. Close Bleeder Valves as Each Wheel Is Complete

When the fluid looks good, remove the hose, use your wrench to tighten and close the bleeder valve, reattach the cap, and move to the next wheel cylinder. It’s not a bad idea to spray a little brake cleaner on the valves, too.
7. Check All Fluid Levels and Test Brakes
After each wheel cylinder is bled, check the brake fluid reservoir once more, and make sure everything’s at the right level. If it all looks good, hop in the car, and press the brakes. The pedal should feel firm, with no sinking or weird travel.
If you did everything right, the brake pedal feel should be the same as before (maybe a bit better), and now you can sleep soundly knowing your brake fluid isn’t pitch black.
Video
For those who can’t or don’t want to read, we have selected a video that shows the process we discuss above. Check it out.

How To Use HF Pneumatic Brake Fluid Bleeder – One Person Job
FAQs
We want to try to answer any questions you have before you start the job. We’ve selected common points of confusion from our experience, as well as commonly asked questions from popular search results. We answered those questions below.
Q: How often should I replace my brake fluid?
A: Each car and manufacturer might have slightly different timelines, so check the recommendations in your owner’s manual or online. In general, a good rule of thumb is every two to three years.
Q: Do I have to use a vacuum pump?
A: No, you don’t, but this vacuum pump certainly makes quick work of a tedious job. I was able to flush my brake system in about 35 minutes, probably a third of the time if I had used the traditional pump-and-dump two-man method.
Q: Do I need an air compressor to use this tool?
A: Yes, to a degree. You’ll need something that can create a consistently strong vacuum. In my case, I used an air compressor that’s also suitable for air tools. Others have used AC evacuation compressors or even an electric bike pump.
Let’s Talk: Comment Below and Reach Out to the Editors
We’re here to be expert guides in everything how-to related. Use us, compliment us, yell at us. Comment below, and let’s talk.