We may earn revenue from the products available on this page and participate in affiliate programs. Learn more ›
Moving to a multi-carburetor setup on my 1969 Dodge Charger project car has been one of my favorite upgrades to date. It made some major improvements over the single-plane setup I ran previously, but that doesn’t mean it’s been perfect. I spent a lot of time tuning the thing, but could never get it quite right.
The most notable concern has been the driver’s side bank always running rich. Even when mirroring the jetting combination that ran perfectly for the passenger side and then leaning it out, I could never get it to clean up. I decided to take a better look at things when tackling a job that removed the intake from the engine. I wasn’t prepared for what I found. Well, I was, but you know what I mean.
Between the two carburetors sat a humongous lump of aluminum that was left behind in the casting process. It was jagged, it was ugly, and was absolutely to blame for the fuel mixture oddities I discovered while tuning. And since I already loved the legendary induction system so much, I was excited to rid myself of it and multiply the gains to be had by moving from one carburetor to two.

What Is Casting Flash?
Cast parts get their name from their manufacturing process, as the molten material is cast into a mold that gives it its shape. Casting flash is a buildup of excess material where the mold’s seams exist.
In most cases, casting flash is a small ridge left behind. In others, it can be a bit more severe. And though I had plenty of that to deal with, this hulking hump really doesn’t qualify as casting flash. It seems as though something else had gone majorly wrong during the casting process.

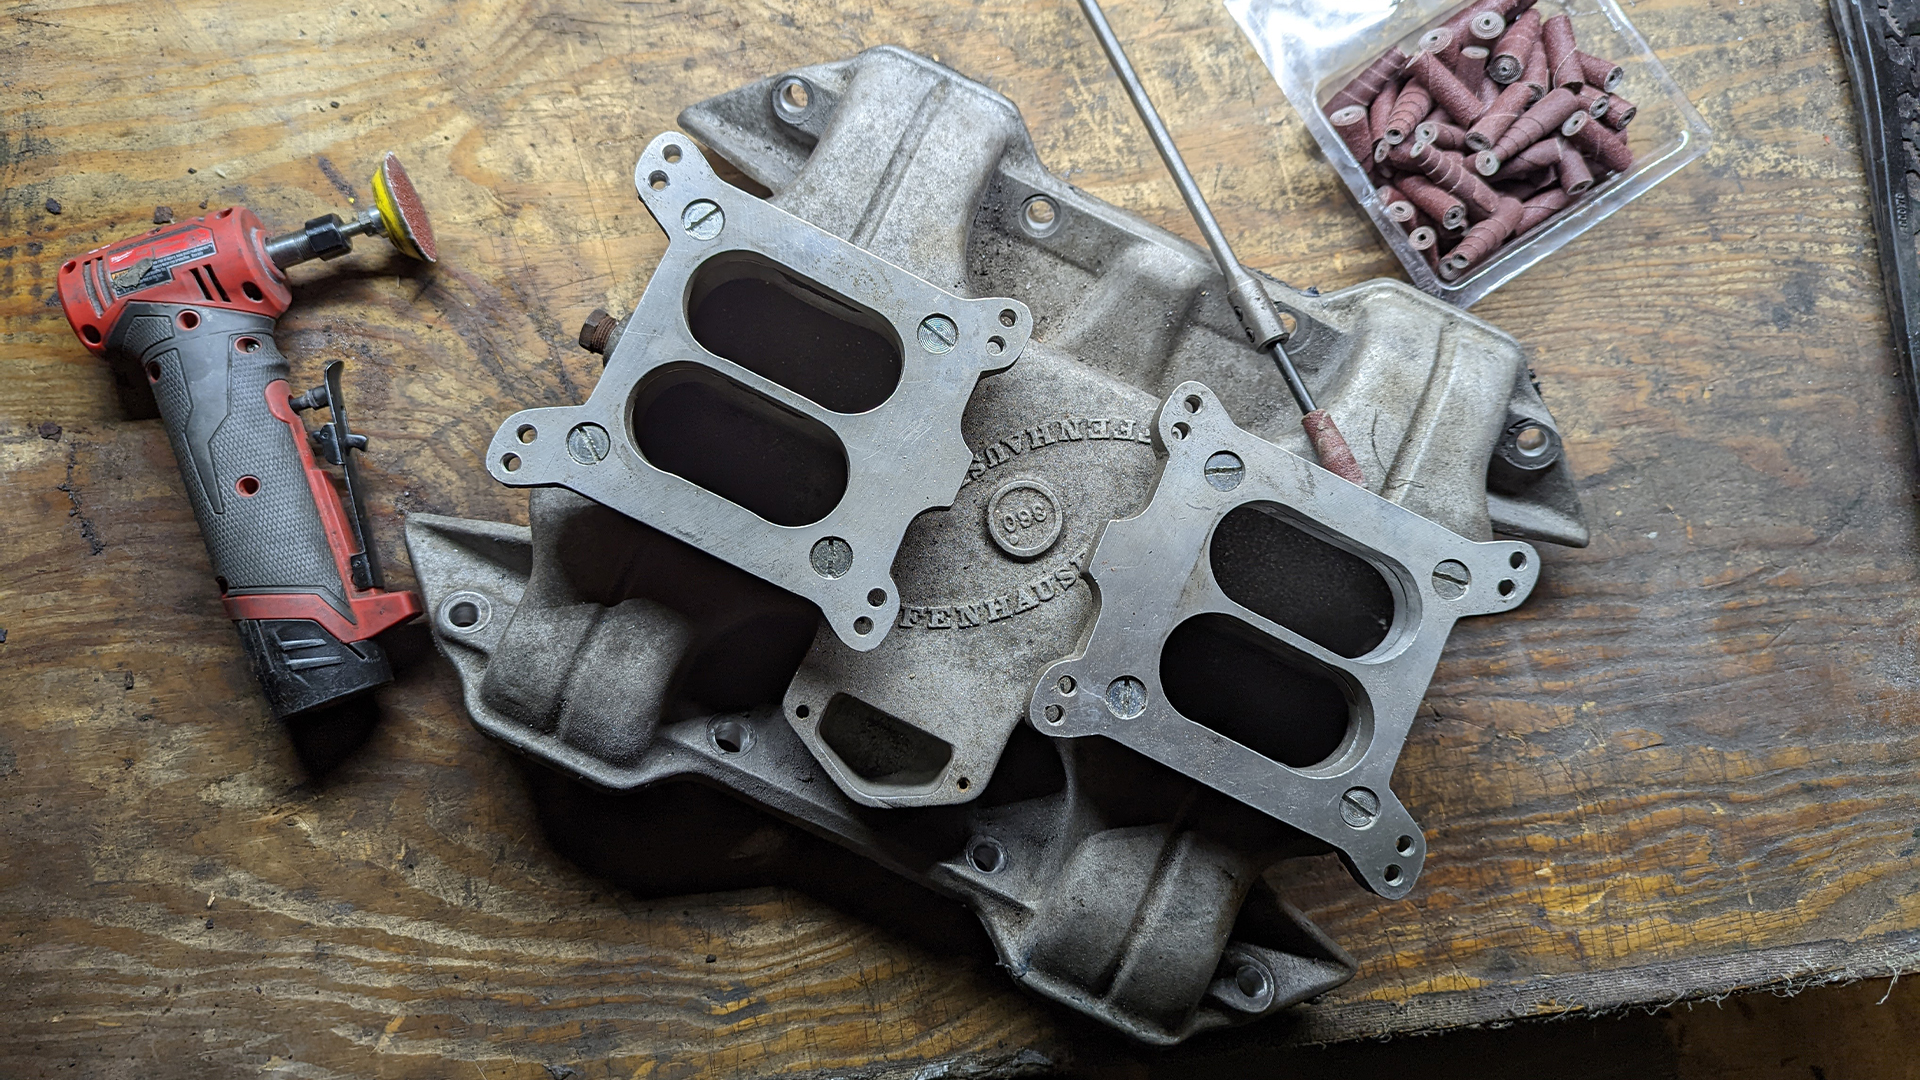
This Offenhauser intake utilizes a split-plenum design. Like a single-plane intake, the plenum is very large, and the intake runners have a straight shot to it. The difference is the divider that runs the length of the intake, almost entirely separating the two sides. This particular layout has an opening in the divider roughly halfway between the carburetors. My best guess is that the material removed for that opening somehow fused itself to the intake floor before things could cool down.
Regardless of why the ugly mass was there, dealing with it was critical. Even a small casting flash is a problem for optimal performance. Obviously, a monstrosity like this will cause even bigger problems. It’s undoubtedly responsible for disrupting flow and knocking fuel out of suspension, and removing it was a must.
The Tool Bag
While this is no porting job, the load out was no different than what’s typically used to remove material from intake manifolds and cylinder heads. The central tool of this project is my Milwaukee M12 Right-Angle Die Grinder. Pairing it with some sanding cartridges and a carbide burr gives it the teeth it needs to chew through the aluminum blemishes. Reach is another issue entirely as the burr I selected nor the mandrels for sanding are long enough to reach the main target between the carburetor pads. For that, I opted to modify a drill-bit extension so that it’d fit the Milwaukee’s 1/4-inch collet. Burrs and bits with longer shanks do exist, but this was a decent solution to my problem and I was able to make it work.
- Milwaukee M12 Right-Angle Die Grinder
- Forney 3/8 Inch Tree Burr Tungsten Carbide
- Bosch Daredevil 12-Inch High Carbon Steel Drill Bit Extension
- Warrior 52-Piece Sanding Cone Set
Getting to Work
The primary goal of this job is quite literally to get the intake manifold in shape. The aluminum hulk was the primary obstacle, so that’s where I started.
The first part of addressing the mass was knocking down the jagged edges scattered across the surface. Leaving them in place not only obstructed my already limited view, but it would also negatively impacted my control over the tool. Thankfully, the carbide burr made quick work of the issue. Still, I spent well over an hour working the piece into something I felt confident approaching, which made it clear that a job like this is a true test of patience.

Once smoothed over, I started into the slab that remained. The approach to that was simple. I worked from left to right, removing small amounts of material with each pass. At first, I stuck with the burr to save on sanding cartridges, but they ultimately proved to be the right tool for the job. And by the third or fourth hour, I was willing to commit to whatever worked best.

It took about eight hours total to remove the mass entirely. I could have saved myself a lot of time by simply smoothing the edges and calling it a day, but cutting it short just didn’t sit well with me. I wanted to push myself to see the job through. On the bright side, the remainder of the work felt like child’s play because of it.
I could finally focus on getting this intake in fighting shape with the hulk behind me. A few more humps existed directly below the carburetors. Though they were dwarfed by the first, knocking them down was still a primary concern, along with casting flash in the same area as they existed in the immediate path of airflow.

During all of this, the already misshapen carburetor pads had taken a light beating, making it the obvious next target. This manifold actually has the carburetor pads bolted in place. The castings didn’t match perfectly, and the gasket between the two protruded into every opening, which was far from ideal. Thankfully, the positioning at the very top of the intake made dealing with the large ports easy.
While working on the top of the intake, I opted to address the sharp edge at the plenum roof, where the direction of flow transitioned from the base of the carburetors to the intake runners. While I did not reshape the path, knocking down the hard edge was still worthwhile as sharp angles can hurt airflow just the same as any of the other ridges and lumps encountered up to this point.

The final targets on this intake were the runners themselves. I could see the light at the end of the tunnel, but there was still a fair bit of work to do. Each runner had a line of casting flash that ran from end to end. Seeing as I put in as much work as I did, a quick superficial pass wasn’t going to cut it. I took the time to properly dress the casting flash down before finally addressing the openings of each port to ensure they were all in the right shape.

The Payoff
At the end of the day, all of this work is corrective, not an improvement. I didn’t change the design of the intake, nor did I even port-match it to the heads. So I don’t expect it to offer measurable gains over any other properly cast, or cleaned-up, dual-quad setup. However, it absolutely has helped the mixture some, and the throttle response seems to have improved, according to my limited runs.
Unfortunately, I have yet to take it out for any kind of real testing as there was still a ton more work to do after wrapping this portion of the project. By the time I bolted it all back together, late December was upon me and I decided to handle the next big job. So even if it seems ok now, I can’t say how much better it is until I spend some more time tinkering. Fortunately, plenty of bodywork is keeping my mind occupied until the spring when I can really dial it in.
More From The Drive
- Read Jonathon Klein’s heartfelt goodbye to Ken Block
- Peter Nelson is here to tell you all about shock rebound
- Chris Rosales helps you enter the world of tire chains
- Let James Gilboy show you the mint Nissan hardbody that could be yours
- Caleb Jacobs gives us a good first look at the VW ID.7