We may earn revenue from the products available on this page and participate in affiliate programs. Learn more ›
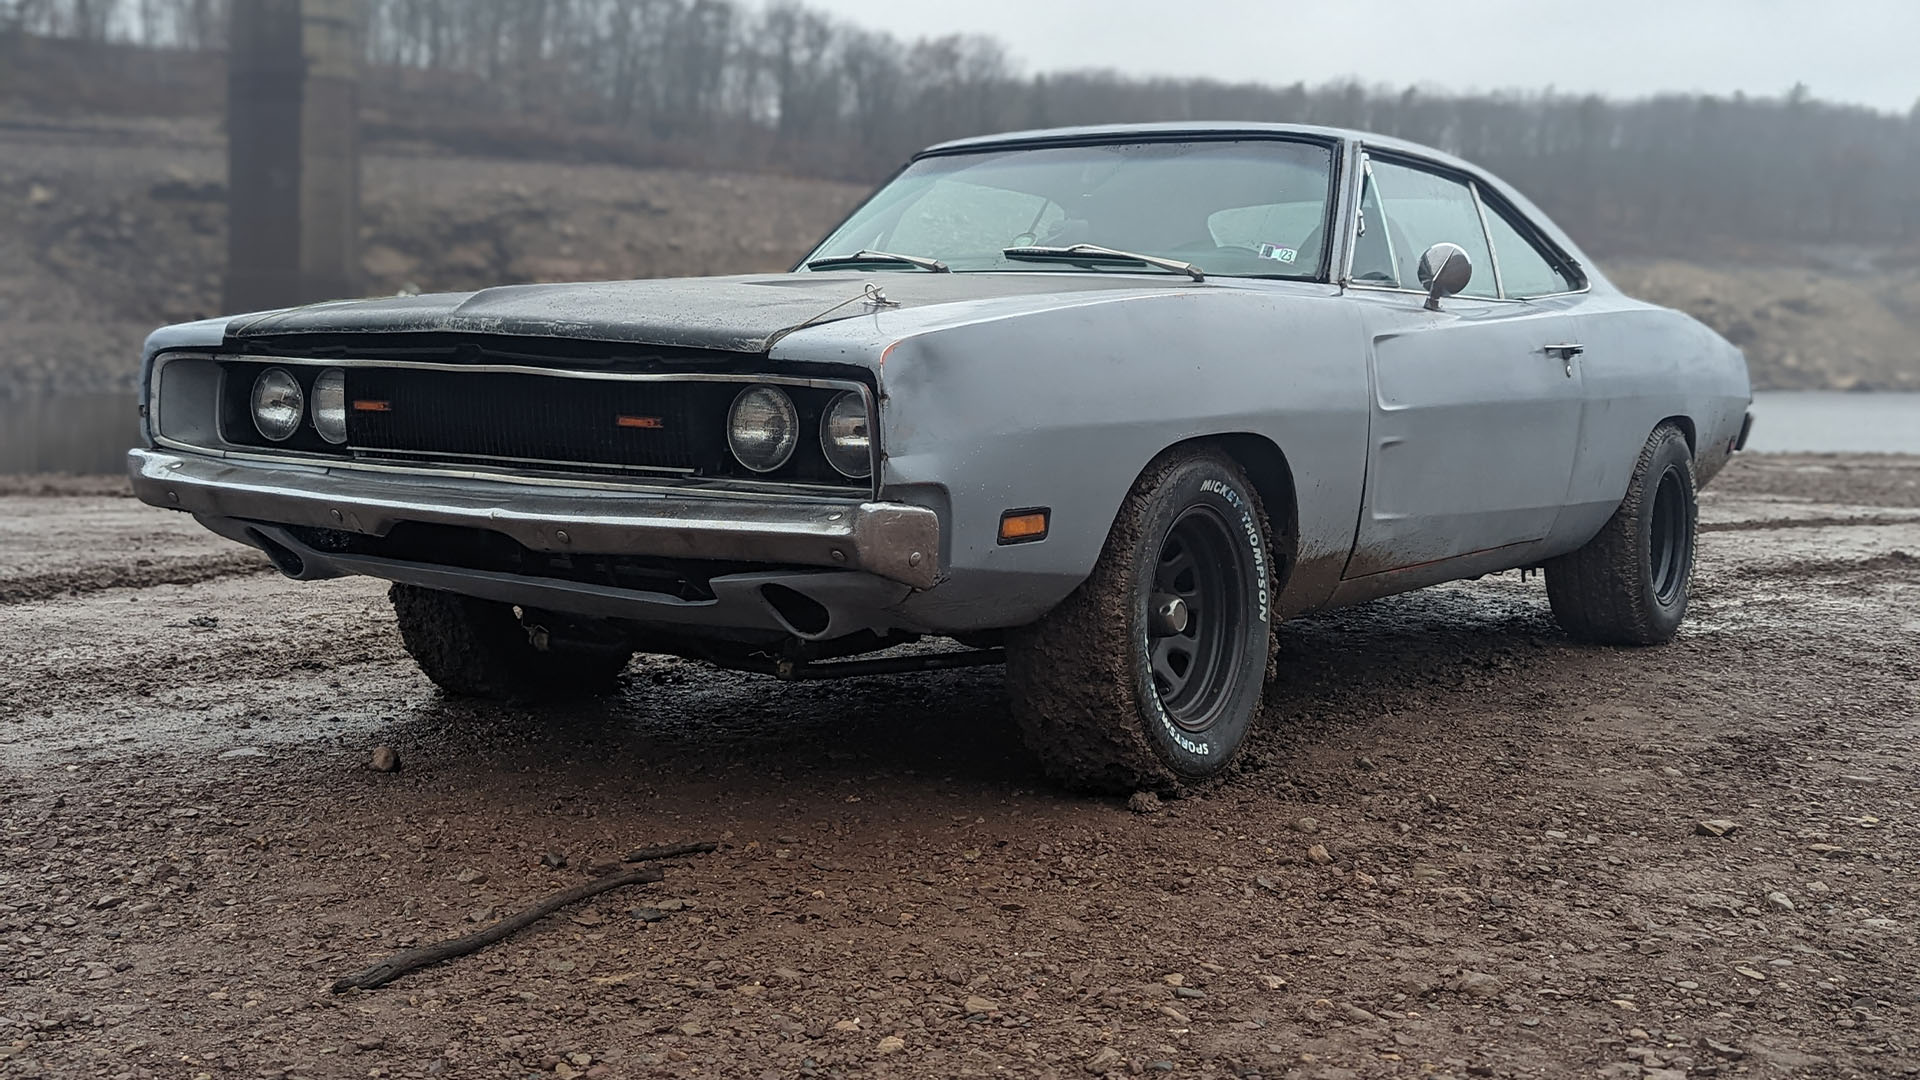
As the year comes to an end, it’s safe to say that my ’69 Charger has survived yet another season of being used as a daily driver. But I’m dutifully chipping away at the to-do list that stands between it and its former glory. Each year, the car comes back stronger and more reliable. I’ve spent more time behind the wheel of the car than beneath the hood and even managed to sneak a few short road trips along the way.
The lack of major issues recently has allowed my vision for this car to mature to the point where I’m not only certain of what I’m trying to achieve, but I can make some significant steps toward it.
That won’t happen overnight, though. My standards for a personal car may be low, but there’s a good amount of work to address before I can even think of laying paint on the family warhorse. Thankfully, I’ve found plenty of mechanical work to keep me sane in the meantime.

Where We Left Off
The last time you saw the car, I had just completed installing the dual-quad intake. That was back in August and I was made a believer in multi-carb induction. My time with it since then has only strengthened my love for it.
The only thing I wanted to change was the direct linkage between the carbs. Progressive linkages are abundant, but they can get pricey if you’re after an original unit. Modern progressive linkages are relatively cheap, but I didn’t want to just toss roughly $100 at something I wasn’t sure I’d really need. So I built a progressive linkage with some scrap I had lying around coupled with some odds and ends I picked out of the hardware bins at Ace Hardware. I used an eBay listing of an original 2×4 Hemi linkage selling for $400 as inspiration and came up with a pretty ideal solution for my problem.

As happy as I was with the initial product, I eventually got into really dialing this system in. The real reason driving me to a progressive linkage is better street manners and an improved economy. Even if there’s no such thing as an economy tune for a 440, every little bit counts. It’s also worth noting that the change to opening both carbs at the same time to gradually opening one and then the other changes tuning demands. For the next few weeks, I’d mess around with different combinations of jets, rods, springs, and accelerator pump settings to find what worked for my needs.
Along the way, I found inconsistent fuel mixtures between banks, with the driver’s side running way rich. Jetting, carb cleanings, nor swapping to an electronic distributor to eliminate as many variables as possible evened things out. One thing led to another, and I cracked the top end open. As to be expected, I fell down a rabbit hole. Actually, a few of them.

Dialing in a Rough Casting
Removing the manifold unveiled three issues to address, the biggest of which was a hulking lump in the casting I found on the driver’s side of the intake. Clearly a reason for the imbalance of fuel mixtures I’d seen.
Offenhauser 360 dual quad manifolds aren’t quite as weird as their 360 Dual Port counterpart, but they’re still pretty weird compared to other mainstream manifold designs. This intake features a split-plenum design that looks like a dual-plane at first glance but is more closely related to a single-plane in that the runners all get a straight shot to the plenum. Only rather than having a single, wide-open plenum, dividers in the casting separate the driver’s side from the passenger side.
Halfway between the Carters, an opening exists in the divider which is right where I found the chunk of jagged aluminum standing between the front and rear carburetors on the driver’s side. I can only guess how something so hideous could have occurred, but I had no choice but to deal with it if I wanted optimal performance.

I was actually pretty excited to find this mass in the manifold, as learning your weak points presents the opportunity to make improvements. This thing already ran awesome, even when it was all out of whack. I’m willing to bet that its presence caused fuel to fall out of suspension, collect on the manifold floor, and cause the rich running condition I experienced. Smoothing this over should go a long way.
It should come as no surprise that there are all kinds of imperfections in the edges found throughout the manifold. Of course, I am putting my burrs and porting sanding rolls to work to get the entire package in shape while it’s removed from the engine.
Getting the Valve Train in Shape
With the manifold out of the way, I decided to tackle a job I’d put off for far too long. Despite running worked-over heads on this thing, I’ve been working with the stock pushrod length. It’s never presented an issue for this use. Still, I know that cutting corners is holding me back in terms of performance and the overall health of this project.
Setting a straight edge across the valve stems revealed that the intake valves on each cylinder were set considerably higher than the exhaust valves—a result of the valve job a prior owner had done to these heads. This meant that I’d need shorter pushrods on the exhaust valves. A pushrod measurement tool confirmed that the same lengths would work for each cylinder and that I’d only need shorter pushrods for the intake valves.
Ideally, adjustable rockers will find their way into the engine bay. However, this is far more affordable than a good set of rockers for this engine, which go for around $500-$1,000. I’ve also got other plans to move onto, and I want to spend the time and money sciencing out the 383 that will eventually take this 440’s place.
Hitting C, D, and E on Our Way From A to B
Things never go according to plan, even when the plan is to fix whatever issues you find. At some point, a major roadblock had to appear. In this case, mangled intake threads opted to jam things up.
This particular hole had previous thread repair work done, and that solution had failed. This put me in a situation where I needed to plug the hole and start over. I ultimately pulled it off, but the job chewed up and spat out enough taps and small drill bits to make me nuts. I learned the hard way that sometimes it’s cheaper to just let pros handle things.

This major hiccup didn’t discourage me, though. It was a good opportunity to remember to understand and respect my personal limits, as well as remind me that this isn’t the part you need to go fast with. Take it easy, bond with the machine, and treat it well because that’s important.
So, to practice what I’ve learned, I took the time to clean out every lifter before assembling the power plant for one last hurrah of 2022. Likely not necessary, but it was one of those things my mind needed me to accomplish in order to feel as though I did things the right way.

Frankenroof, Paint, and the Hunt Continues
With those engine battles out of the way, I’ll finally be able to take advantage of a winter workshop and get into some cosmetic work. Again, a true vision for the car has developed, and I’ve already begun to collect what I need to make it happen, including a Hurst Competition Shifter to replace the whacky console shifter I’ve made due with.
Among the parts collected is a donor roof, as my current covering has a few rough spots that need to be patched. I’d opt to replace the entire thing, but the upper portion of Charger sheet metal is pricey and hard to pin down. So I’ll have to do what I can with a scrap roof a local Mopar nut and friend of mine pulled off of his project. I think it’s doable, but It won’t be easy and I’ll really put myself to the test. Thankfully, only a few small spots need work.
I’ve also managed to acquire some paint. I need to get some more for mixing purposes, but I’m still not going to reveal the exact plan at this stage in the game. You’ll just have to stay tuned if you want to see how this homemade hotrod turns out.
More From The Drive
- What’s your take on Wera’s Joker adjustable wrench?
- The Drive Awards 2022 is here and rolling
- Here’s how to remove and install bushings and bearings
- The Toyota GR86/Subaru BRZ is our favorite car of 2022 for under $40K
- Apple car won’t be self-driving nor will it arrive until 2026