
We may earn revenue from the products available on this page and participate in affiliate programs. Learn more ›
You love your car. I know you do, or you wouldn’t be reading this. The best way to show your vehicle how much you appreciate it is by taking care of it. One of the best ways to do this is by mounting a counterattack to the slow but steady assault on your vehicle’s exterior. Every mile you wrack up, season that passes, and loose debris that hits its paint takes a toll. But it’s OK because you can buff out all those battle scars and leave your paintwork as shiny as the day your vehicle rolled off the line.
When you take a buffer and some polish to your vehicle, you’re essentially rubbing off the thin layer of paint that contains the imperfections that have built up. This sounds relatively simple, but you need to be careful. If you apply too much force or use a machine that’s too powerful, you risk damaging your paintwork.
But that won’t happen to you because The Drive’s awesome info team is here to help.
Estimated Time Needed
Three to four hours.
Buffing Your Car Safety
Buffing your vehicle isn’t a particularly dangerous job, but you do need to take some precautions. For example, you’re going to work with an orbital buffer, so remove any rings, watches, necklaces, and bracelets. Since you’ll also use chemicals, it’s wise to wear a respirator, especially if you plan on doing this job frequently.
Everything You’ll Need To Buff Your Car
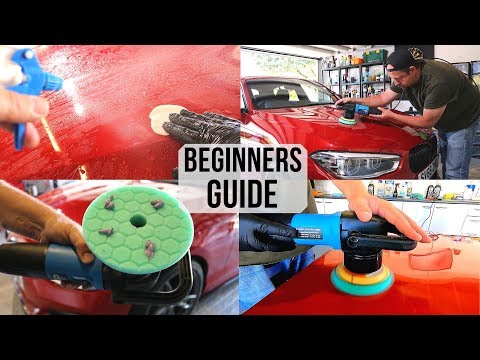
There’s more than one way to buff a car. Unless you’re trying to punish yourself, don’t do this job by hand because it will take a long time and a lot of effort. You could also use a high-speed buffer, but if you’re skilled enough to use that, I don’t imagine you’d be reading this guide. So, for the purposes of this article, I recommend you use an orbital buffer.
Tool List
- Chemical Guys Random Orbital Polisher
- Buffing polishing Pads
- Meguiar’s Ultimate Polish
- Meguiar’s Gold Class Car Wash Soap
- Meguiar’s Quik Detailer Mist and Wipe
- Meguiar’s Supreme Shine Microfiber Towels
- Sun Joe Electric High-Pressure Washer
- Chemical Guys 14-Piece Arsenal Builder Car Wash Kit
- Scotch General Purpose Masking Tape
- Chemical Guys Detailing Inspection Dual Light
That’s everything you need to keep your car shining year-round. Hopefully, you have some of the general detailing equipment lying around your garage.
Here’s How To Buff Your Car
It’s going to take a few hours, but when you’re done, it’ll be worth it.
1. Wash Your Car
Before you think of taking a buffer to your car, you need to wash it, or you’ll be embedding bugs, mud, and who knows what else into your paintwork. Clean paint will also help you see the benefit of your work more clearly.
Start by giving your car a deep clean using a power washer and automotive soap before letting it dry or drying it with a microfiber towel. Then, you’ll need to use a clay bar to remove any deeply embedded pieces of grime. Make sure you use a lubricant spray when rubbing the clay bar to prevent marring. Once you’ve finished with the clay bar, spray some detailer over your paintwork and wipe it down with a microfiber cloth to remove any residue.

2. Protect Delicate Areas (Optional)
If you’re worried about damaging delicate areas from the heat of your buffer or getting polish in places that it’s hard to remove, you need to protect them. This includes areas such as rubber door seals, headlights, emblems, and grills. The easiest way to do this is to cover the parts in masking tape.
3. Apply Polish To The Pad
If you’re using a new pad, spray a little detailer on it before applying the polish, as this will add some lubrication. Apply four pea-size blobs of polish on the pad, and make sure to shake the bottle well before applying.

4. Spread The Polish
The easiest way to polish your vehicle is to work in sections. I find setting up an area that’s two by two feet works best. Before turning the buffer on, dab the pad over the section you’re covering. Then, turn the buffer onto its lowest setting and gently spread the polish over the desired area. You’re not trying to buff the bodywork yet, you’re just spreading a thin layer of polish.
5. Time To Buff
Once you’ve spread a layer of polish over the area you’re working on, it’s time to buff it. If you’re using an orbital buffer, turn the power up to five or six. Apply light pressure to the top of the buffer with your hand. Move over the section in horizontal lines that have a 50% overlap, then repeat this process moving vertically.
Once you’ve buffed the area vertically and horizontally, you should consider this as one pass. After you’ve completed three to four passes on the same area, you’re done. In total, each area should take around three to four minutes to complete. Remember not to push too hard on the buffer. The polish will start to turn chalky as you buff, so let it do the work for you.

6. Wipe it Down
There’ll be some leftover residue from the polish, don’t worry. Remove the residue with a microfiber cloth by gently rubbing it away in a circular motion or straight vertical lines.
7. Inspect Your Work
Use a detailing light to inspect the paintwork after you’ve wiped away the residue from the polish. A regular LED light can suffice if you don’t have a detailing light. If you use a single-stage polish, it’s likely that your paint will still have some imperfections, but you should see a noticeable improvement compared to the areas you haven’t worked on yet.

8. Change or Clean Pads
If you intend on polishing your pride and joy every week, you’ll need to change your buffing pads every few months. But regardless of how new a pad is, you’ll need to clean it after completing each section or two.
A simple way to clean your pad is to set the buffer to a relatively low level and stroke it with a soft-bristled toothbrush. You’ll know it’s working when you start to see all the gunk that’s built up disappear.
9. Repeat
Repeat steps four to eight until you’ve polished the entire vehicle, then step back and enjoy.
Video
The Forensic Detailing Channel has a comprehensive video about how to buff your vehicle, and it’s worth checking out to see the technique in action.
How To Polish A Car For Beginners – Paint Correction Guide for first timers
More From The Drive
- Read Jonathon Klein’s heartfelt goodbye to Ken Block
- Peter Nelson is here to tell you all about shock rebound
- Chris Rosales helps you enter the world of tire chains
- Let James Gilboy show you the mint Nissan hardbody that could be yours
- Caleb Jacobs gives us a good first look at the VW ID.7