We may earn revenue from the products available on this page and participate in affiliate programs. Learn more ›
After a full two years, 50,000-odd miles, and way too many track days, my Volkswagen Golf GTI has been through a lot. At various points throughout my relationship with the car, the suspension was creaky, the coilovers were blown, many warning lights have appeared, and the tattered remains of my black headliner were so droopy that it tickled my head right behind my ears. Around a year into ownership (about a year ago from now), I decided to finally face the music and tear the headliner all the way out so I could get it done by a professional while still saving some money.

Headliner in most cars isn’t just a bit of fabric glued to the car’s metal roof — there’s typically a soft piece, like a cardboard foundation almost, around which the headliner is wrapped. This helps it retain its shape. So when you’re changing a car’s headliner, what you’re usually doing is removing that foundation, stripping it of old materials, wrapping a new material around it, and then re-installing. That middle stage is the hard part — especially if you really want a clean, taut, factory look.
You might ask why I didn’t fully DIY this. It’s simple: I only wanted to do this possibly annoying job once and I definitely do not have the skills or tools to do a great job. Redoing interior pieces is an art, and if you want it done well you’ve got to be prepared for a major time commitment or deal with a craftsman.
I am capable of removing and reinstalling the headliner, but getting a pro to do a lasting job on the actual textile work was worth the money to me. Not all DIY jobs have to be top to bottom, and these sort of hybrid workflows give good results. The actual removal of most car headliners isn’t too bad of a job — it’s the applying of the materials over the inserted piece that’s tricky and requires special skills.
To do the job from start to finish, meaning I’d drop the car off as-is and get it back with a new headliner, upholstery shops near me were quoting over $1,000. But if you can just get the main headliner piece to an upholsterer and let them skip the removal and installation stage, you can save serious money.
I actually decided to hire a mobile person to do the job who quoted me $500 to do the headliner, pillars and sunroof cover after some haggling. So by doing this I have saved over half of my money.
As I prepared for the task of removing the headliner, I researched far and wide for a guide, but I came up with zilch. I found that strange, because saggy headliners are one of the issues that plague Mk5/Mk6 Volkswagen small cars. I saw the words “I’m too scared to do it” in the forums more times than I could count. By all accounts, I would have to spark up some sage and start a prayer circle to exorcise the headliner from my dilapidated German shitbox.
After work on a Monday, I decided to just tackle the issue. My game plan? Find every hidden screw and clip and remove them, which is simple enough.

I began with the easy stuff. I removed the A-pillars, B-pillars, and C-pillars. On the Mk6 Golf, there is a T25 or T20 screw holding the very top, behind the little plastic piece that says “AIRBAG.” After that, I pulled the A-pillars toward the inside of the car, and the clips popped out. The last steep was twisting it out of the dashboard and out.
The B-pillars were a similar deal. I removed T20 screws behind the plastic “AIRBAG” piece and yoinked upward. If you planning to do this job yourself, make sure to unbolt the seatbelt from the bottom, as there is an access panel down next to the seat. Move the seat forward to get at it, and use an M10 or M12 triple square socket with an extension. Then you can snake the belt out of the B-pillar panel.
The C-pillars are exactly the same as above, save for some extra 10mm nuts at the top, under the plastic roof panel at the very back of the car. These didn’t need to fully come out, they just need to peel back from the top.

The next step was removing the grab handles in the roof, the sun visors, the rear dome light, and two T20 screws underneath the front dome lights. I went for the sun visors first. The hinge itself took a single T20 screw underneath a cover, then I slid it forward, and unplugged the harness. When you’re doing this, make sure to get the sun visor retainer thing, too. The cover for the screw can be a pain to pop off. Get a very thin flathead to pop it up from the bottom and unscrew the single T20 on each side.
The grab handles were easy. I popped the covers open with my fingernails, unscrewed the two T20s per handle, and pulled the handle towards me with some mettle.

The front dome light screws were also easy. I popped the black plastic panels from the overhead console off. There are two: the one that surrounds the sunroof switch knob and the one that looks like it has speakers. To remove these, I used a flathead and gently pried them off. Underneath that, there will be two silver T20 screws. I removed those and dropped the entire switch panel. During this process, don’t unplug the sunroof switch and microphone, just find the tabs holding them in, use a flathead to pry them, and free them from the panel. At the very front, there will be two black T20 screws. Remove those, and you’re done. For the rear dome light, I used a flathead to pop the cover off and to pop the light housing off before I unplugged it.
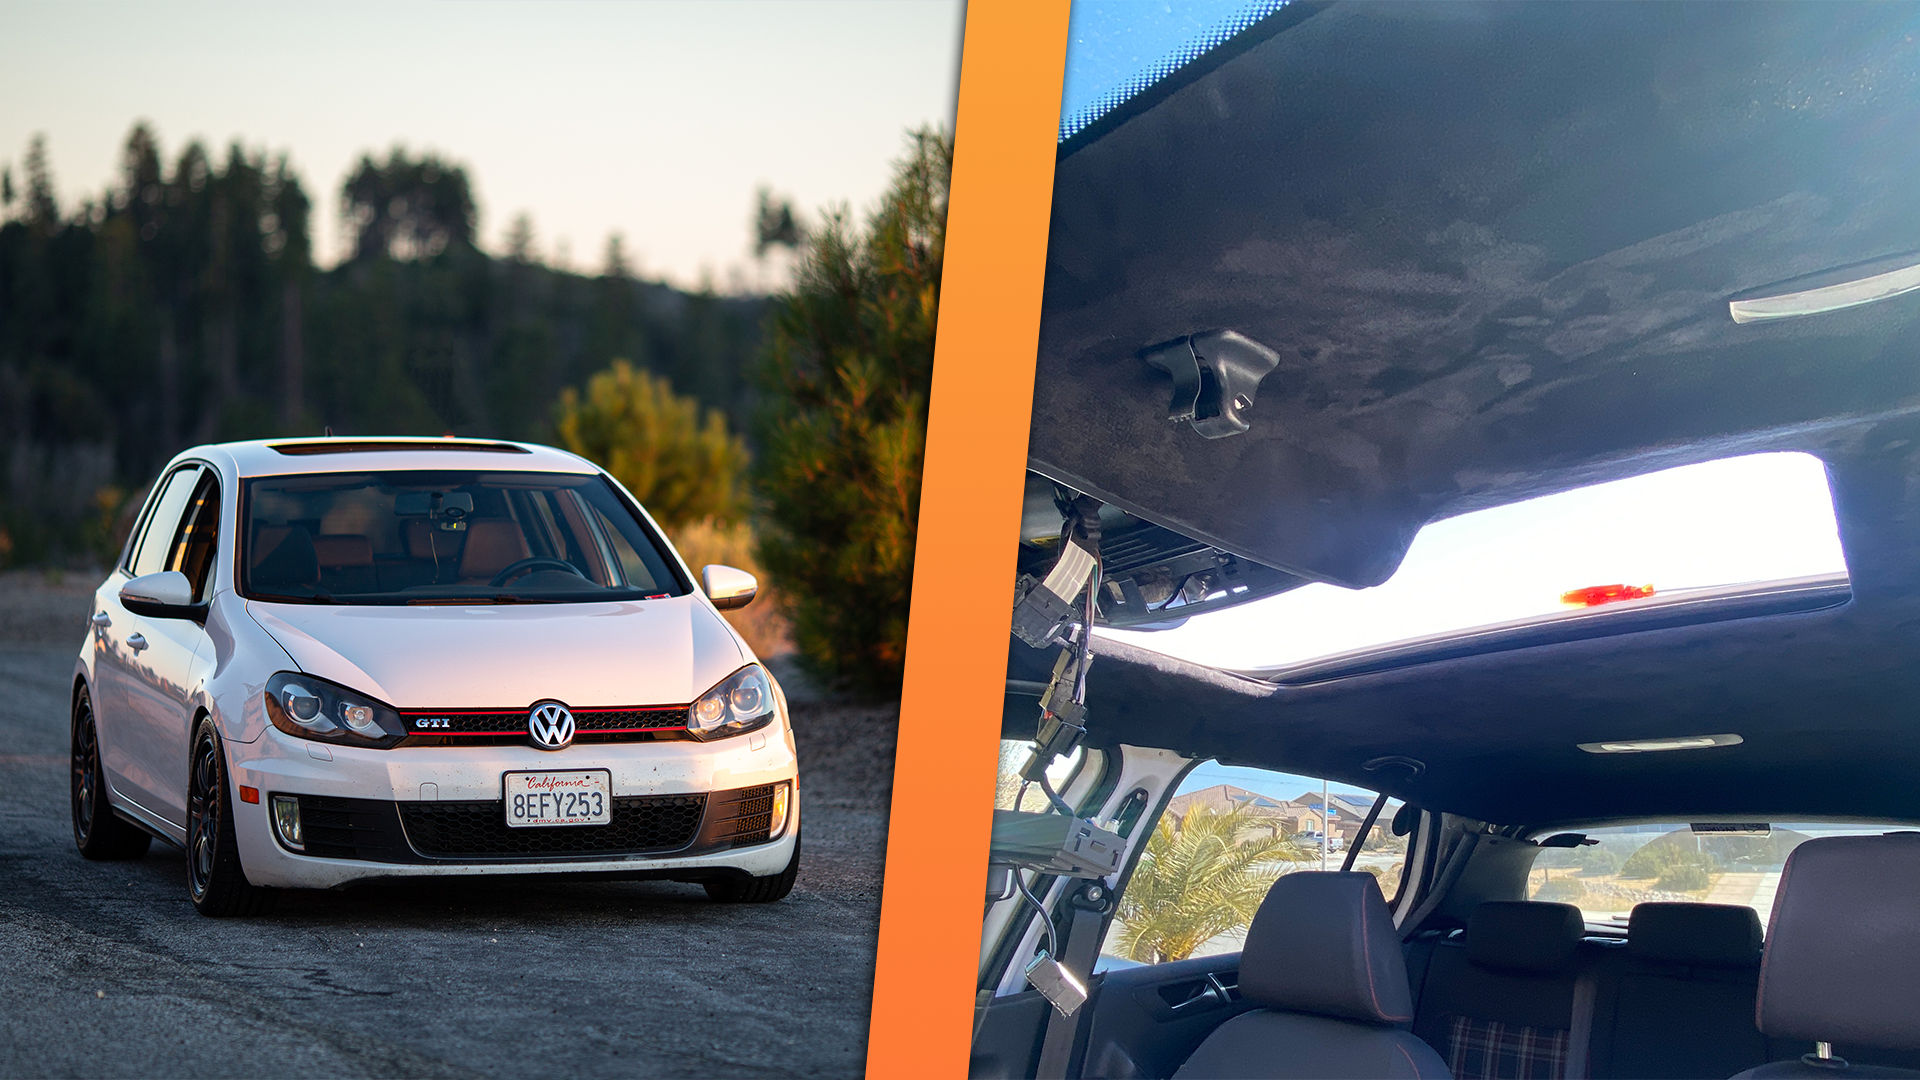
With all the accessories and clips off, the headliner was ready for removal. The scary part was over, right? Not quite. At that point, it was time to gently, but forcefully, pull the headliner down. On the GTI, the headliner is only clipped in around the sunroof. Otherwise, the grab handles, visors, overhead console, and pillars held it in. I made sure to clear away any obstacles in the back and began pulling the headliner straight down from the sunroof opening. The clips un-clipping sounds scary, but that’s how it’s supposed to be. I unclipped all around the sunroof, then reached under the very front of the headliner by the windshield. I pulled down to release those clips, careful of bending the headliner too far.
Annoyingly, that still wasn’t quite it. As you pull the front down, don’t let it hang on itself. There aren’t any clips holding it on, and it’s actually hanging from the thin ribbon harness that supplies power to the overhead lights. Once you pull it down from the clips, look at where the sun visor used to bolt in, and feed the connector out of the bracket.

The final removal out of the back hatch of the car wasn’t too bad. It took me an hour of work, and I didn’t even have to start a seance. It bent slightly coming out and going back in, but it was in good shape. After choosing a black suede material to replace the charcoal cloth mesh that is applied at the factory, I let the upholstery man do his thing for a few hours. When he gave it back, I fed it back into the car with minor fuss.
The hardest part is getting it mocked up. After that, the rest of the job is putting every fastener back in its correct spot and nudging clips until they hit home. The GTI officially had a fresh headliner.

Now that I had the chance to take it apart and reassemble it, it makes more sense now. Most cars would be put together this way, so this could potentially help anyone looking to remove a headliner. For a sedan or a coupe, it would be more difficult and require removing big parts like the seats and guiding the headliner out of one of the door openings.
Really, all this job takes is a little bit of patience and care. That saggy or stained headliner isn’t an excuse anymore. My GTI feels nicer than ever and it is certainly fancier thanks to the suede. You could even go a step further and add the Rolls-Royce starlight roof. Either way, I’m deeply satisfied and I can’t help but caress the material at random intervals. Perhaps at stoplights. Sometimes, I get the grain of the suede just right. My satisfaction is heightened by the fact I paid 50-percent of what I should have.
In all fairness, there is probably a much cheaper upholstery shop somewhere that will do it but it would have been impractical for me to chase this down. Sometimes, it’s best to pay a reputable professional decent money to get a good job done with high-quality materials. It’s been another year and a half and my fresh suede has held up incredibly well.
Beyond my antics, interior customization should come back. I almost want to go deeper into this re-upholstering business… stay tuned.