We may earn revenue from the products available on this page and participate in affiliate programs. Learn more ›
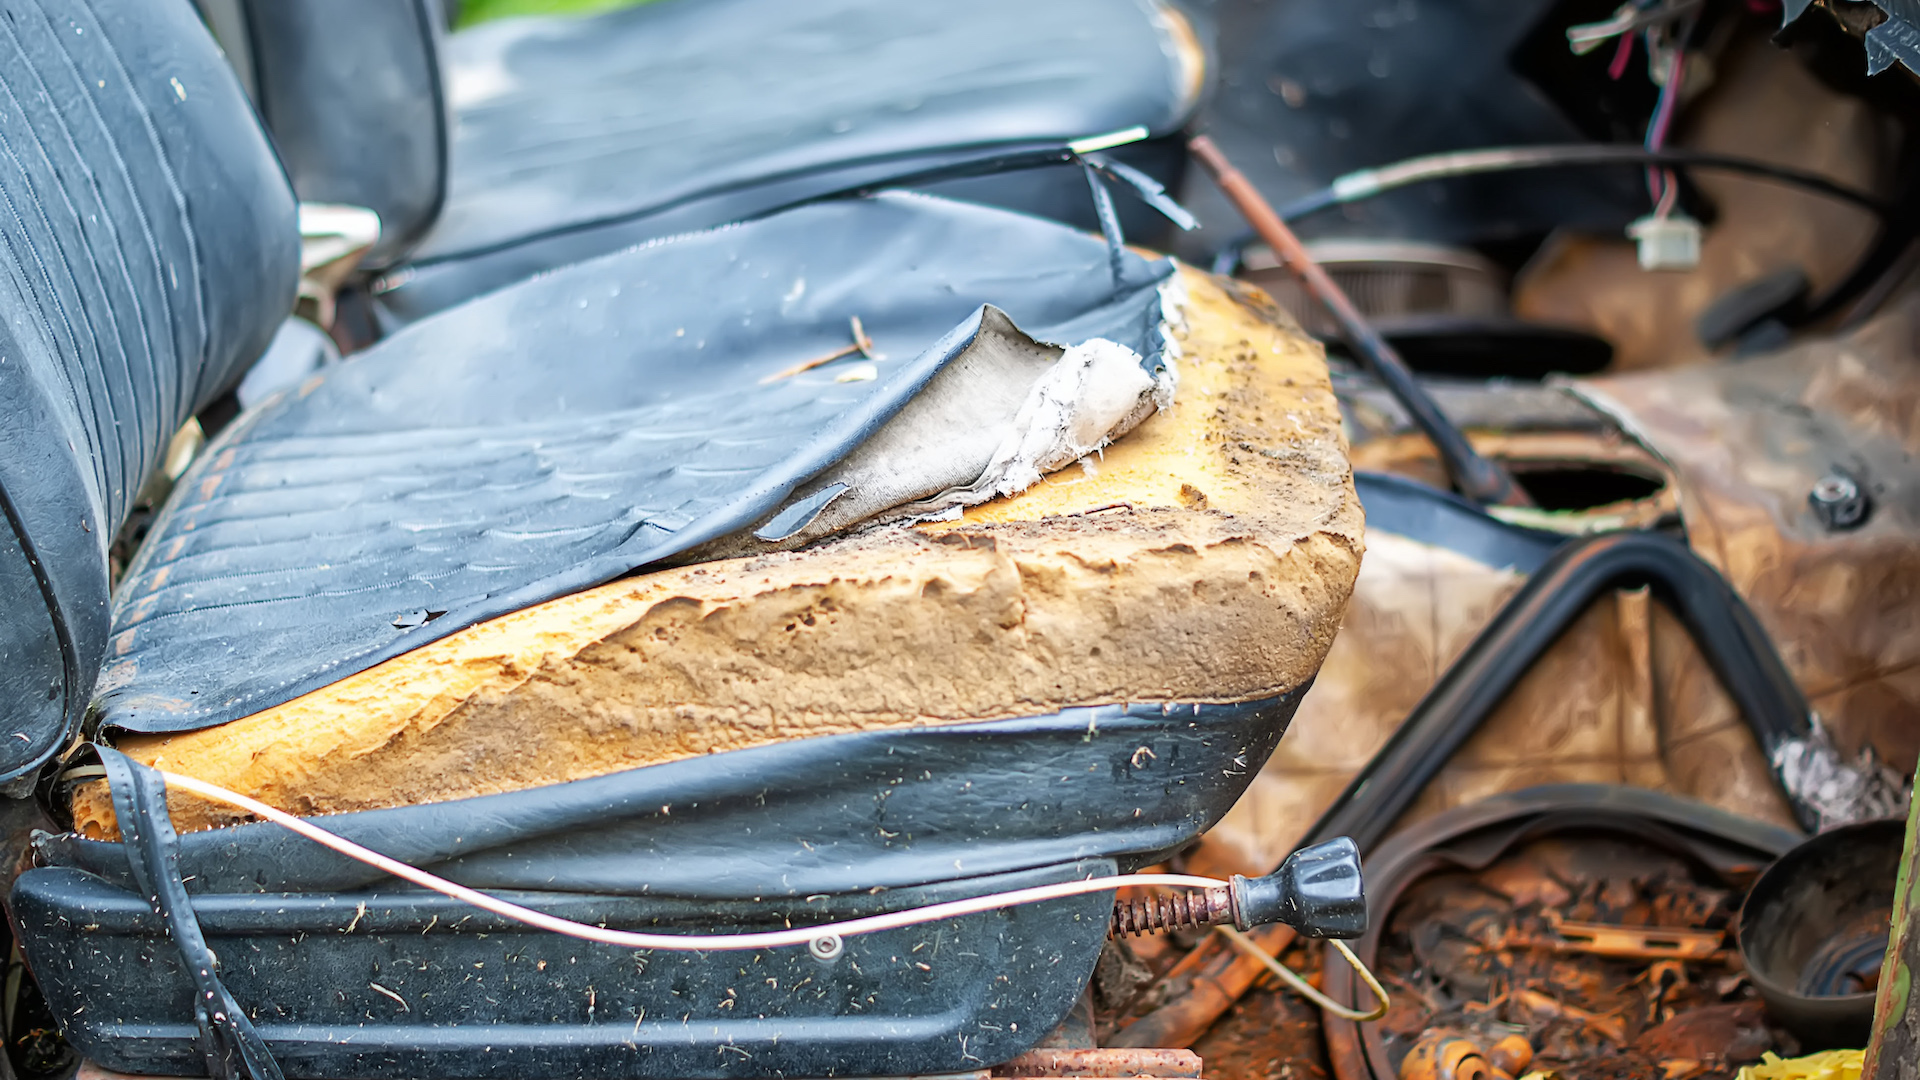
Despite its reputation as the “cheap” material in cars, vinyl upholstery has many benefits and can make for a reasonably upscale interior. It comes in nearly any hue, can feel similar to real leather, and is easy to clean. Making it even more appealing is its price, which is typically less than natural hydes.
Having said that, vinyl can tear, just like any other fabric or seat material. Luckily, there are many ways to repair the damage. When your vinyl seats tear, it can be frustrating, but you need to take action without much delay. As durable as it is, vinyl can and will continue tearing if not attended to.

The Drive’s editors have seen a few torn seats in their day and are here to help you get a feel for repair basics. This is one situation where a cheap, quick fix is completely acceptable, but it all depends on how comfortable you are with an ugly spot on your seats. Let’s take a closer look.
Vinyl Repair Basics
Estimated Time Needed: 1-2 hours, depending on the fix
Skill Level: Beginner
Vehicle System: Interior
What the Difference Between Vinyl and Upholstered Seats?
Vinyl is made out of plastics and other materials and is frequently used as vehicle upholstery. Vinyl is upholstery, but not all upholstery is vinyl. Got it? Vinyl rose to popularity in the 1950s as plastics technology improved and has evolved into a material that today is better in some ways than real leather. It’s easy to clean and durable but does not perform as well as natural materials in hot temperatures, as it tends to feel sticky and uncomfortable.
Vinyl Seat Repair Safety
Working on your vinyl seats can be messy and will put you in contact with chemicals that can cause burns or worse.
- Wear gloves and eye protection. Nothing says a tough guy like chemical burns.
- Work in a well-ventilated area. We’re fixing holes in seats here, not trying to add some to your lungs.
- Take care when using scissors or cutting tools to avoid cutting your undamaged vinyl seats or yourself.
- If you don’t have a garage, park in a quiet lot or away from traffic. You will need to be able to work without worrying about being run over.
Everything You’ll Need To Fix Tears in Vinyl Seats
Before you dive into fixing your vinyl seats, decide how you want to approach the project. Do you want a seat that looks as close to perfect as possible, or do you just want to fix the tear? Are you into using an expensive kit, or do you only care about the bare minimum? Fixing the seat to return it to its former glory will take more money, time, and effort than just repairing a hole. Because there are a few avenues to achieving the fix, our recommendations for tools and parts are mostly optional, depending on the method you choose.

Tool List
- Vinyl repair kit
- Liquid vinyl
- Super Glue or Gorilla Glue
- Tape
- Cleaning towels
- Sharp scissors
- Sandpaper
Organizing your tools and gear so everything is easily reachable will save precious minutes waiting for your handy-dandy child or four-legged helper to bring you the sandpaper or blowtorch. (You won’t need a blowtorch for this job. Please don’t have your kid hand you a blowtorch—Ed.)
You’ll also need a flat workspace, such as a garage floor, driveway, or street parking. Take a minute and find a well-ventilated spot to work as well. Check your local laws to make sure you’re not violating any codes when using the street. We aren’t getting your ride out of the clink.
Here’s How To Fix Tears in a Vinyl Seat
We’re sticking to covering tears not located near a sewn seam. If your seats are torn at the seams, you might be able to repair them with a heavy-duty needle and thread. This process will involve at least a passing understanding of sewing and an eye for the seat shape.
Also, keep in mind that any luxury or comfort features that have been equipped in the seats may make this process harder. If you’ve got seat heaters or ventilated seats, massage features, or other functions, make sure you’re not damaging the underlying components while fixing the seat.
Using a Vinyl or Seat Repair Kit
First, it’s important to remember that every kit is a little different, and note that many offer color matching, so you’ll need to find one that is fairly close to your car’s interior color scheme.
- Clean the area and seat thoroughly. Use a mild cleaner and towel to scrub the seat clean. Get rid of any staining, dirt, and crumbs you can see. Let the seat dry.
- Feel free to vacuum, if needed, to remove crumbs and other dirt. This is especially useful if you have kids who love to leave Cheerios behind.
- Inspect the tear. If it is ragged, uneven, or frayed, you will need scissors to trim the edges and make it as straight as possible. Take care not to trim away so much material that the tear becomes unmanageable.
- Most vinyl repair kits come with a backing cloth or padding material that needs to be placed inside the torn area to act as an interior anchor. Cut the material so that it’s slightly larger than the tear in all directions and glue it in place.
- Don’t try to pull the edges of the tear together at this point.
- Allow the glue to dry completely before moving on to the next step.
- Your kit should include a filler paste or compound. Using the included applicator or an old butter knife or small spatula, spread the compound over the tear.
- This process may take a few coats. Be patient and let each coat dry before applying a new one.
- Repeat the application process until you have a cover that is just slightly raised over the seat material.
- Once it’s completely dry, sand the filler until it’s flush with the seat cover. Try to avoid sanding the non-filler seat vinyl.
- Clean the area with water and a towel and apply coloring to the cover.
- You won’t need soap for this job.
- When applying the coloring solution, you will likely need more than one coat, especially for darker-colored seats. Let each coat dry before reapplying.
- If your kit came with a sealant, make sure to apply it before using the seat. Some color solutions require a sealant to stay in place so they don’t rub off on clothing.
- Once the fix is complete, keep in mind that you shouldn’t just jump in and drive off. Give the solution, adhesives, and other bits time to dry and set in place before you hit the road.

Using Liquid Vinyl
- Clean the seat area thoroughly with a mild cleaner and towel.
- Prepare the liquid-vinyl solution. Take care to pay attention to any dilution ratios or special mixing instructions.
- Using a sponge, apply the liquid vinyl solution.
- Only apply a small amount at first to avoid overuse.
- Clean away any stray product immediately.
- If you need to apply more than one coat, let the previous layer dry thoroughly before applying more.
- Apply sealant or conditioner as advised by directions on the liquid-vinyl solution.
- Once the fix is complete, be patient. Don’t immediately get in and drive off. Give the repair time to dry and set in place before you hit the road.
If you really don’t care what the fix looks like, you’ve got a few options. In some cases, the vinyl will be forgiving enough to allow you to clamp the tear shut and either glue or tape it. You will need to leave the area clamped long enough to allow the glue to dry, and may need more than one application. Patches are another quick and dirty way to fix a vinyl tear and should be able to be applied with the included adhesive material or applicator. Finally, if you’re resigned to your torn fate, pick up a graphic seat cover and get it over with.
Pro Tips for Fixing Tears in Vinyl Seats
- Many liquid vinyl solutions and fix kits contain adhesives and chemicals that don’t work as well in extreme temperatures. Try working in a shady spot or park in a garage, if possible, to allow the seats to cool off.
- It’s better to apply a little colorant or sealant to your seat and add more later than it is to go full bore with the product at first. Don’t go crazy and ruin your seats.
- Even after drying, liquid vinyl may need time to set up completely. Be ginger with your seats until they’ve had time to dry out all the way.
- Be sure that your seats really are vinyl before trying to fix with a kit or other method. Newer synthetic leathers may require special attention.
Watch: Using a 3M Kit To Repair a Seat
This video demonstrates how a kit is used to fix a tear in a vinyl seat.

FAQs About Fixing Tears in Vinyl Seats
You’ve got questions, The Drive has answers!
Q: How much would a professional upholstery job cost?
A: You can count on spending between $250 and $1,000 per seat, depending on the material, the severity of the tear, and any special seat features. If you’ve got heated or ventilated seats, massaging features, or other things going on, the fix may be more complicated.
Q: How hard is it to reupholster the seat myself?
A: If you’re skilled with a sewing machine and materials such as leather and vinyl, you can probably pull it off, but the process is labor and time intensive. You’ll need to measure and cut patterns, size and cut the material, and then stitch it all together and fit the seat. It’s not an easy job.
Q: Is leather better than vinyl?
A: Leather is generally considered to be more upscale and luxurious than vinyl, but vinyl has plenty of redeeming qualities. In many cases, vinyl is more durable than leather and more resistant to sun damage. It can also be more resistant to scratches and tears, but that’s not the case with every type of vinyl seat. In the end, it depends on the preference of the user.
Q: Can I change out the seat completely?
A: You absolutely can, and in many cases, you’ll be able to find a salvage yard seat that will do the trick. If you own a newer car, however, it might be better to take it to the dealer or a certified shop. Safety equipment and other vehicle components, such as sensors and climate functions, can’t just be slapped back together or they won’t function properly.
Q: Can I have my vinyl replaced with leather?
A: Yes, but expect to pay up. You can spend $5,000 or more for an upholstery job, so it’s important to be sure you want to do it and that the car is worth the effort.
Let’s Talk: Comment Below To Talk With The Guides & Gear Editors!
We’re here to be expert guides in everything How To related. Use us, compliment us, yell at us. Comment below, and let’s talk! You can also shout at us on Twitter or Instagram, here are our profiles. Got a question? Got a pro tip? Send us a note: guidesandgear@thedrive.com.