We may earn revenue from the products available on this page and participate in affiliate programs. Learn more ›
Turbocharging and supercharging are some of the greatest automotive technological innovations ever. These forms of forced induction enable an engine to produce more power than its displacement normally would and, depending on how it’s tuned, allow it to still maintain good fuel economy.
However, as the old saying goes, “With great technology, comes great complexity.” It was probably coined by some German engineers a long time ago. This means that the addition of forced induction means there’s a lot more componentry that could become worn out or damaged under the hood, especially in relation to the compressed air charge entering the cylinders, widely referred to simply as a boost.
If your car is turbocharged or supercharged and experiencing lagginess and hesitation under load, meaning while it’s accelerating down the road, it could be due to a boost leak. Here’s how to test for such an annoyance and get your car back to tip-top shape.
Buy or Build a Boost Leak Tester
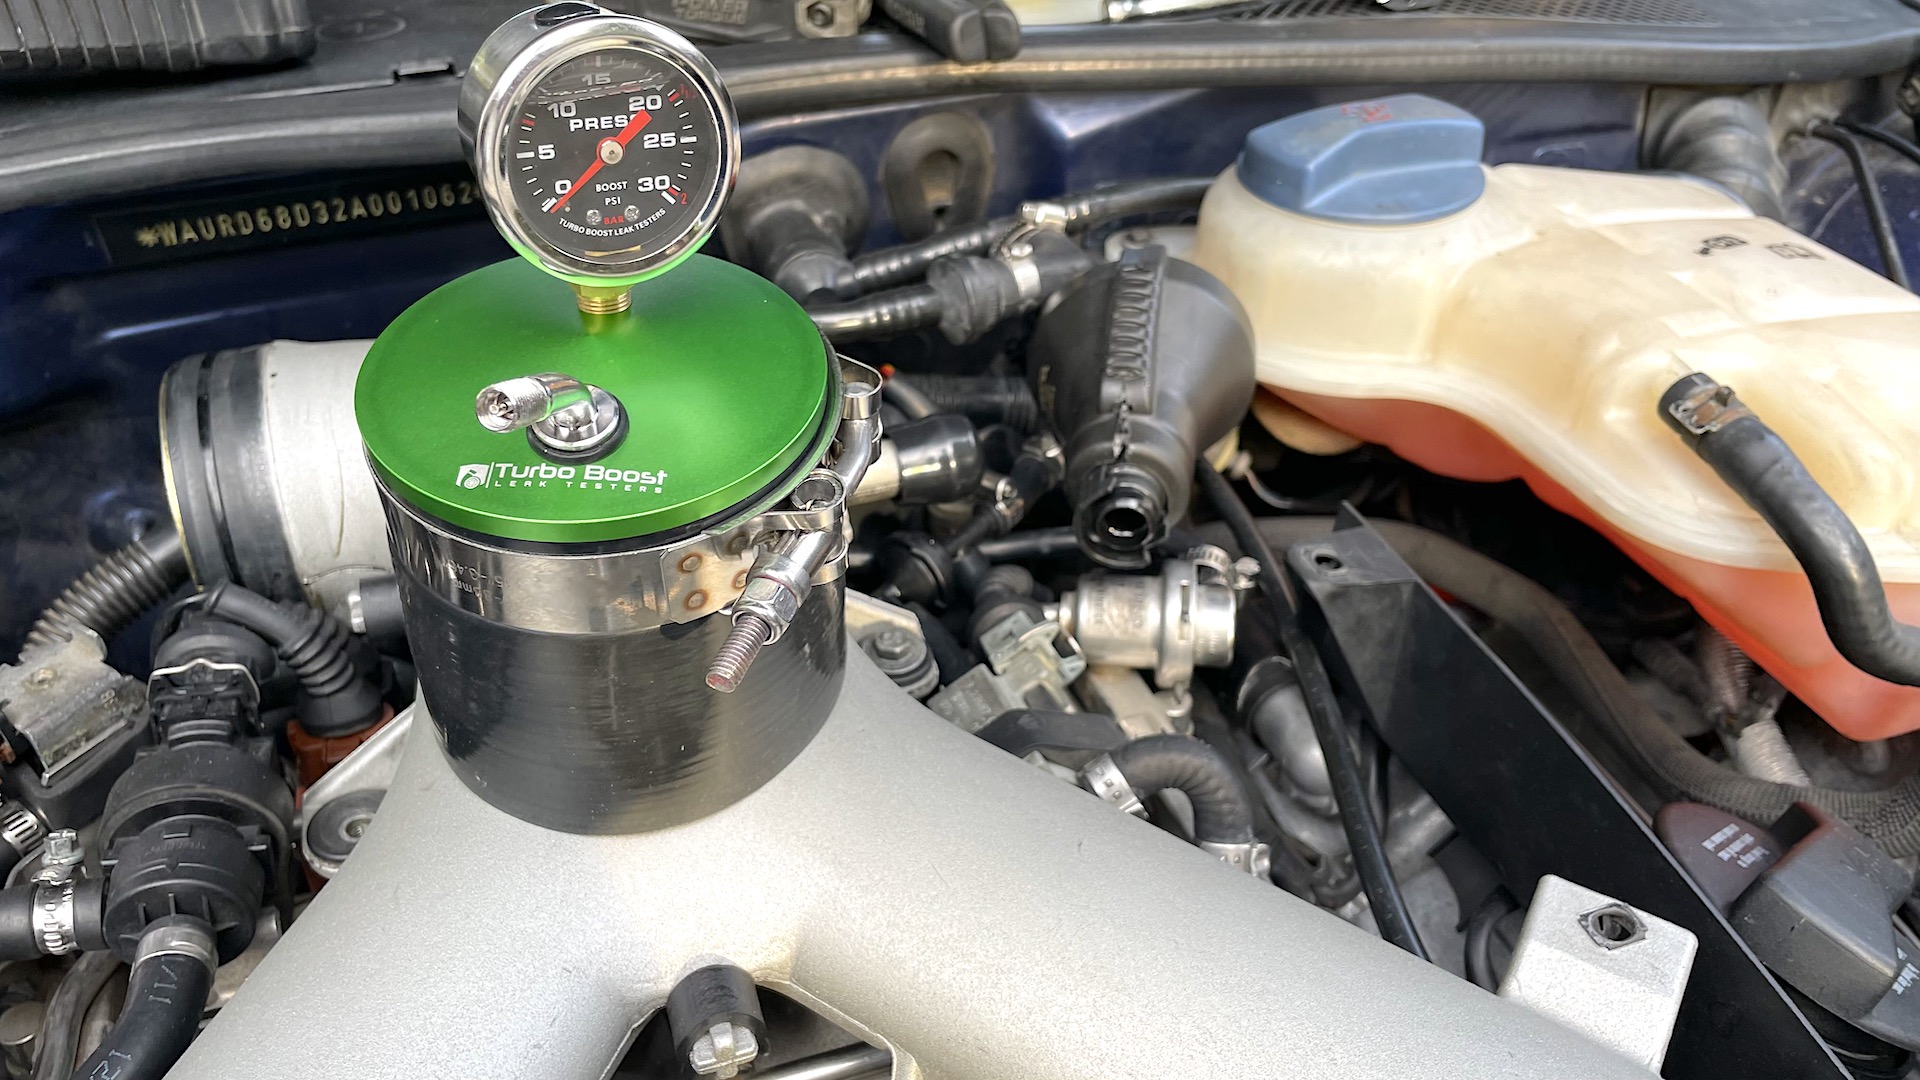
The first step is to either buy or build a boost leak tester. In my case, I bought one specifically designed for my 2002 Audi S4 from TurboBoostLeakTesters.com, a Southern California-based company that also has a presence on Amazon. The kit includes everything I need and is of good overall quality.
If you’re inclined to build your own, there are DIY resources all over the world wide web that describe what’s involved.
Once you’ve got this handy tool ready to go, the following will help you start doing some pressurized troubleshooting.
Set Up Your Boost Leak Tester
Once you’re ready to get to work, it’s a good idea to assemble your tester ahead of time on a bench. This helps ensure that you won’t lose any hardware or fittings. In my case, I decided to use the air supply fitting that connects to a conventional tire inflator. However, if I were to instead opt for a fitting that’d adapt to a conventional shop airline, this is also in my kit and easy to swap in.
Make sure all connections are nice and tight, too, as you’ll be building up some PSI and don’t want to develop a leak at the tester itself and skew your testing.

Plug In Your Boost Leak Tester
Up next, ready your car and plug everything in.
In my Audi’s case, my included directions stated that I should disconnect the CCV hose from the intake piping. This is because the pressure coming from the tester might harm the engine’s various top-side seals and cause them to fail prematurely. Then, it’s a good idea to loosen your oil fill cap as well, and re-tighten it after testing.
My kit included a cap for the CCV hose, as well as a silicone coupler with screw clamps to plug the tester into my intake, but your setup might be different. Again, check your directions. Or, if you’re working with a tester of your own creation, you’ll want to install it as close to the air filter as you can. This ensures that every millimeter of tubing that the air travels through gets tested.

Add Air to the Boost Leak Tester
The next step is to fire up your air source and get some air into the system. At first, the best I had for this initial trial run was a very weak tire inflator, which wasn’t able to achieve the recommended pressure level. Later, I picked up a proper compact compressor with accessories from Harbor Freight and was able to test the system properly.
This is because you want to pressure the system to at least 5 PSI. This ensures the intake system is put under some strain that will reveal where any potential leaks could be. It’s a good idea not to exceed the PSI that your turbo(s) produce. Higher PSI than that isn’t advised as it could cause damage to components.
Though, my inflator method still had the ability to push enough air into the system and reveal a very apparent leak.

Look and Listen for Leaks
Next up, if there are any leaks in any components, you should be able to hear where they’re coming from. It could be coming from multiple places, too.
Depending on how complex your intake system is, you might have your work cut out for you. My Audi has double the amount of components to inspect. My top intake pipe that the tester attaches to branches off to double the number of couplers, intake/charge piping, turbos, intercooler, and diverter/blow-off valves. To perform the most thorough test, I’ll have to remove my car’s front bumper cover and push the radiator away from the engine (affectionately referred to among Audi wrenchers as the service position)

Another method for checking for leaks is to spray soapy water on all applicable components. Though avoid spraying down any electrical connections or the alternator—engine compartments withstand some exposure to moisture, it’s still a good idea to be careful.
If there’s an air leak, it’ll reveal itself with some light bubbling. In my case, despite not being able to pressurize the system to 5 PSI, an air leak in my passenger-side diverter valve produced some bubbling at a vacuum connection.

Watch the Pressure Level
Typically, losing 1 PSI per second with the air source disconnected and the system sealed is normal. However, if the air source fails to build up any pressure at all, or drops at a faster rate, you’ll have a lot of inspecting to do, as this means there’s a big leak (or several) somewhere.
Fix and Replace Components as Necessary
Tighten down clamps and replace parts as necessary. Oftentimes, parts like intake elbows and piping can be temporarily fixed, but should definitely be fully replaced to ensure flawless, reliable operation.
The especially convenient thing about boost leak testers is they’re an inexpensive tool that could prevent any unnecessary purchases. If you’re like me and do a lot of online forum research to help troubleshoot issues, you might want to just start purchasing and throwing parts at the problem.
Boost leak testers help you pinpoint exactly what the issue is, or eliminate potential causes altogether. Depending on how often you use it, it could pay for itself quite quickly. Especially if you own a European car with pricier-than-normal replacement parts.
A Visual Accompaniment
Check out this video for more on how to test for boost leaks.

How to Test for Boost Leaks | MAPerformance DIY