My Cheap Electric Go-Kart Is Better Than Ever—and Now You Can Build It Too
Stronger materials, pneumatic tires, a digital gauge cluster, and a 48-volt battery from a Ford Escape PHEV round out the final upgrades.

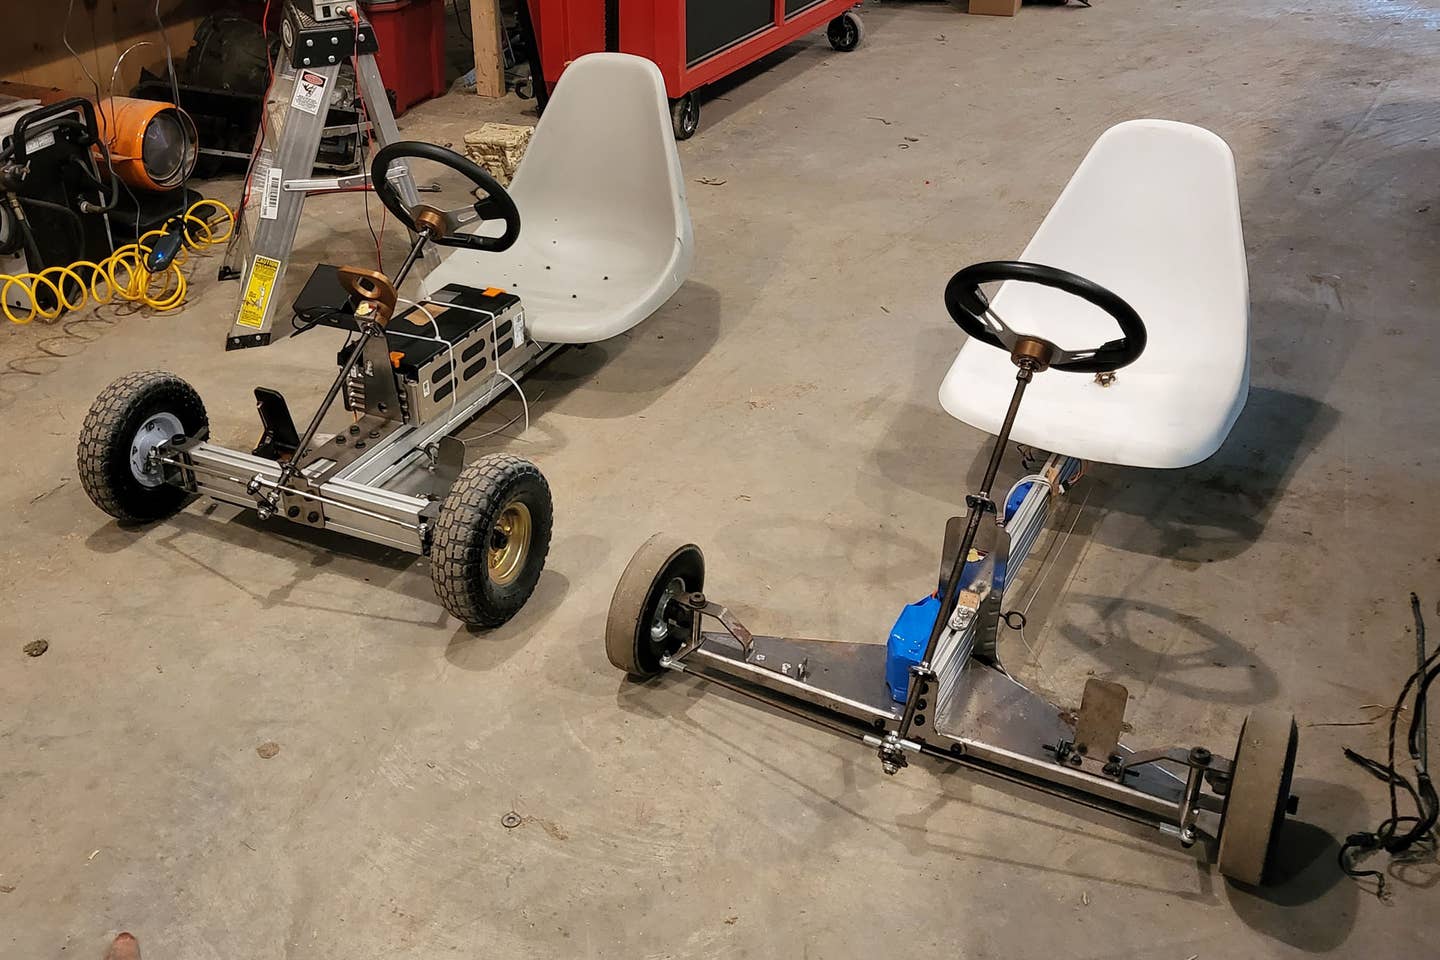
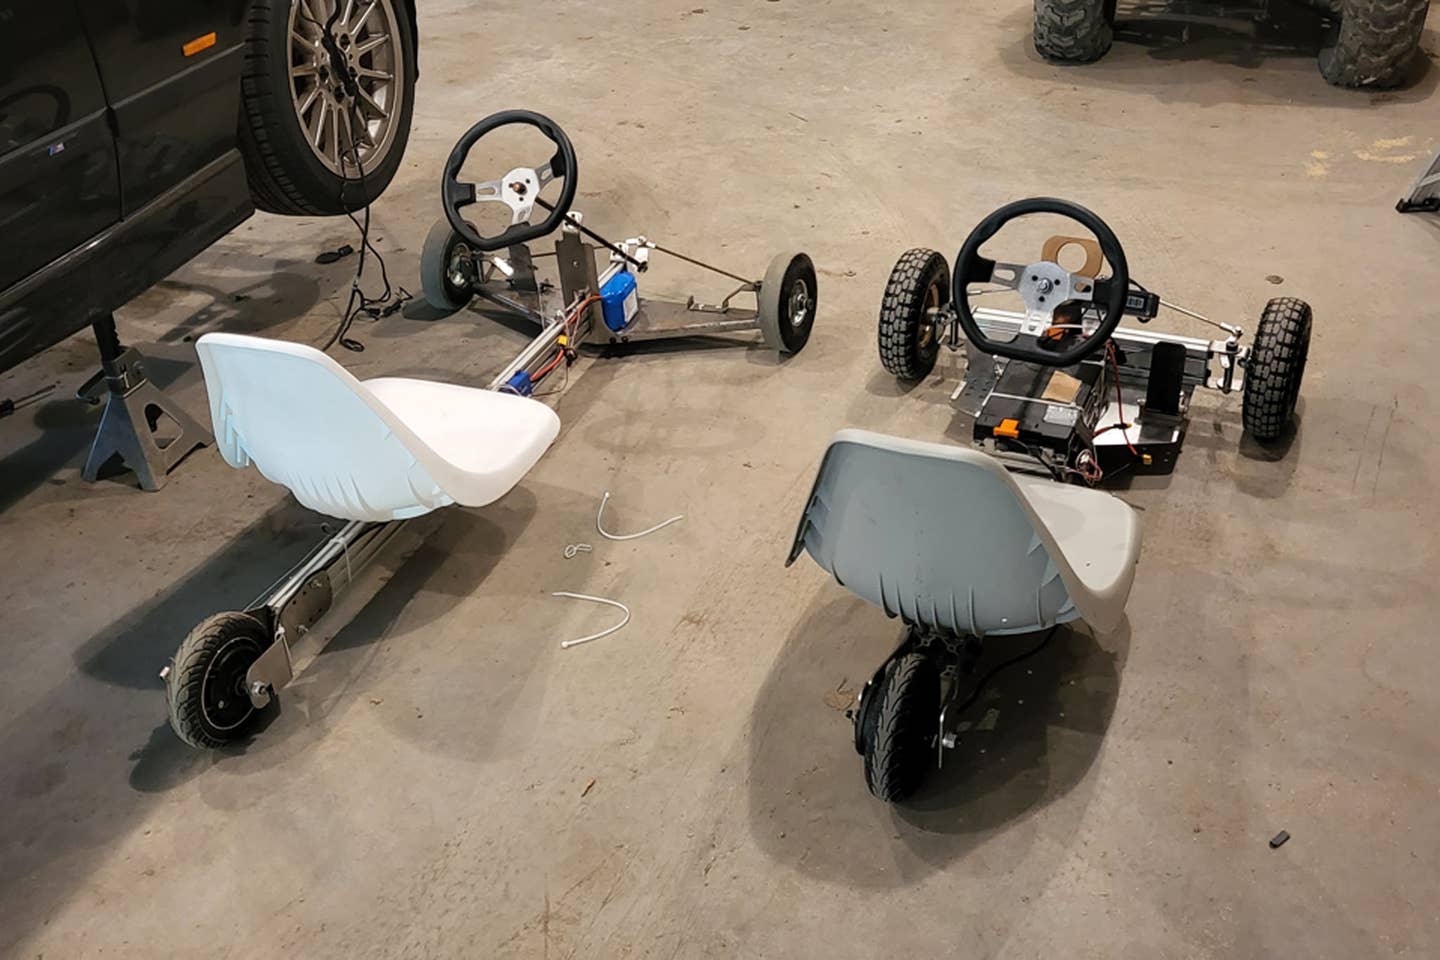
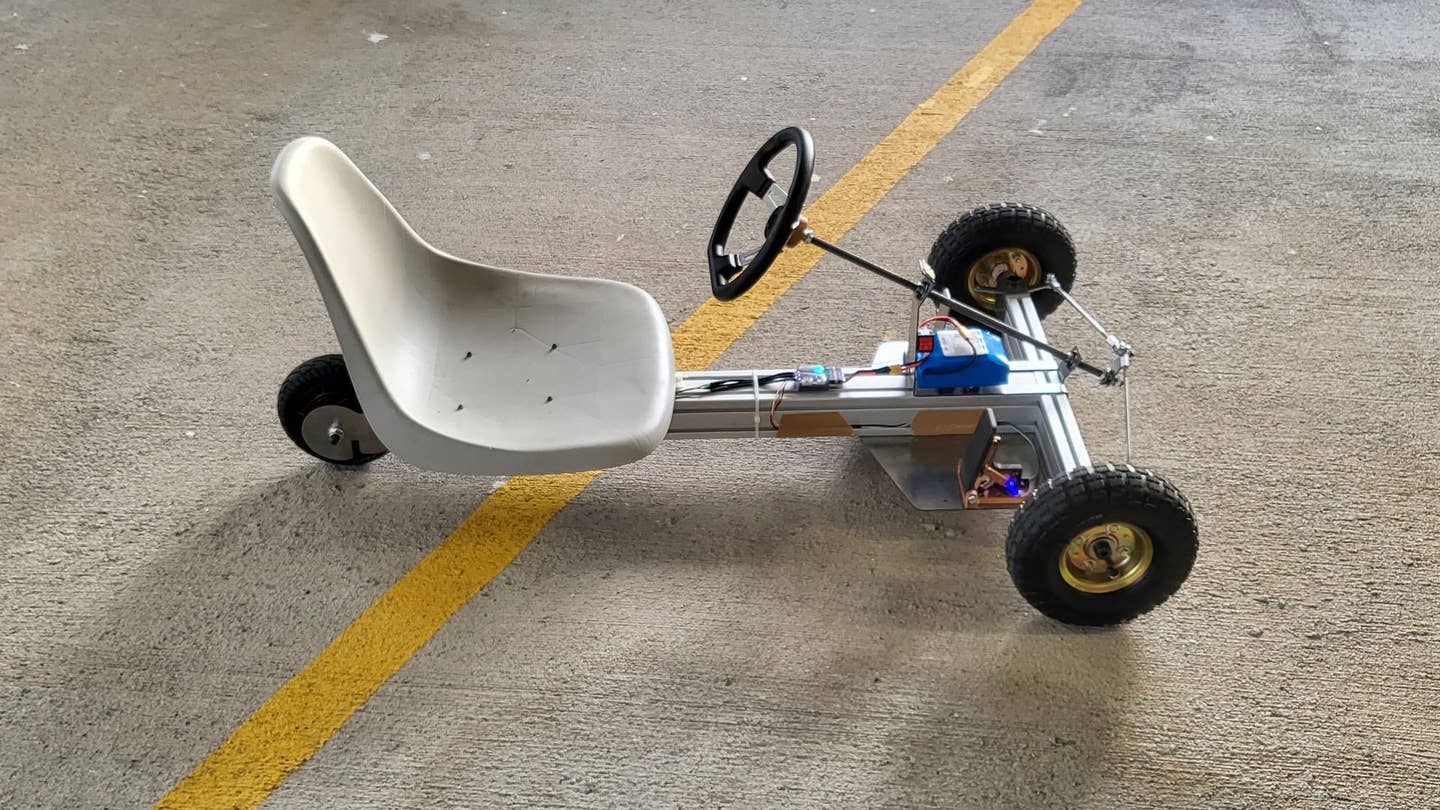
A few months ago I designed and built a cheap electric go-kart. It was the first electric go-kart I ever built. Actually, let me be totally honest with you. It was the first real electronic device of any kind I ever designed and put together. It worked, it was fun, but it deserved an even better sequel. There were a lot of ways it could be improved.
It was cheap, to be sure; around $750 all in. But it needed some changes to be the best it could be and support as many potential drivers as possible. Now it’s around $800, but let me tell you, there are many, many upgrades crammed into that extra $50. It rides much better, the frame is more rigid, and it has an actual throttle pedal, which is nice. It can definitely be made for cheaper than $800 if you have some spare parts laying around as well.
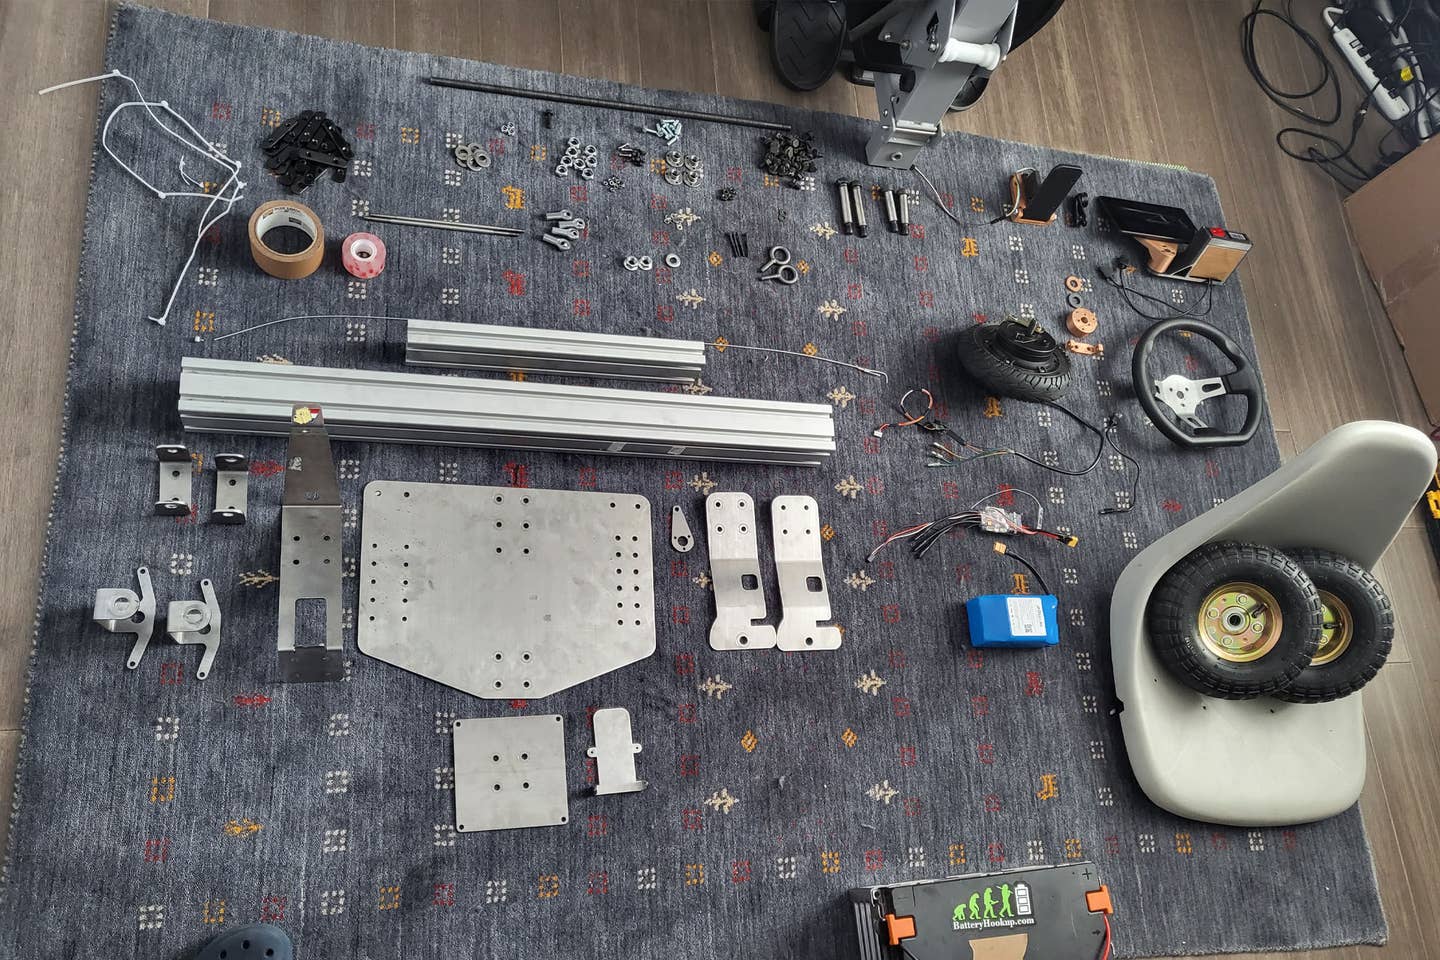
And because it’s finally solid enough for me to be comfortable with it, I’ve decided to post the plans for free so anyone can build it at home. Click here to check it out. That was really the goal for this: to show it’s possible to put together a real go-kart for adults with a bunch of mail-order parts and some basic tools. No cutting, no welding, no nonsense. Why? Because we need more fun in this world.
The Changes
The first thing you should know is that much has remained the same. The motor, for instance, I liked a lot and it’s very cheap, so I carried it over to this design. I also used the same base battery, but I cooked up a few other options as well which you’ll see. Likewise, the seat, steering wheel, and other small details have remained the same.
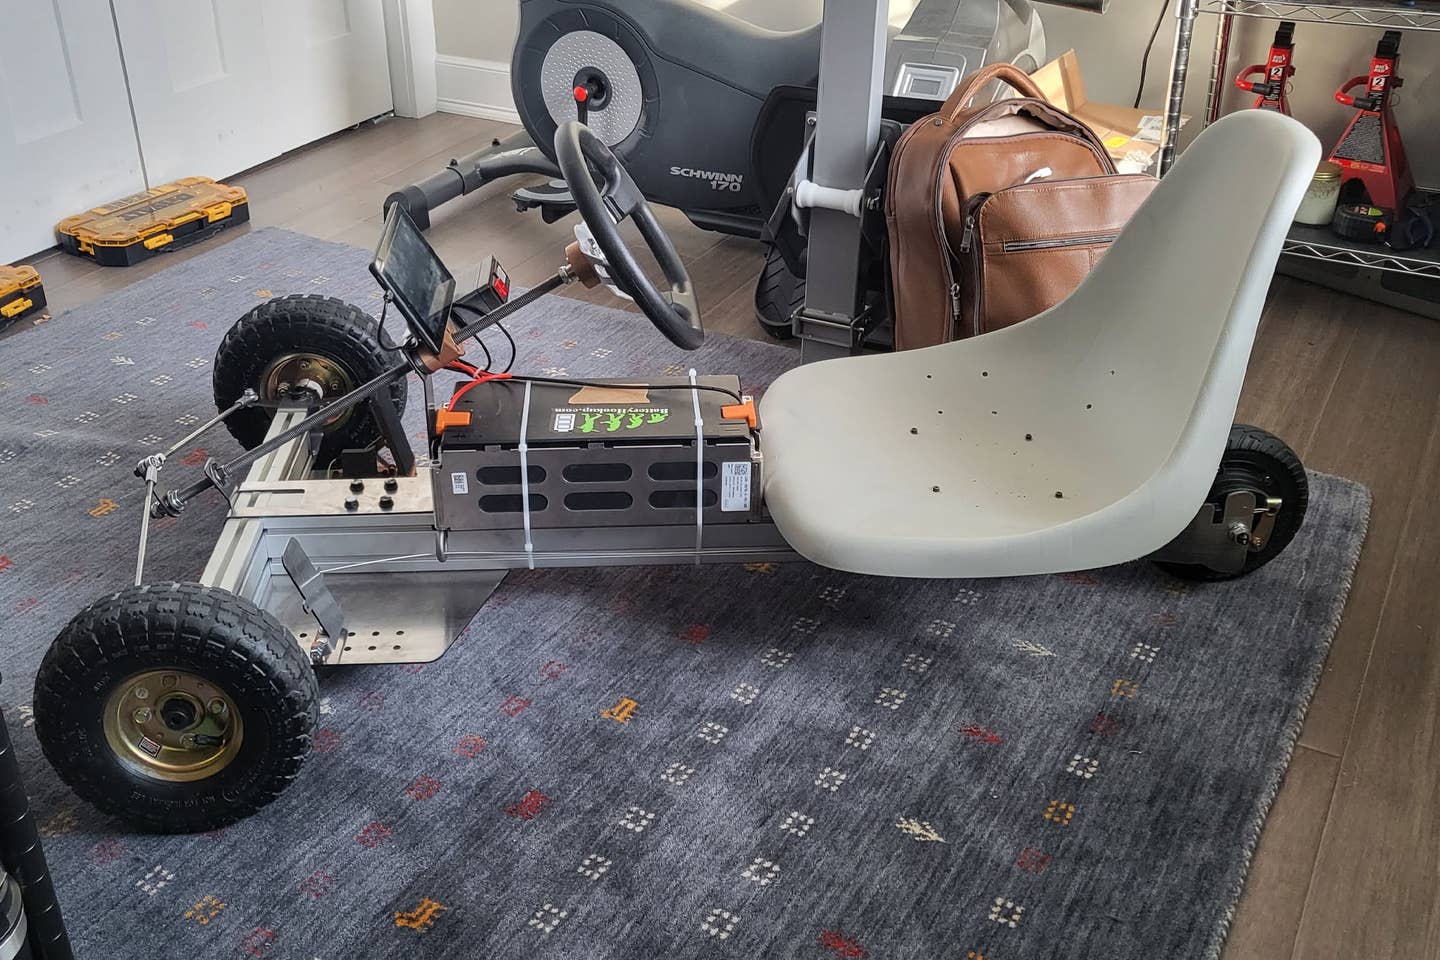
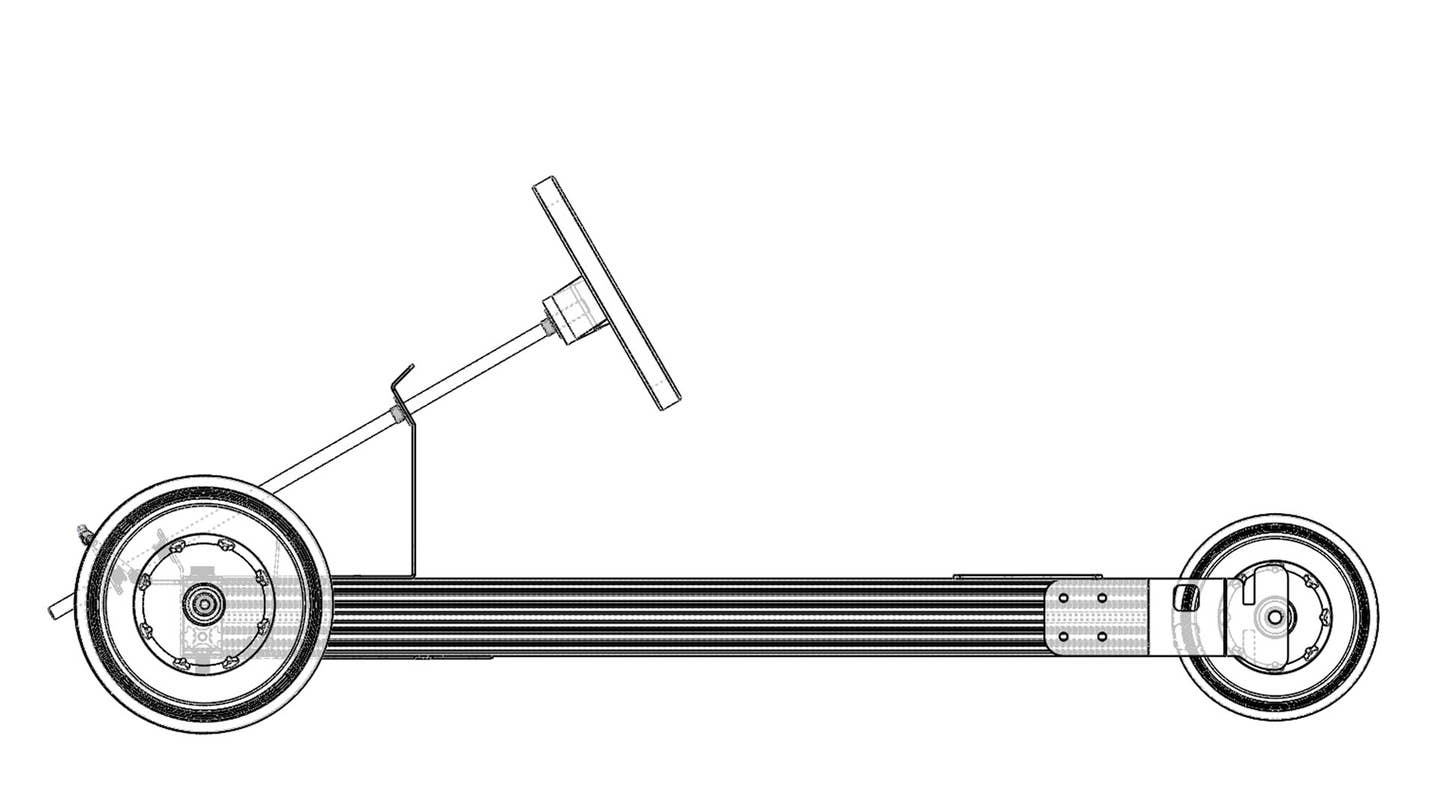
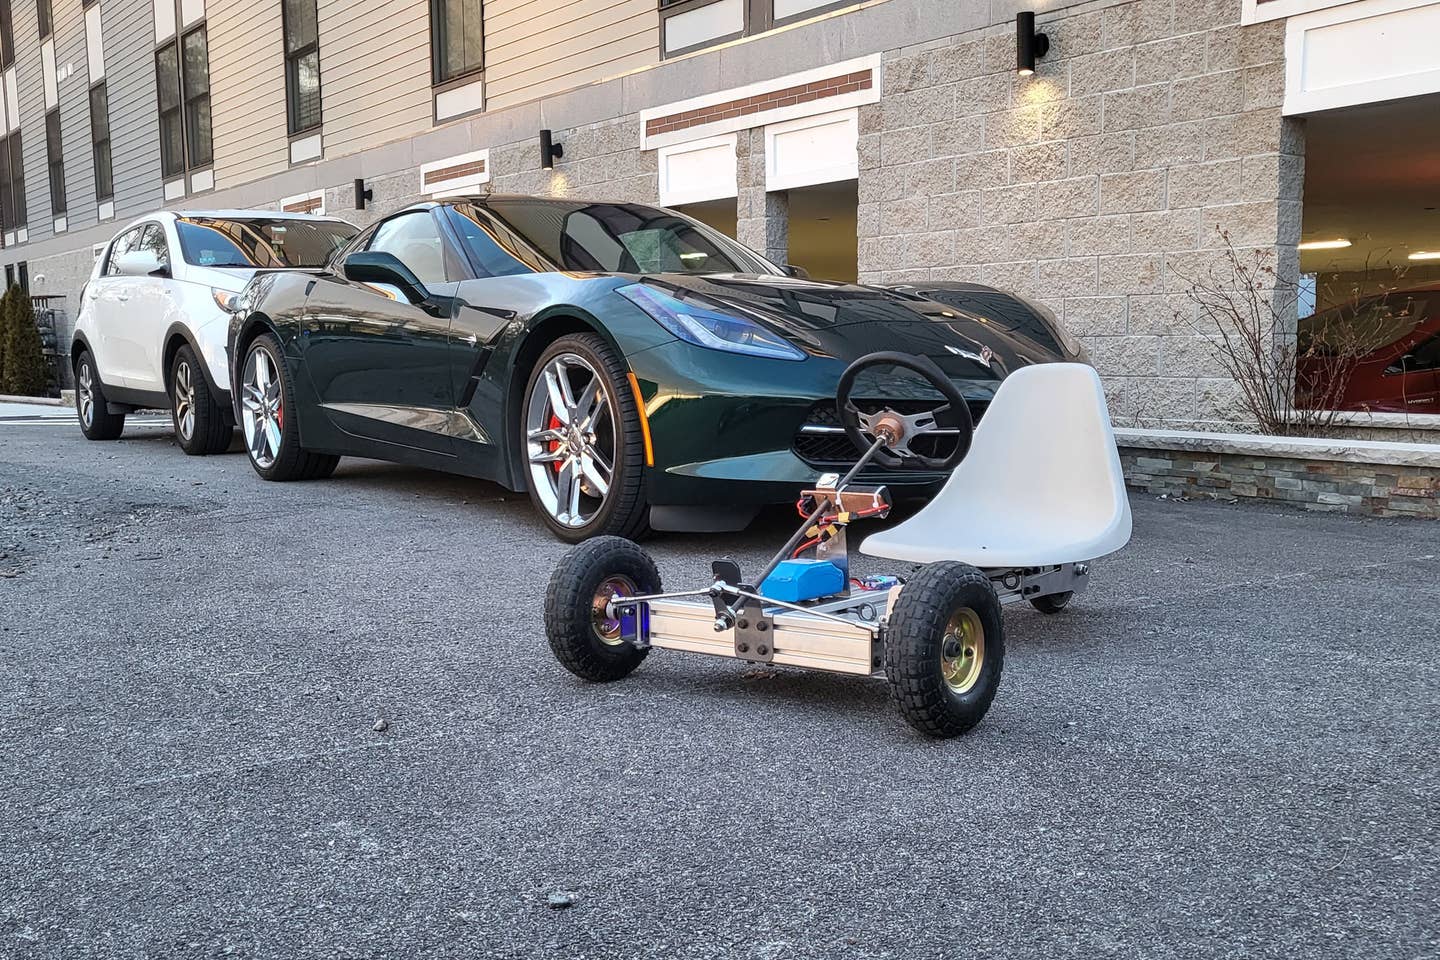
The biggest improvement, by far, is the new front wheels. They’re now ten inches in diameter instead of eight—and pneumatic. This improves the ride drastically, and they don’t turn into swiss cheese after a few laps on concrete anymore. The front axle is also an aluminum extrusion now instead of bent 10-gauge steel, which makes it nice and stiff, and the main chassis spar is three inches square versus one by three inches as the old kart was. This means it can support heavier riders, among other things. Many parts like the front knuckles and their supporting hardware are also a thicker gauge of steel, which makes them plenty stiff. Riders up to 200 pounds should be fine as far as chassis strength goes.
As far as electrical changes, I changed the speed controller (VESC) to a cheaper but more capable and popular version from Flipsky. I also decided to design my own 3D-printed throttle pedal, which I have provided files for. I have seen some people get those cheap Amazon pedals to work—I provided a link in the parts sheet—but I couldn’t after trying a few, so I made my own. It uses a simple servo tester, some M4 nuts, and a spring. All the specs are included.
Adjustments and Price
One important thing I should mention is that the front axle is now narrower, which makes this thing a little tippy. You have to move your weight around at high speeds to keep it on three wheels. I made it narrower so it would fit clearly through a doorway, which it does. I live in an apartment with a cat—as some of you keenly observed in the first post—which made this feature important to me. I think it also fits into the broader goal of making this doable for more people.
The more ambitious among you can customize the main chassis dimensions to your liking if the standard ones bother you, as neither the main spar nor the front axle are super sensitive to changes in length and width. I have the primary spar cut to three feet, but it could easily be four or maybe even five feet if you get long enough jumper wires to stretch up to the throttle pedal. The front axle can also be widened, though it will need longer tie rods. But if you buy some ¼-28 all-thread, you can cut that at whatever length you require with a hacksaw and it will work. As long as the extrusion gets its ⅝-16 taps on both ends, it doesn’t matter how wide it is.
The new kart costs around $800, which is now pretty reasonable in my mind. This thing will just work once it’s assembled and programmed. It’s very durable. It can be made less durable for cheaper if you want, though. I simplified some parts versus the previous version to make this happen. The seat mount, for instance, is still just a flat plate, and it could easily be cut out of wood. With longer fasteners to fix it to the frame, it would work fine. The footplate is also now a flat part, and likewise, it could be cut out of plywood. I have included detailed diagrams of both of these parts so you can do this if you want.
I’m also not saying you absolutely shouldn’t make the chassis out of wood. [Ed note: But we are saying we’re not responsible for what happens if you do.] A 3x3 and a 1.5x3 could easily be cut to size and would probably work, at least for a while. This would further reduce the cost of the kart. If you used treated lumber it would probably last longer than you think. It would take more work to make this sort of chassis happen, but a lot of people have more time than money. If you want to make the main chassis parts out of wood, I have included a diagram of the chassis parts so you can do that.
The Extras
After I got this kart working, I wanted to experiment with other batteries, motor “tunes,” and instrumentation, which I suggest you do as well. That’s the whole point of this thing. This isn’t a locked-up, plastic-cladded toy that only does one thing. It’s relatively easy to change things up, alter its performance, or just make it more interesting. I made a few changes along those lines, which you don’t have to do, but spice is the variety of life. Or, something like that.
The first thing I did was add some simple instrumentation. There’s a slew of voltage/amperage/wattage meters online that can be wired in parallel or inline to your battery power cables or after the controller so you can see more about how your kart is putting down power. I grabbed a few options, and also an inline power switch from the battery. Just makes turning this thing on and off a little easier; the alternative is disconnecting an XT60 connector manually.
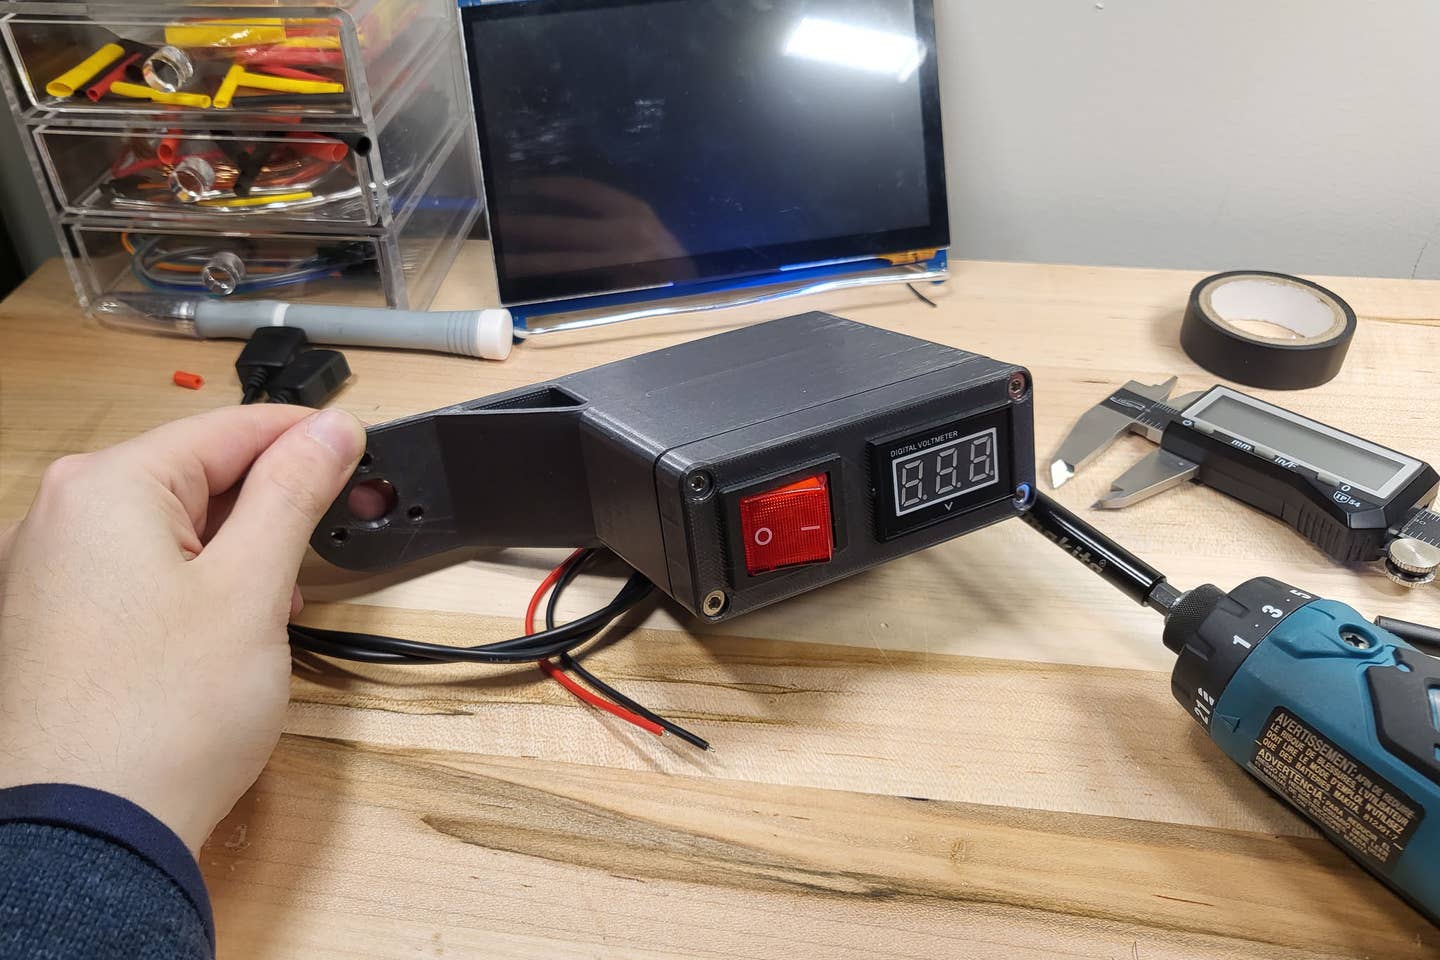
I was happy with my basic setup which I've posted files for. It's the grey box you see above. It houses a voltmeter, a power switch from the battery, and a buck converter that takes almost any voltage from the battery and cuts it down to five volts. This allows me to charge electronics like my phone with it, and it also unlocked some even cooler options.
The new VESC I selected for this kart is not only cheaper, but it can output live data via Bluetooth if you buy an extra module. That meant I could monitor conditions and change regeneration power, current to the motor, and other parameters from my phone with the VESC tool app. In the end, I got a refurbished Amazon Fire tablet, made a mount for it, and connected it to the VESC via Bluetooth just for this purpose.
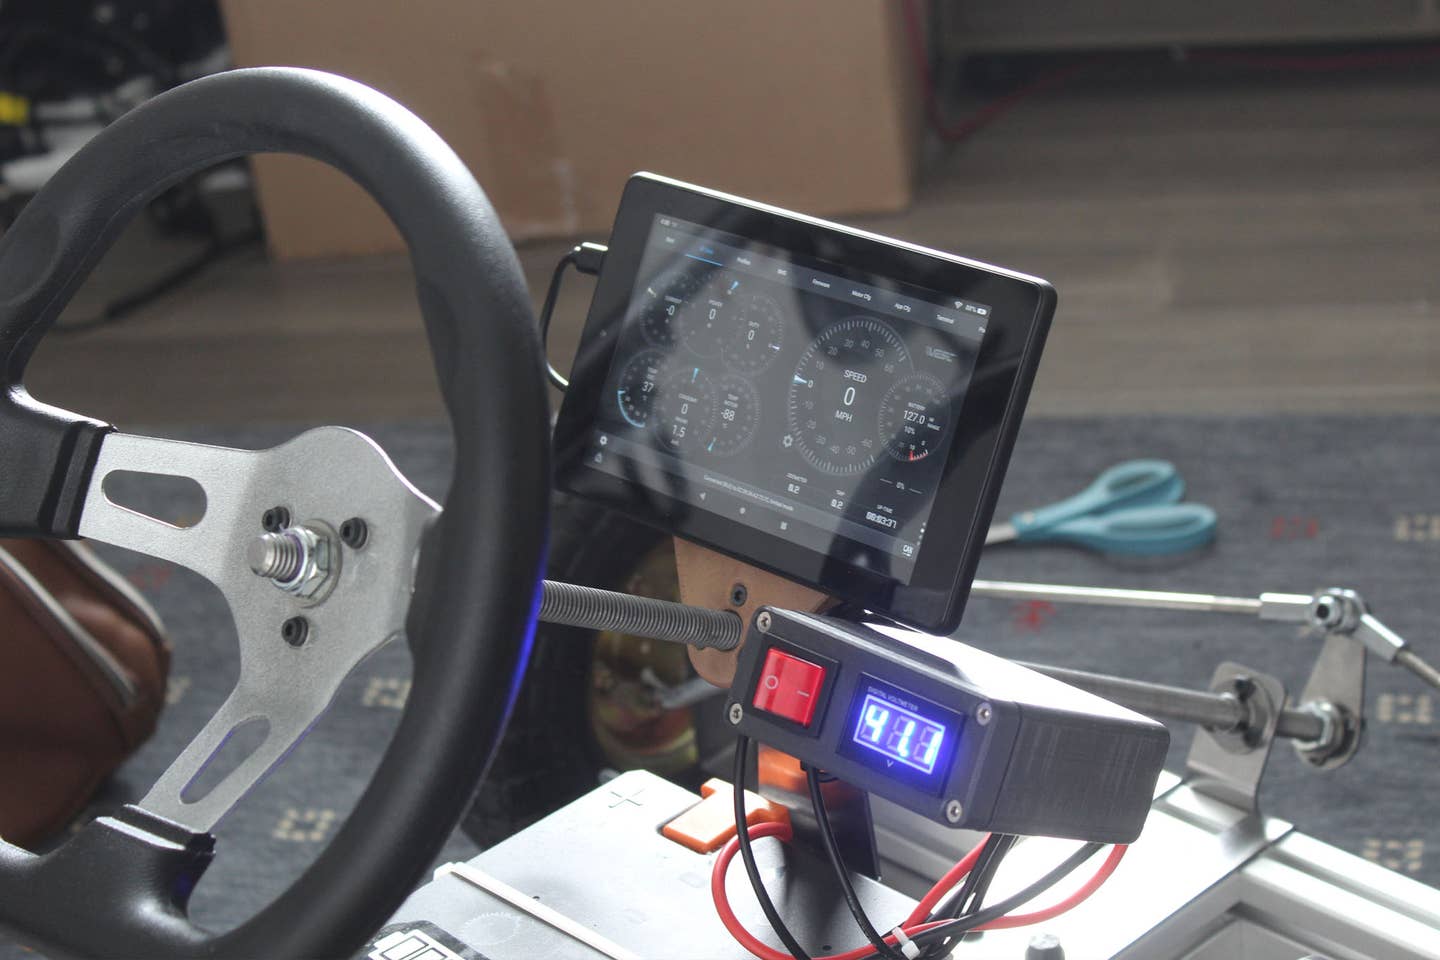
All of this effectively gave me a digital gauge package and the ability to adjust settings on the fly. I've included a printable file for the mount that just uses double-sided tape to fix the tablet to the kart if you want to do this. You can use a phone, too, but tablets are pretty cheap these days.
I also tried a few different battery configurations. The hoverboard battery works fine but it suffers voltage sag under high loads, which makes its peak power potential a little limited. I have had a big 42-volt hybrid battery module from a Ford Escape PHEV that was never installed in a vehicle sitting in my apartment for a while, though. I wired that up and it’s a lot of fun. It not only provides consistently higher voltage than the smaller battery, but since it’s a massive 2.07 kWh, I’ve never actually had to recharge it. At peak output it can provide 1Kw to the motor in a burst, which is about three times what it's rated for. This allowed me to get up to around 21 miles per hour. The big battery also gives this thing a range of probably 20+ miles. That is, if you're interesting in commuting in this thing.
You can still find these big batteries floating around online every now and then, so if you see one, just know that you can use it on this kart. Samsung made them and searching "12s 44.4v 47ah 2.07kWh Module" will lead you to any (if they are for sale).

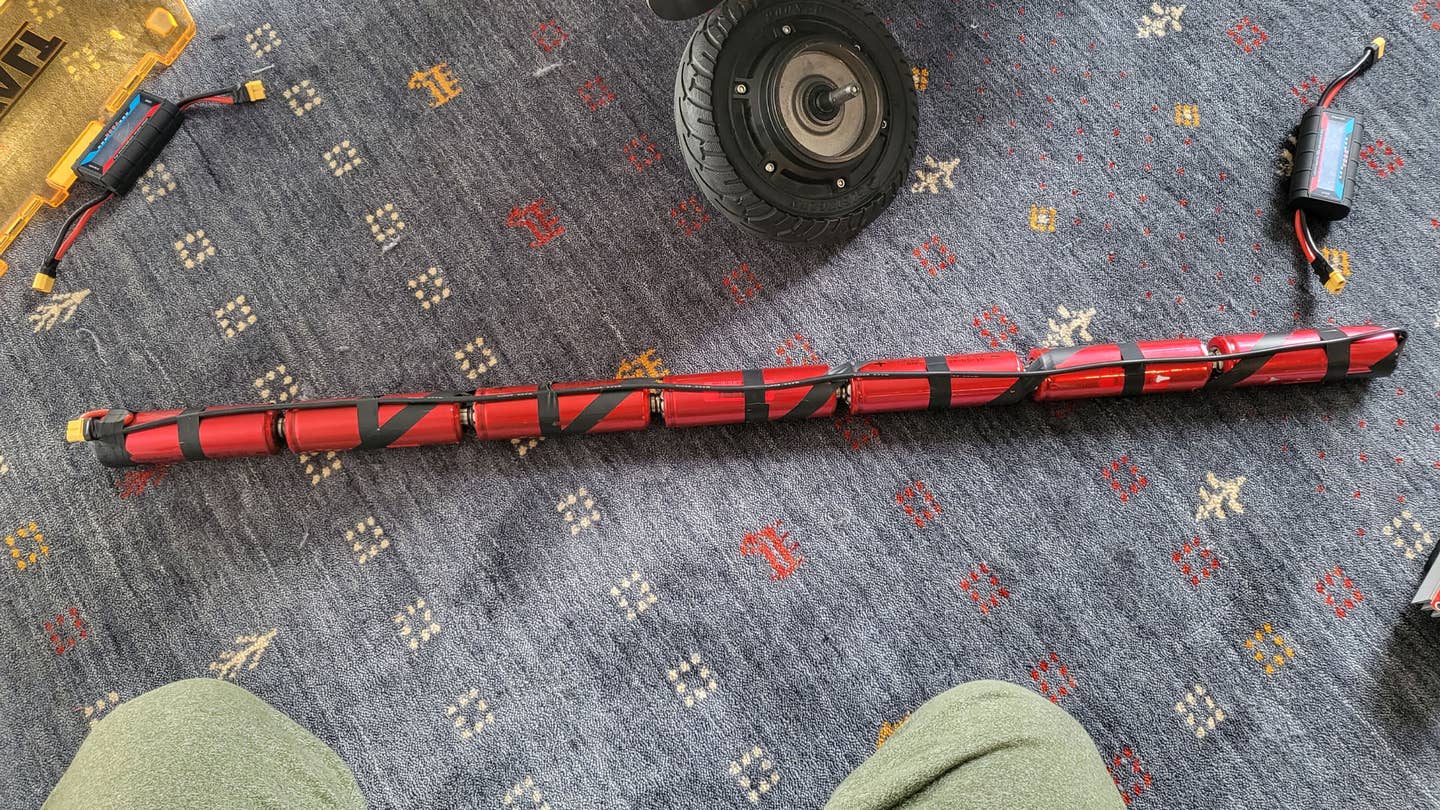
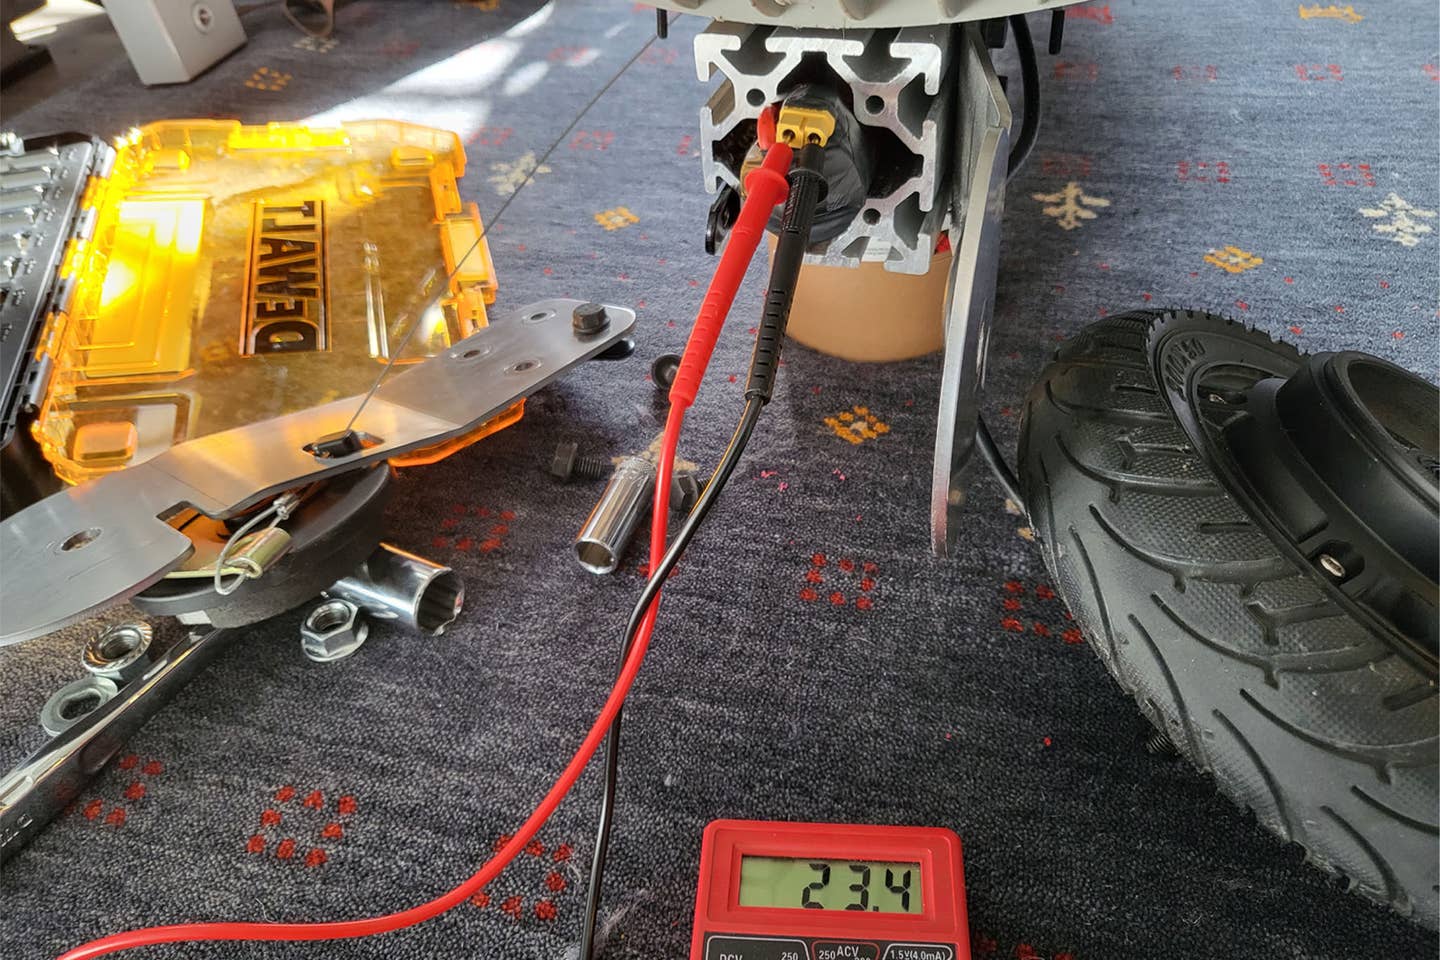
This wasn't my final battery configuration, though. The wildcard option I wanted to try was a brunch of Headway 38120 lithium iron phosphate cells threaded together in series. These things can provide and be charged at really impressive currents, and I wanted to try some very heavy regenerative braking. They’re big cells but they fit almost perfectly inside the chassis spar and because they have threaded ends, making a pack is super simple—you just screw them together. The only problem is that they have a low cell voltage and I couldn’t fit enough in the extrusion to get up to 36 volts. With 7 cells, I got to around 23 volts nominal. This isn’t enough for this kart, so I decided to use a boost converter to get me up to the voltage I needed.
I didn’t know if this would work, but it actually did, which I was pretty hyped up about. I tested it outside because I thought there would just be a loud pop and some magic smoke, but it functioned almost normally. This is a reasonably inexpensive option if you’re interested and you can use the boost converter of your choice as long as you stay under its rated current limit. I just got mine on Amazon.
The big con is that there’s no regenerative braking, as the boost converter I used didn't seem to like any kind of back current. So the entire experiment was kind of a wash. The VESC would just overcurrent and stop whenever I tried to give it a little, so I think something funky is going on. If you do opt for a boosted setup, just set the regen to zero in the control software and it should work fine. Did for me.

Speaking of control software, I was going to provide a configuration file you can just upload to the VESC tool, but for some reason I cannot locate it on my phone wherever it is stored. You'll just have to setup the motor manually, which actually isn't very difficult using the wizard inside VESC tool itself. Most of the time, it can detect a lot of the settings you need. There are a ton of resources on YouTube to help with this if you are curious.
I actually managed to get the Hall effect sensors working too. They allow the kart to be started simply by pressing the pedal instead of pushing it off. It’s kind of a pain to wire the Hall sensors up but it’s nice to have. Again, YouTube is a good resource for setting this kind of thing up, although I may make a guide in the future. The kart does not need the hall sensors activated to work, though. If they are not wired up, you just have to give the kart a little push so the motor knows which way to turn.
Finally, It's Ready
Overall, though, this project is done. If you want a cheap electric go kart, my design is out there. I know $800 is a lot for just parts, but that includes shipping and tax, and it might be cheaper depending where you live. It’s also always possible to improvise this kind of stuff, and I encourage that. In the end, this project is all about fun. I don’t care if you have to use wood or nails or whatever to get something like this working. What matters is that it does work, and that you’re happier having built it.
I didn't realize how much work went into this until I actually put all of the parts lists together and provided all of the component documentation. It has been a lot of work. That being said, I enjoyed all of it. Even very simple vehicles like this are so much fun. I still plan a four-wheel version eventually, so stay tuned for that.
As a sidenote, I expect I may have forgotten a few things. If you decide to build this kart and you notice something missing, feel free to send me an email. Embedded below is a complete assembly video for reference. I made a mistake in it that I have to correct later in the video so watch the whole thing before you start assembling.

Happy building, and happy go-karting.
Got a tip or question for the author? Contact them directly: peter@thedrive.com