

We may earn revenue from the products available on this page and participate in affiliate programs. Learn more ›

When you see a rad pro garage online or on your TV, no one ever thinks, “Man, look at that floor. It’s spectacular!” But when they try to recreate it at home with shelving, garage storage cabinets, lights, and projects, they inevitably come away thinking, “Why doesn’t mine look as dope?” And that’s because they should’ve paid more attention to the floors. If they aren’t running some high-end, dealership-esque tiles, they’re rolling on epoxy floors—which you can easily install in your home shop.
An epoxy garage floor can make or break a high-end garage build or even jazz up one that might not be as fancy. And these floors make spill cleanups beyond easy, as all you really have to do is wipe them down whenever oil, gas, or antifreeze spill all over. But here’s the rub. There are so many on the market. How do you decide which is best for your application?
Easy, you listen to the editors at The Drive and save yourself a headache. Let’s get your garage floor looking shiny.
Summary List
- Rust-Oleum Rocksolid Polycuramine Garage Floor Coating
- Behr 5 gal. Slate Gray Self-Priming 1-Part Epoxy
- Armorpoxy Designer Gray Gloss 2-Part Epoxy Kit
Our Methodology
I’ve worked in shops numerous times in my life, one of which saw me applying an epoxy garage floor coating to its confines. I’ve also done it in my own garage, so I know a thing or two about the process and the products.
I prioritized longevity, durability, ease of application, the square footage covered, and price when I put this shorter list of the best-of-the-best together. While it might not have the options as my colleagues around the web, you can sleep well knowing these are the very best and nothing will go wrong.


Reviews & Recommendations
Best Overall
Rust-Oleum Rocksolid Polycuramine Garage Floor Coating

Pros
- Quality
- 2.5-car square footage
- Easy application
Cons
- Prep work is absolutely necessary
Rust-Oleum’s Rocksolid polycuramine garage floor coating is everything you want in a garage floor coating. Designed to be incredibly strong, last forever, be easy to clean up, and easy to lay, it’s got everything going for it.
According to Rust-Oleum, which is a brand we’ve used and trusted for ages with everything from paint to solvents, the kit includes the main epoxy solution, a concrete etcher which preps the surface, two foam rollers, and the decorative chips that also offer better grip when the floor becomes wet. It’s also incredibly fast-curing, as Rust-Oleum says it’s safe to walk on within 8-10 hours depending on ambient conditions and humidity, and just over 24 hours to drive your car onto.
The kit is good enough for up to a 2.5-garage floor, which translates to 500 square feet. What’s good is that you only have to do one coat, which makes the kit extremely easy to apply. No multi-step processes to consider when planning out your weekend and where your cars and toys will live.
What you should know is that prep work is absolutely essential for this kit. If your garage floor isn’t fully cleaned, and the etching hasn’t had enough time, you’re going to get bubbles and cracks in your coating after a short time. Do the prep work and save yourself some time. You also have to buy a few pieces of equipment in order to apply it properly, so that’s an added cost as, at the time of writing, this kit will set you back $370 on Amazon. That’s not bad considering professional installs will cost you five times that.
Best Budget
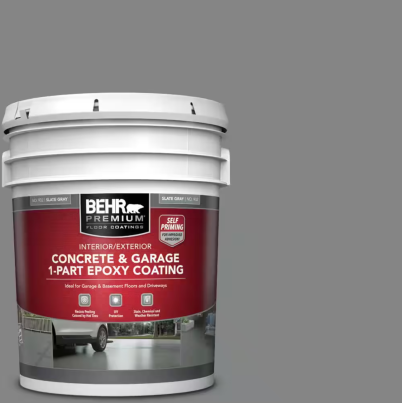
Behr 5 gal. Slate Gray Self-Priming 1-Part Epoxy

Pros
- Inexpensive
- 5-gal quantity offers impressive square footage
- Self-priming
Cons
- No grip flakes
- Harder to manuever
Behr’s another name-brand that we implicitly trust, as we’ve used its interior paints, primers, and exterior solutions throughout our lives. The name means quality, and we’ve never experienced anything but that in all our dealings. The same is true with this Self-Priming 1-Part garage floor epoxy.
The idea behind this 5-gallon bucket, which is good for up to 2,500 square feet, which is way more than an average 2-car garage. In fact, you could do your garage and your basement and likely have more leftover for whatever sealing project you come across next. The mix also dries incredibly fast between coats, as it’ll take just an hour until it’s dry to the touch, while only between 4-6 hours before you apply the second coat.
However, it does take longer for it to cure enough before you can drive onto it. Behr states that you should let the epoxy dry for around 24 hours before you step foot on it, and a full 72 hours before you drive onto it. That’s a while, but you’re getting a quality product here and you want to do it right.
Speaking of, do not skip the directions. Like all the epoxies on this list, you have to take your time and do all the steps. Otherwise, you risk ruining your floor and the application. Don’t do that. As for price, at the time of writing, Behr’s coating costs $208 for a 5-gallon bucket, but you can get a smaller set, though it’s more economical if you get the bigger kit.
Best Professional Kit
Armorpoxy Designer Gray Gloss 2-Part Epoxy Kit

Pros
- Pro quality
- Everything comes with the kit, including cleets
- Understandable directions
Cons
- Expensive
- Patience is necessary
And now for the big dog in this fight, the Armorpoxy Designer Gray Gloss 2-Part epoxy kit. This is a pro-grade kit, as it nearly comes with everything you need, including most of the tools those other kits don’t have. But with great power, comes great responsibility. Or so Uncle Ben tells us.
This kit includes enough epoxy for up to 500 square feet of garage floor, as well as decorative flakes, roller pads, a metal mixer, gloves, paint brush, cleats, squeegee, and the clear coat to give you a professional kit to finish the job. It’s super low VOC, which makes application easier on you, and is industrial grade, which means it’s going to last and last.
Now, because it’s a professional kit, there are not just the ordinary steps done in the first two products, i.e. all the prep work you have to do to the surface—you still have to do that here—but you’ll be prepping the epoxy itself too, which makes this far more difficult than those others. However, you’re getting a better product at the end, at least if you do it all right. As it’s more complicated, there’s more room for error.
So I suggest you follow the directions closely, as this kit isn’t cheap. At the time of writing, Home Depot has this for sale for $699 for everything. But you do get a host of different color options, and if you do it right, it’ll likely look the best. You just have to be meticulous in your application and mixing. This kit is perfect for those anal-retentive DIY’ers who love getting lost in directions, so not me personally.
Our Verdict
There’s no beating the name-brand quality of Rust-Oleum’s Rocksolid floor coating. It’s the perfect kit for any DIY’er, as it comes with exactly what you need to upgrade your garage, minus the tools. But either the Behr or Armorpoxy would serve you well, too.

What to Consider When Buying Garage Floor Epoxy
Here’s what you need to know.
Square footage
One of the biggest things you need to understand before you buy garage floor epoxy is how big your garage is in square footage, as this will tell you how much epoxy you need to cover the entire floor. Some kits will cover a basic 2-car garage, but some singular products might only cover a quarter. Determine your square footage first, then buy the product. That’ll save you time and effort of running back and forth to the hardware store.
Dry time
Different epoxies take different times to dry, so you’ll have to read the label to see which dries the quickest if you absolutely need your garage back in action.
Pricing
Epoxying a garage floor doesn’t have to be super expensive, but neither is it cheap for quality products. Look at spending between $250 and $400 for basic DIY kits, and more if you get in professionally done.
FAQs
You’ve got questions. The Drive has answers.
1-2 coats depending on the formula.
They can if you don’t take care of them, use them too quickly after drying, or fail to clean them properly before applying the epoxy to the floor.
That’ll depend on the epoxy you purchased. Check the label, which will tell you the approximate dry time, though it’ll vary depending on air moisture and ambient temperature.