Everything You Ever Wanted to Know About Tuning Your Holley Carburetor
Nope, we still haven’t given in to EFI.

We may earn revenue from the products available on this page and participate in affiliate programs. Learn more ›
The last time we talked about carburetors, we focused on getting the idle mixture and speed in line. But that’s not all that a carb requires of its owner.
Having your idle in line doesn’t mean the car’s going to run right when you take it for a ride. Simply jamming the throttle won’t exactly make things better, either. Just because a carburetor is designed to supply more air and fuel at wide-open throttle (WOT) doesn’t mean you’re getting the correct mixture.
That’s why The Drive’s top tinkerers are back at it. This time around, we’re going to talk about how to tune a carburetor so that you get more out of it than a good-sounding idle.
Carburetor Tuning Basics
Estimated Time Needed: 1-3 Hours
Skill Level: Advanced
Vehicle System: Fuel Delivery
What Is Tuning a Carburetor?
Many people conclude that a carburetor simply dumps air and fuel into the engine when you depress the accelerator. That’s fair to say in general terms, but plenty of science goes into the operation.
Carburetor designers understand that an engine does not operate solely at WOT or at idle. They know that part-throttle driving conditions exist. And even at wide-open throttle, maintaining a proper air-to-fuel ratio (AFR) is incredibly important. Therefore, different parts are used to control that mixture in any of those situations.
Not only that, but the relationship of the mechanical connections also comes into play. Something like dealing with that nasty stumble off idle is addressed by making physical adjustments to the accelerator pump circuit.
And that’s what tuning a carburetor is. You’re making sure the right parts are used to maintain your AFR throughout the revolutions-per-minute (RPM) range and that all adjustments are correct. In the case of our Holley four-barrel guinea pigs, we’ll be talking about jetting, power valves, discharge nozzles, accelerator-pump settings, and even those vacuum secondaries.
There are advanced tuning techniques you may also want to consider, but don’t just assume you need them. Instead, cover your bases with the basic tuning tricks to find out whether you need to take a more serious approach. Besides, many of the unmentioned modifications, such as drilling the throttle plates and metering blocks, are irreversible and warrant full-length discussions to fully understand. Long story short, we’re diving a little deeper into curing your run condition and lack of power off the hop without going to extremes.
Before we get going, we should mention that we aren’t taking a super-advanced approach. Like many of you, we don’t have a dyno or track at our disposal. So, we’re talking about how the average mechanics can dial in their carbs for some performance improvements.
Carburetor Tuning Safety
Tuning your carburetor entails more than simply sitting in the driveway, swapping parts, and revving the engine. You won't truly know how they impact your engine's performance until it's under full load. That means you'll need to do some test driving to see what works and what doesn't.
If you're just dialing in the performance for street use, a quick cruise around the block should be enough to get by. The use of a dyno would certainly help in this case, but the usually expensive sessions aren't warranted. Tuning the carb for WOT is a different story, as you'll want a dyno or drag strip to get into the science of things. No matter the extent of your driving, however, make sure that you practice proper safety any time you get behind the wheel.
Beyond that, swapping many of these parts requires you to work under the hood. There will be plenty of spilled fuel and a running engine. These are the reasons you need to keep these tips in mind:
- It's a roadway, not a speedway. Not to sound like the troublesome neighbor yelling at you to slow down, but we need to reinforce the fact that you don't want to go flying through the neighborhood to tune your carb. It might be a buzzkill, but keep the kids in mind.
- Keep your fingers on you. The engine will be running for some of the tuning, so be mindful of your finger placement if you want to keep them. And don't forget about those pesky headers. It’s not likely that you’ll go touching anything on the exhaust system while tuning a carb, but it can happen — especially when small parts fall into the engine bay.
- Contain your fuel. Swapping jets and power valves requires you to open up the fuel bowls on your Holley. Make sure to place a rag underneath the carb to keep leaked gas from causing problems.
- Don't take any chances, always wear protection. You didn't think we'd let you sneak off without mentioning safety glasses and gloves, did you? Of course, we all break the rules from time to time, but we can sustain a few burns and get all teary-eyed when we do.
Everything You’ll Need To Tune Your Carburetor
Tuning your carburetor requires the proper parts even more than the correct tools. In fact, you can use little more than basic hand tools to get the job done. Still, having the proper tools prevents damaging the parts, and some will even make the process easier by eliminating the guesswork.
Below you will find a comprehensive list of the parts and tools you’ll need to tune your Holley carb. Items such as jets, power valves, and discharge nozzles all vary in size, so make sure you gather the appropriate ones for your carburetor. To do so, look at the numbers on each of these parts as they exist in your carburetor. This will help you to determine which sizes you need to be looking for while you shop. Something like a Holley carburetor-repair kit does help, but you’ll see why double-checking your sizes is essential.
Tools
- Wrenches
- Screwdrivers
- Needle-nose pliers
- Adjustable wrench
- Feeler gauges
- Holley jet removal tool (Optional)
- Vacuum gauge (Optional)
- AFR gauge (Optional)
Parts
- Holley jets
- Power valves
- Holley discharge nozzles
- Accelerator pump arm cam
- Holley small-parts kit (includes jets, power valves, discharge nozzles, pump arm cams, and gaskets)
- Holley vacuum secondary diaphragm spring kit
- Adjustable vacuum secondary diaphragm (Optional)
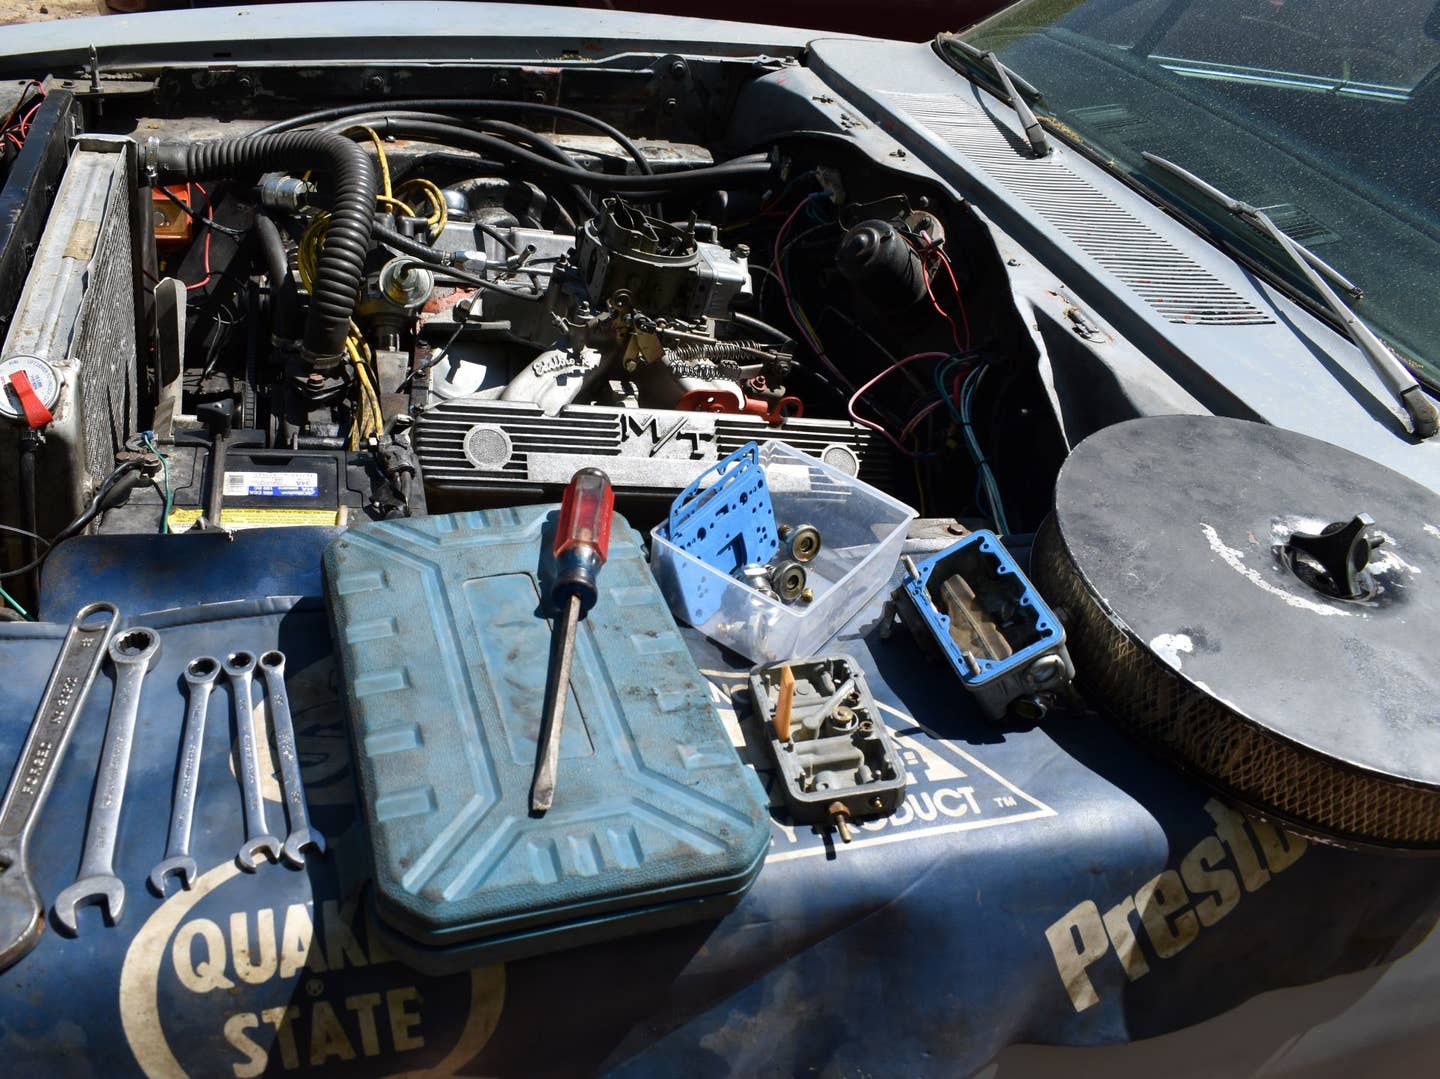
Organizing your tools and gear so everything is easily reachable will save precious minutes waiting for your child or four-legged helper to bring you the sandpaper or blowtorch. (You won't need a blowtorch for this job. Please don’t have your kid hand you a blowtorch—Ed.)
You’ll also need a flat workspace, such as a garage floor, driveway, or street parking that’s also well-ventilated. Check your local laws to make sure you’re not violating any codes when using the street. We aren’t getting your ride out of the clink.
Here’s How To Tune Your Holley
Let’s do this!
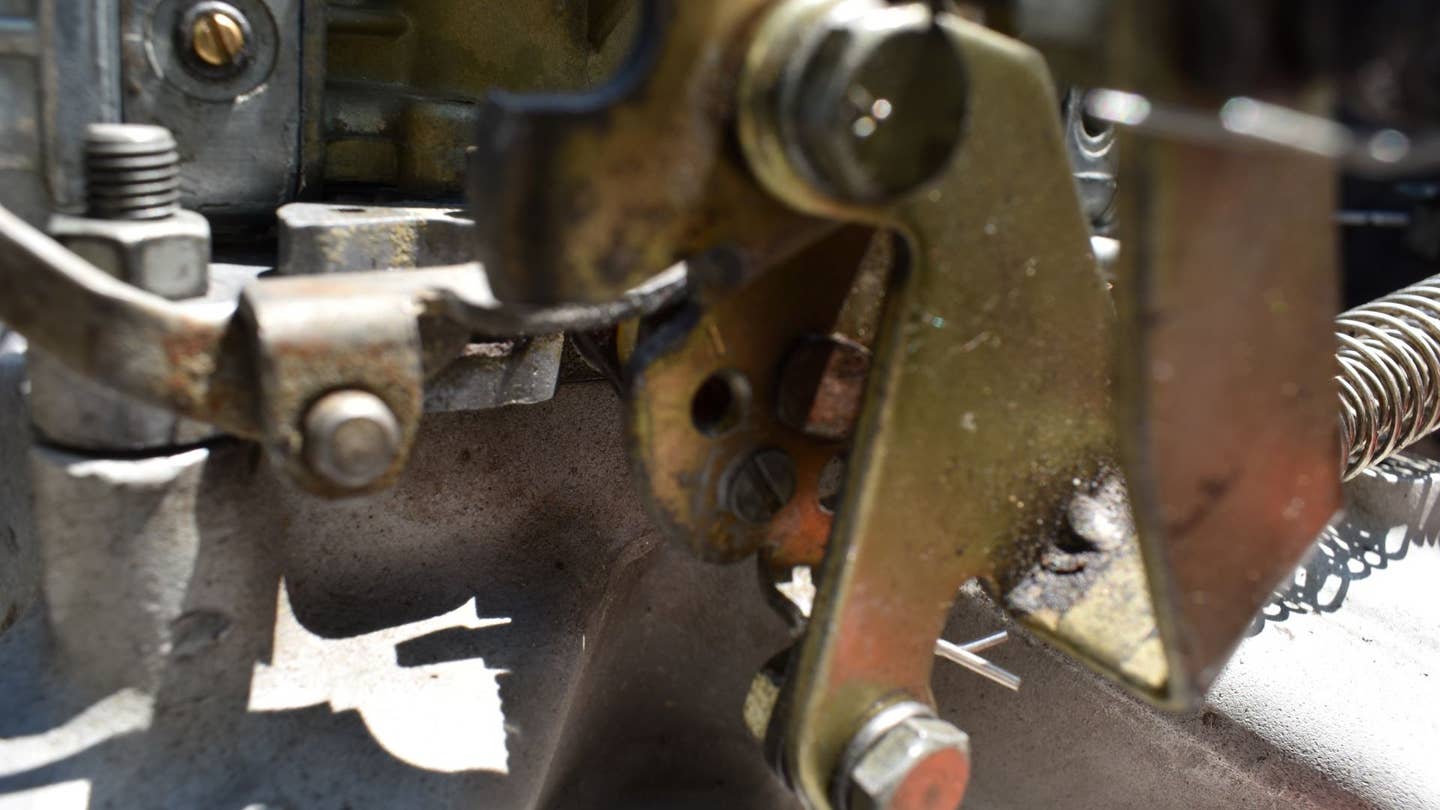
1. Identify the Location of Your Adjustment Parts
It’s worth building a mental roadmap before you get going. Take some time to look your carburetor over and familiarize yourself with the layout. Take a look at your accelerator pump arms, the vacuum canister, and adjustment screws to get an idea of how they work before you start probing. I know you can’t see what you’re tinkering with inside without taking it apart, but that’s why you have the internet. Reading through tutorials such as this and watching videos before you get started is a great way to prepare yourself for the task at hand.
2. Set Your Baseline
Before you can get to dialing in that carb, make sure that you have your idle mixture and speed in line. You will need to come back and make adjustments after swapping the jets and so on, but start with a decent baseline.
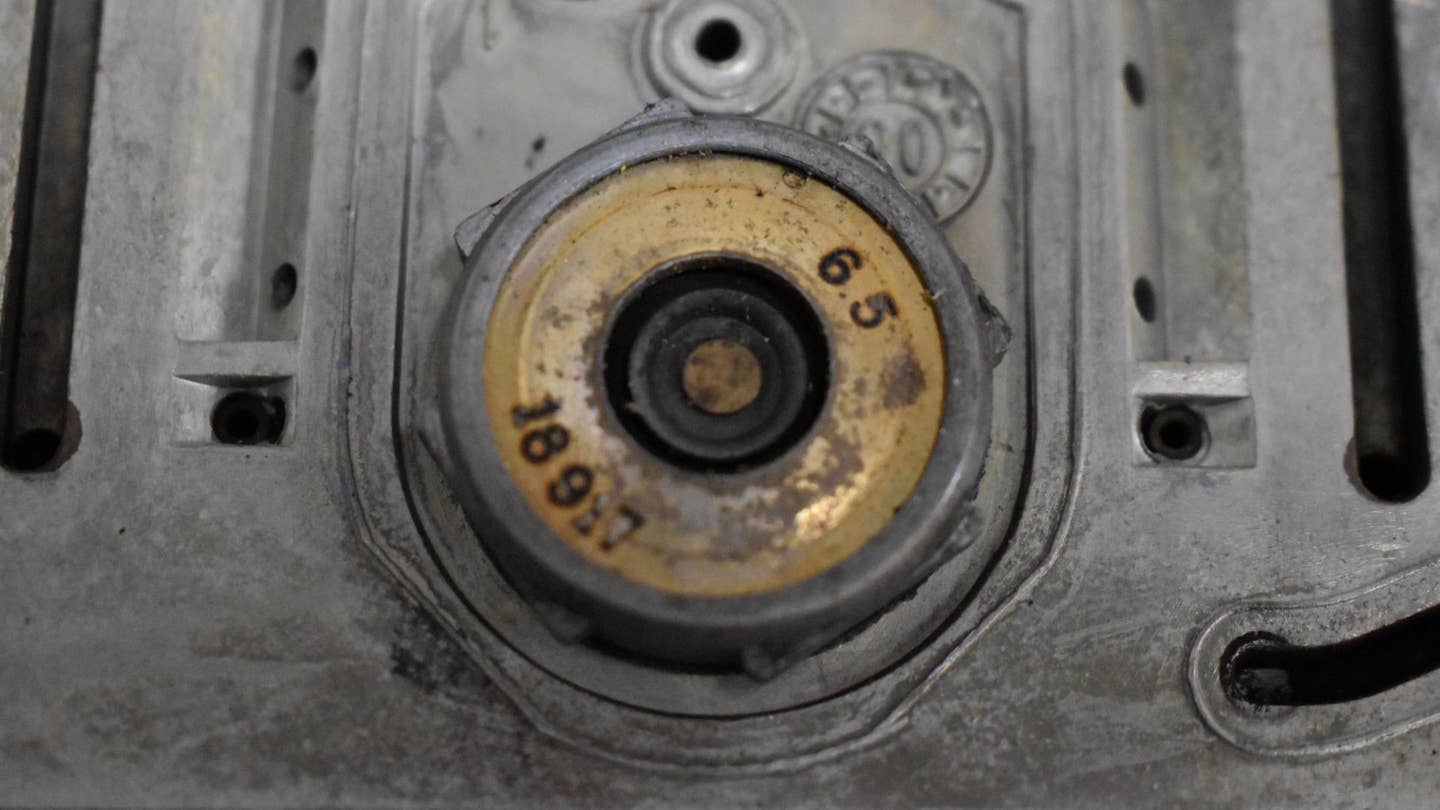
3. Get the Right Power Valve in There
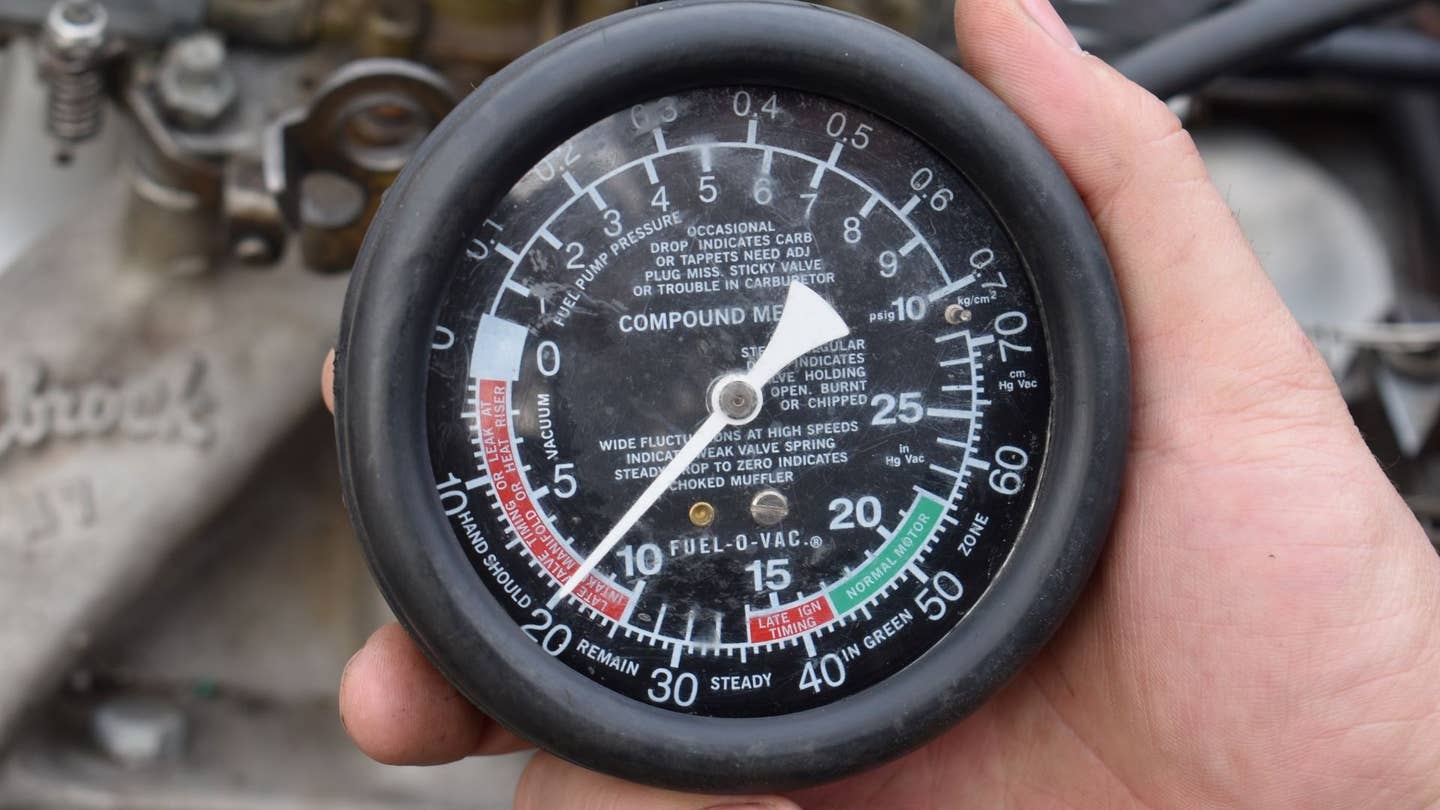
After you dial in the idle, take note of the vacuum reading at idle. To read engine vacuum, tap into a manifold vacuum by connecting your vacuum gauge to an appropriate port. You may have a port for this on the manifold. If not, you can tap into the port on the base of your carburetor. Once the gauge is attached and the engine is running at the appropriate temperature, the gauge will give you an accurate reading of your manifold vacuum.
With a manual transmission, that number from the vacuum gauge determines which power valve you need. If you have an automatic, have someone put the car in gear and jot down the number provided.
To determine which power valve you need, measure the vacuum gauge and divide it by two. For example, if the reading shows 13 inches of mercury, you'll use a 6.5 power valve. What if you read something like 8.5 inches of mercury? Still divide it by two, then take that number and round up to the next-biggest size available. In this case, a 4.5 valve would be alright.
4. Time To Tackle That Stumble
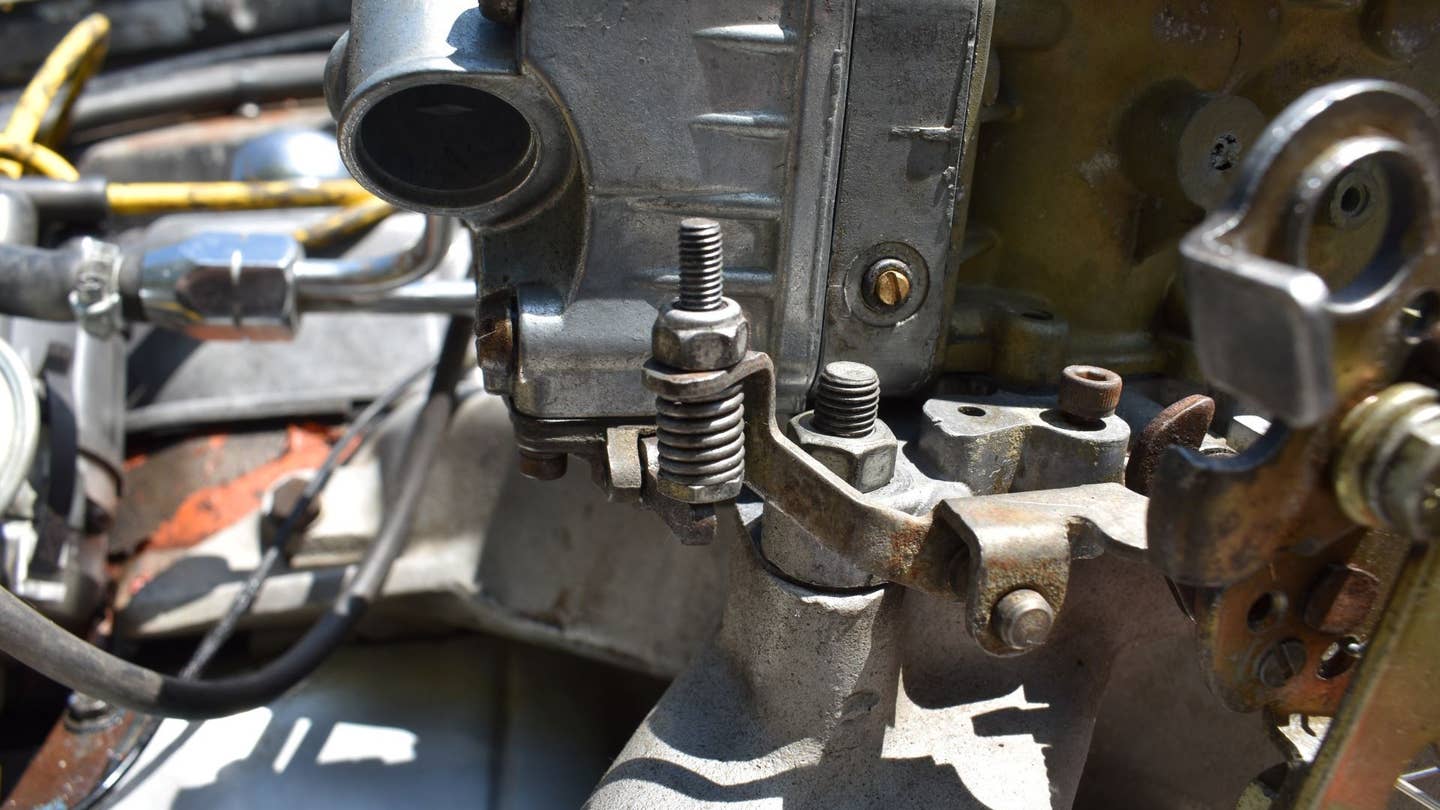
Experiencing a stumble or hesitation in the engine off idle is nothing out of the ordinary. Thankfully, you might be able to cure it in a few minutes with some wrenches and a feeler gauge. The accelerator pump operating screw that contacts the accelerator pump arm is adjustable. You want to make sure that the component is barely coming into contact with that spring or that there's only a .015-inch clearance between them.
5. Accommodate Your Idle
Check out the accelerator pump cam that drives the lever. The operation screw can be placed in a few positions. The position of this cam determines how soon the accelerator pump activates. Position 1 brings the pump shot in sooner, while 2 and 3 delay it. Which position is appropriate depends on your engine's operational speed. Before moving any further, make sure the cam is set to the proper position.

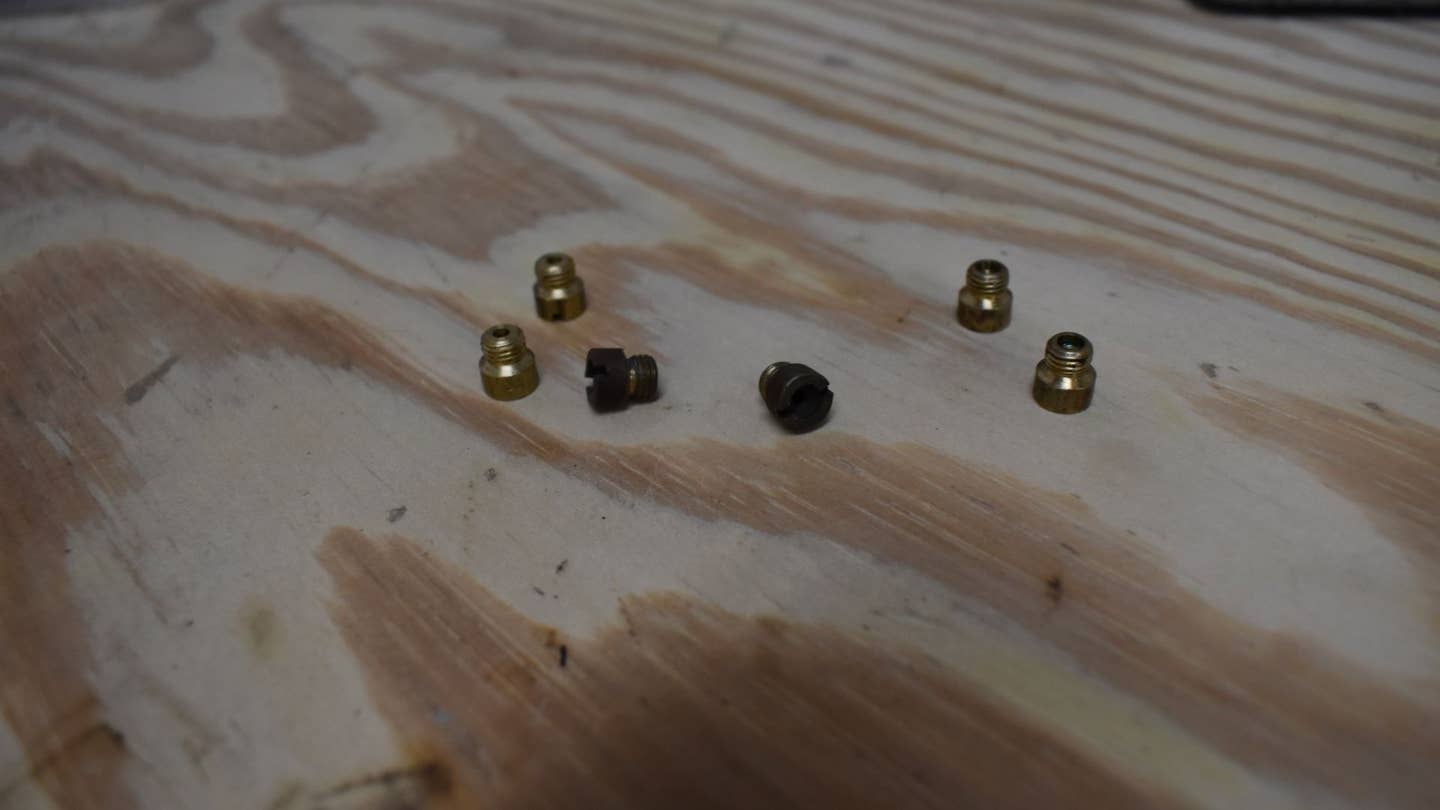
6. Squirter Selection
If the stumble persists after adjusting the cam and screw or you still notice a lack of power off the line, you'll want to change the squirters. The stumble is caused by the engine going lean when you open the throttle blades, so you'll be going up a size. Changing the secondary size on a double pumper is pretty straightforward. It's the primary that requires a steady hand. Not only do you need to sneak past the choke with needle-nose pliers, but the gasket beneath it will fall down into the carb. You can use a rag to prevent this, but you'll probably still need to use picks to fish it out of there.

7. What about the Jets?
Jet selection is subject to variation because it's dependent on many factors. What works for one car might not work for another. So, you really need to know whether your car is running lean or rich before making any changes. Doing so is greatly aided by an AFR gauge, or a vacuum gauge that you run to the cabin of the car to monitor while you drive. The rest of us need to learn how to read plugs and determine whether we’re running rich or lean. If you’re rich, you need smaller jets, and if you're lean, you need bigger jets.
8. Adjust the Secondaries (Optional)
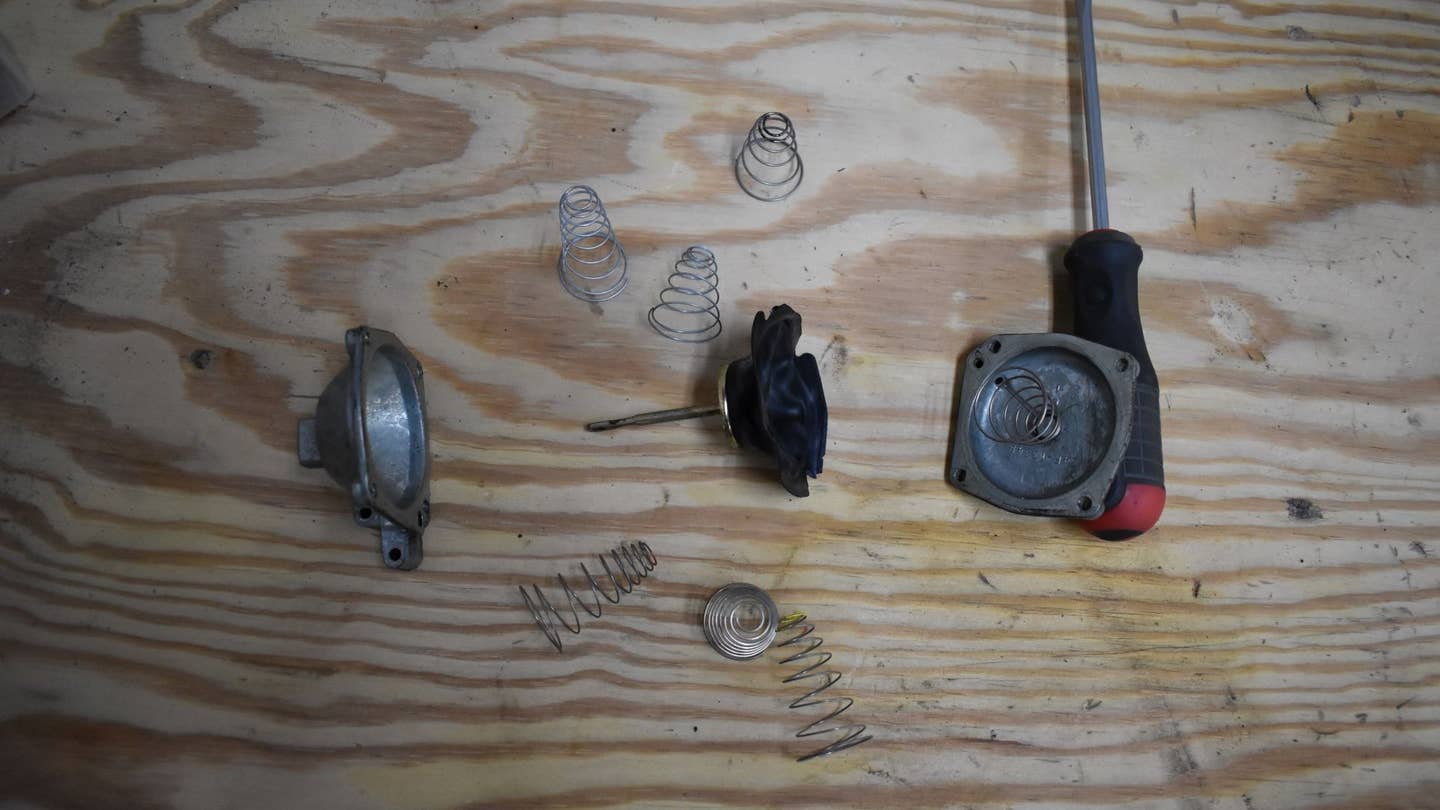
The sooner your secondaries come in, the sooner you'll make copious amounts of power. Those who have mechanical secondaries can move to an adjustable linkage to open the secondaries sooner or later. The same is true for folks with vacuum secondaries, only with the change of spring instead of linkage. Adjusting this is something you might not need to do with a factory engine unless you're trying to save fuel. Performance engines might require you to make changes here, mainly if you're sticking with vacuum secondaries. If that's you, put in lighter springs to ensure the secondaries come in on time to prevent loss in performance.
Pro Tips for Tuning Your Carburetor
Y'all want more tips!
- There’s no magic formula. Every combination is different and places different demands on your carburetor. There’s no single tuning combo that works for everyone, nor can you expect your changes to be on the money the first time around. Be patient. Try different combos until you find what works for you.
- Make sure the carb is clean. Your tuning efforts will go in vain if your carb is dirty or in need of a rebuild. Give it a quick cleaning before you jump into dialing it in.
- More isn't always better. It's tempting to skip over these steps and start making changes solely to improve all-out performance. But what works on the track isn't great for the street. Familiarize yourself with the adjustments you'll need to make the best drag-racing times, but focus more on keeping the car drivable if you use it primarily for cruises or everyday driving.
- Invest in that adjustable diaphragm. Dealing with diaphragm springs on vacuum-secondary carbs is brutal. That’s why making the upgrade to an adjustable system is well worth the investment. Rather than trying to figure out which springs are best and tearing the canister apart every time you want to change them, simply use a screwdriver to increase or decrease tension.
- Timing and carb tuning are best friends. Making all the adjustments in the world to your carb won't stop detonation if your timing is way off. That said, consider making adjustments to your timing to ensure the best possible performance from your combination.
FAQs about Tuning a Carburetor
You've got questions, The Drive has answers!
Q: What causes a carburetor to fall out of tune?
A: As complicated as carburetors are, they don’t have the means to accommodate changes in the environment. With changes in humidity, barometric pressure, and temperature, the levels of oxygen available are impacted. Address the air and fuel ratio accordingly. General wear and tear on mechanical components and the buildup of debris inside the carburetor will also throw off your tune.
Q: How can you tell if your carburetor is running rich or lean?
A: There are different ways to tell if your carb is too rich or too lean. The most accurate method is using an AFR gauge to monitor the fuel mixture as you drive. You can also run a vacuum gauge to the interior of the car to watch as you go. Even though this doesn't measure fuel and air mixtures, you can tell when the mixture is off because the vacuum level will drop. The third method is to read your spark plugs. Rich mixtures leave the spark plugs blackened, lean mixtures leave a white residue, and an optimal burn leaves next to nothing on the plug.
Q: How do you adjust the fuel and air mixture of a carburetor?
A: Adjusting the air and fuel mixture is done by manipulating the mixture screws on the carburetor. These are only to help with your idle mixture, though. You'll want to address the components discussed in this article to manipulate it at partial and wide-open throttle.
Q: Is tuning a carburetor easy?
A: It depends on the carburetor and what you're used to. Generally speaking, Holley and Edelbrock's carburetors are fairly easy to tune. On top of that, they're common, and advice is plentiful. That's not the case for many others.
Q: How can I make my carburetor more efficient?
A: Tuning the carb is dialing in the air and fuel mixture for all running conditions, which boosts efficiency. If you're looking to get better fuel economy out of the carb, you generally want to avoid some tuning tips used to improve top-end performance. Bumping up jet sizes, squirters, and ditching the power valve are all done in the name of power and sometimes to richen up the mixture to prevent detonation. In short, they all increase fuel consumption. One thing to consider is delaying or even eliminating the secondaries for long drives if fuel economy is a major concern.
Q: What happens if my jets are too big?
A: Addressing a lean condition is the primary concern for most. It also happens to be the easiest to identify. Stumbles, backfiring, and even pinging are all things to watch out for. Jets that are too large cause the system to run rich, which also isn't great as it can lead to washing down the cylinder walls and pollution of the oil. The fastest way to tell if you're too rich is listening for sputters or rapid backfiring through the exhaust as you accelerate. Additionally, a rich mixture will cause the exhaust to smoke and smell like gasoline.
Let’s Talk: Comment Below To Talk With The Guides & Gear Editors!
We’re here to be expert guides in everything How To related. Use us, compliment us, yell at us. Comment below, and let’s talk! You can also shout at us on Twitter or Instagram, here are our profiles. Got a question? Got a pro tip? Send us a note: guidesandgear@thedrive.com.