Project Car Diaries: Upcycling Scrap Into My ’69 Charger Restoration
Saving money is the cardinal rule of muscle car survival. Let me show you the way.

We may earn revenue from the products available on this page and participate in affiliate programs. Learn more ›
Purging my 1969 Dodge Charger of rust has been no small endeavor. Even so, things have been moving along smoothly. Between patching up the roof, the door frames and doors, and revisiting a ton of the sins I committed early on, I managed to deal with the vast majority of the rust issues I set out to fix while somehow staying on schedule.
I’m happy to say the only cosmetic work to handle behind the engine bay deals with filler and sanding. That's not to say the war is over.

The fenders needed patchwork, and that's where I started into the nose of the beast. That was no more than simple grafting, though. It's between the two fenders that I rediscovered the mangled front valance which required me to think on my feet. Since saving money is a major concern for this project, I’d seek out a solution that wasn’t spending $200 on new sheet metal.
Thankfully, the Charger restoration has kept me on my toes since square one. Whipping up unorthodox solutions is just second nature at this point. It didn’t take long for me to realize that the solution I needed was sitting in my scrap pile.
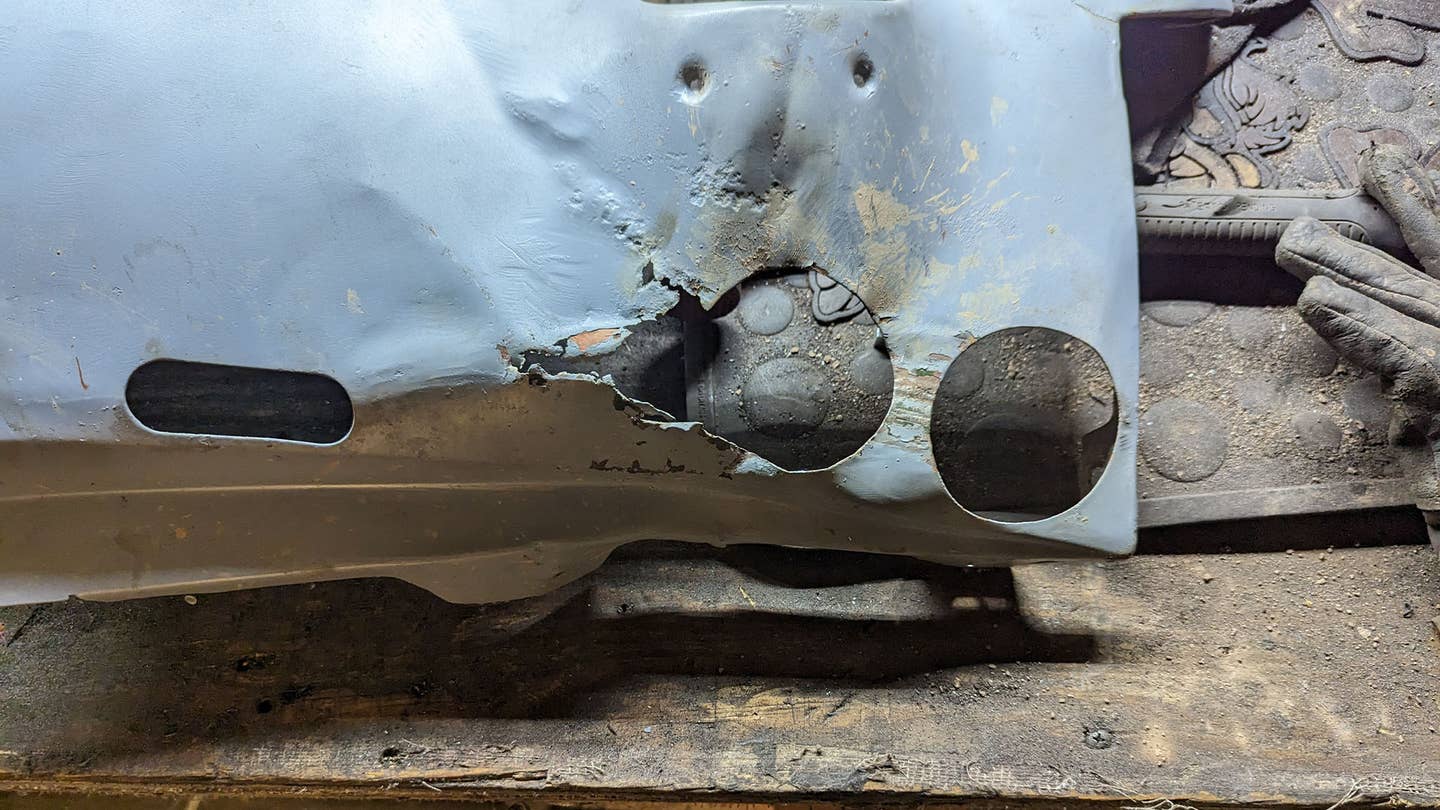
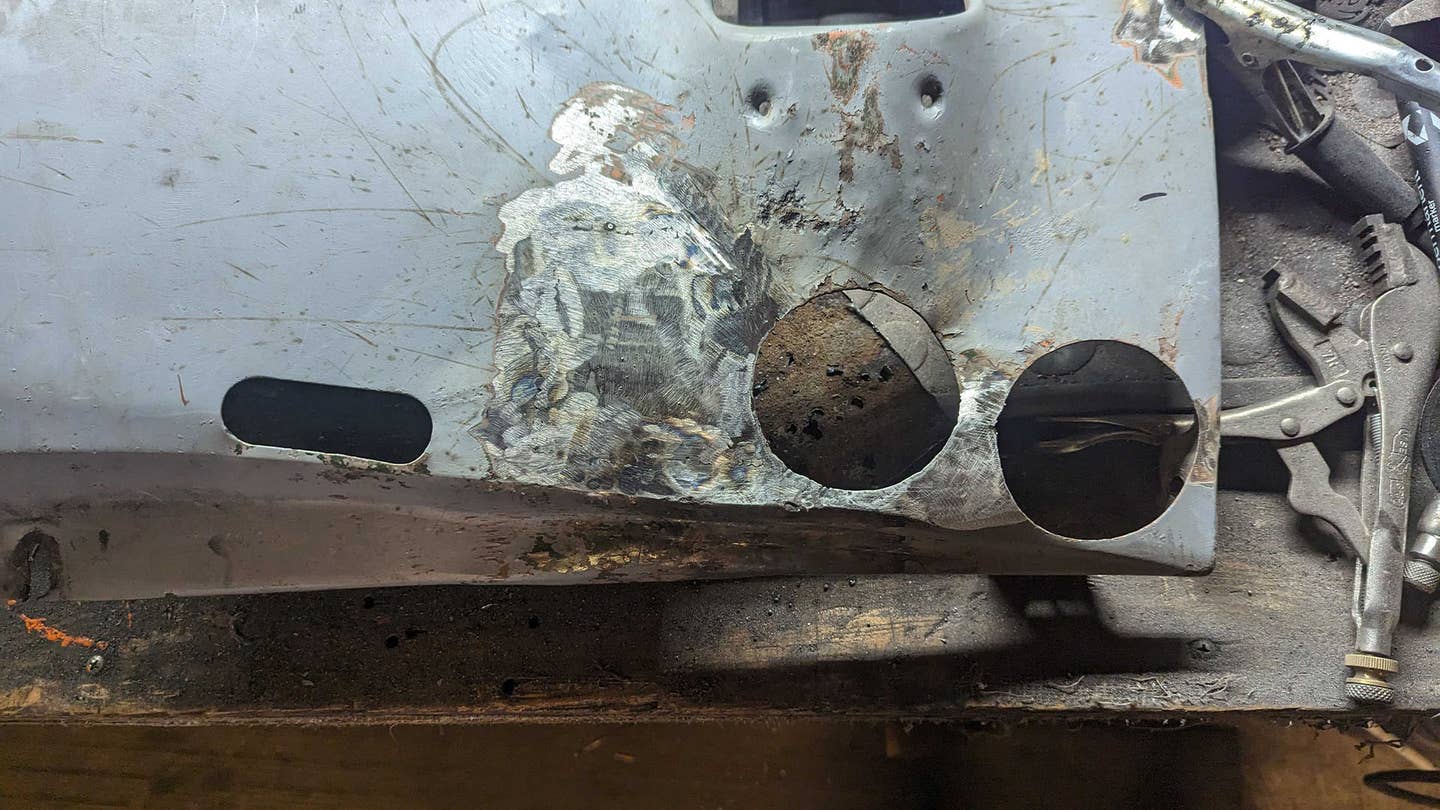
The Mangled Mess of a Valance
In older pictures of the car, you’ll see the valence was actually one of the nicest panels on it. That was a fiberglass piece that wind resistance at highway speeds proved to be too much for. It, along with my parking lamps, took a trip beneath my wheels. That forced me to pull the original valance out of storage. The issues I’m dealing with now are why I was quick to replace it in the first place.
I can’t say for certain what happened to it. At some point in its life, it took a hit that folded the sheet metal like a neatly presented handkerchief. My guess is that the nature of the bends exposed bare metal that let rust do its thing.
Regardless of the specifics of how it happened, this thing was mutilated. Even if I’m not looking for a show car, or anything remotely close to it, I’d have to deal with the damage. At the very least, it’s a loose thread I don’t want driving me wild through the remaining stages of this project.
Scrap is the Solution
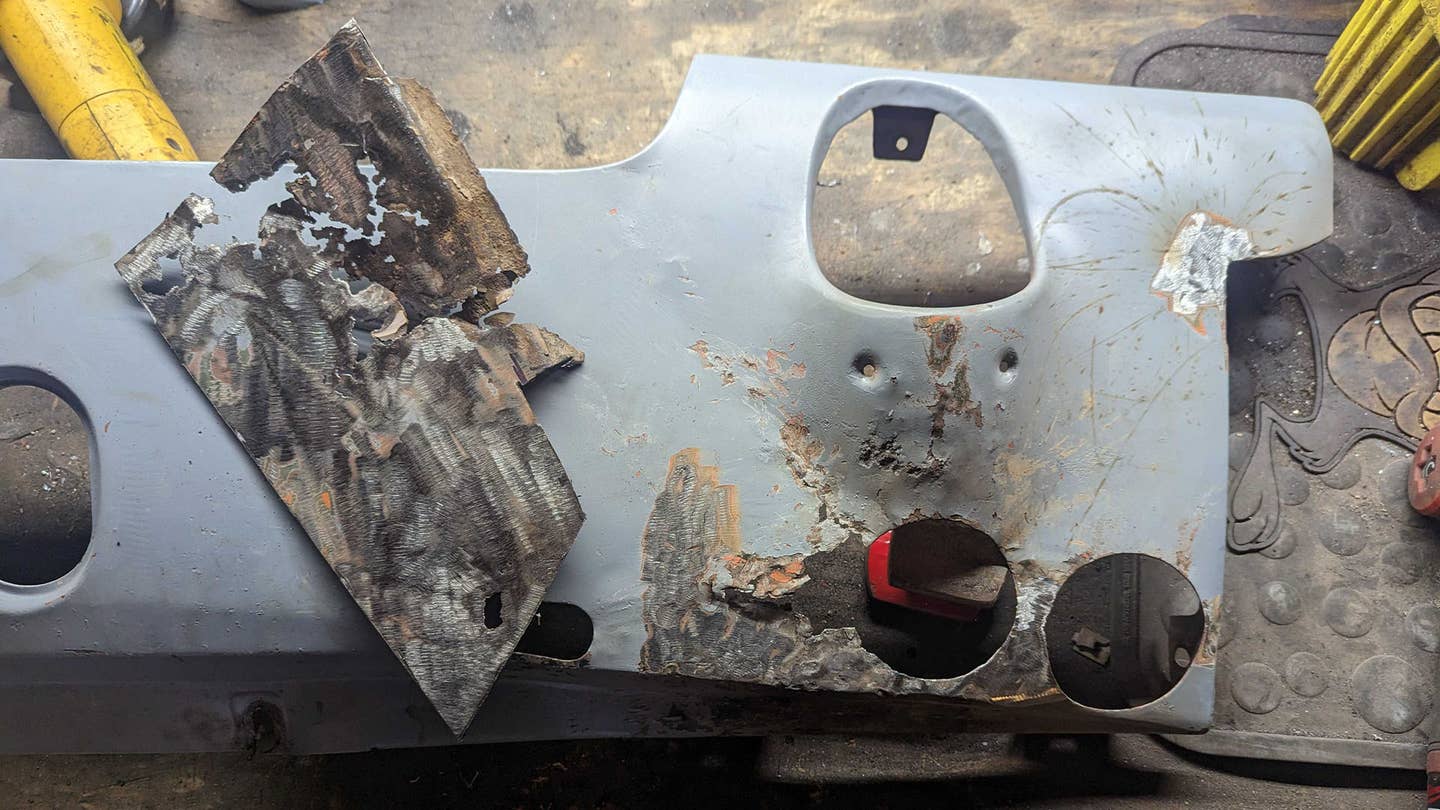
When performing patchwork, finding a patch that's as close to the original sheet metal as possible is important. Having the right thickness and quality goes a long way in simplifying the process. For the most part, patches sourced from other parts of the car or another closely related car are your best bet. That's exactly why I don't just toss anything I chop from the Charger.
As it turns out, the pieces of rusted metal I cut away from the fender were just about perfect. Between the rust holes existed a section that was just big enough to cover the void nature had carved into my valance. Not only that, but it had just the right curve to match the portion it'd replace, saving me even more work. I just needed to put in the time to massage it into place.
Tools and Supplies
This is a pretty quick job, but I did need some specialty tools to get it done. The three most important to this project are my Maddox hammer and dolly set, my Milwaukee M12 right angle grinder, and my beloved Chicago Electric flux core welder.
Ok, let’s not kid anyone. Body filler is the real hero here.
The Job
I started the job by knocking down the dents in the valance. First, I used a couple of pry bars and some hammering to slowly pull the dent down. Once the peaks were low and the panel was relatively smooth, I could compare the donor panel to the valance and begin shaping the patch.
First, I cut away the rust from the donor panel, being mindful of the curvature of the two pieces. Remember, the curve of the sheet metal is just as important as its thickness. I had to ensure the curvature followed the same patch as I slowly cut the metal down so that it’d match the area being replaced.

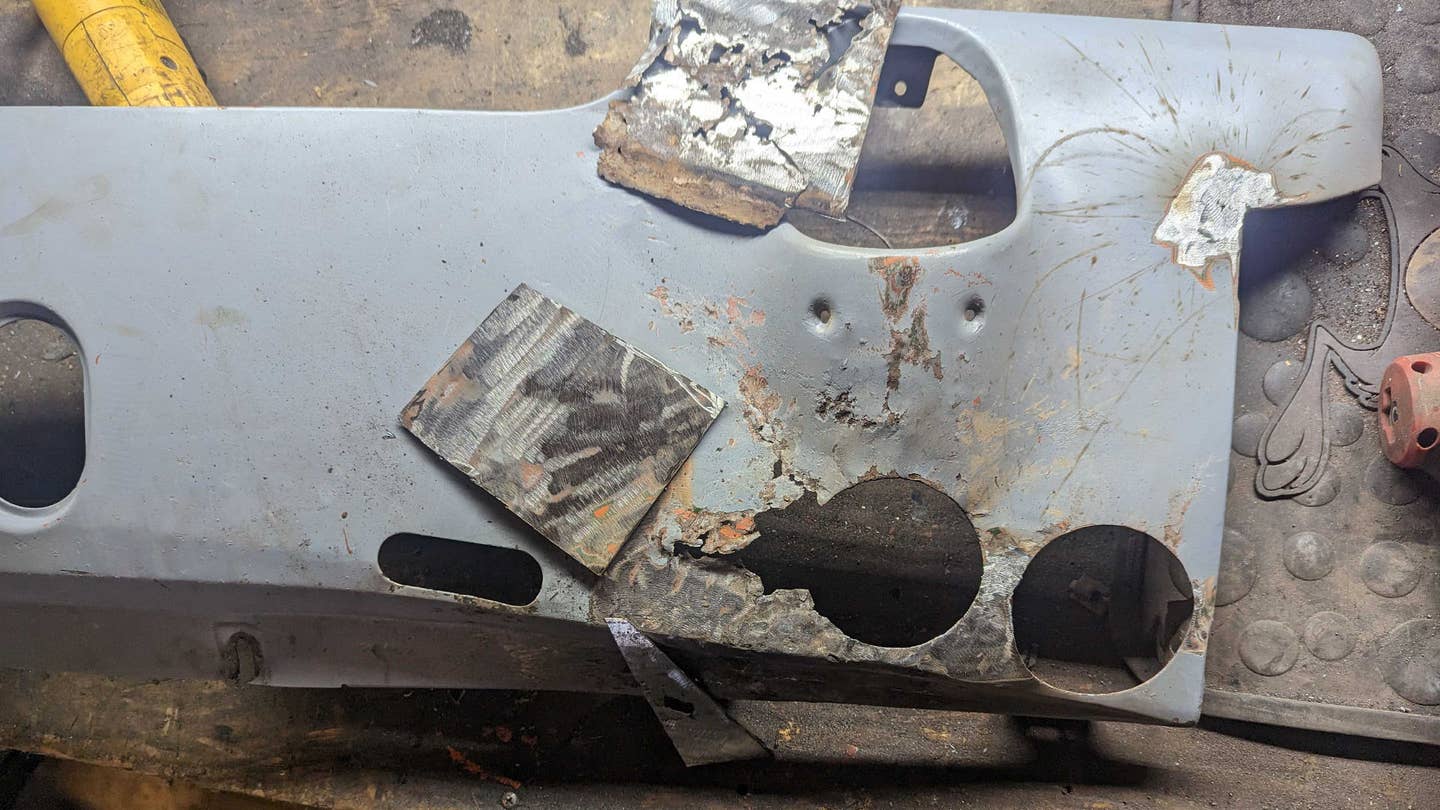
Once the patch was roughly the size and shape needed, I’d take the leap of faith and cut away the disaster area. From there, it was just a matter of slowly grinding down the edges of the patch until it fit the hole left behind.
Welding the patch in is the tricky part. This metal is thin and it doesn’t take much heat to warp it — a lesson I was reminded of the hard way on the fenders. I had to work slowly and methodically so as not to ruin the valance. I could easily work out any warpage with a hammer and dolly with the panel off of the car, but I still took my time and avoided it altogether.
After welding it all up, I had one last issue to tackle. These Charger valances have large holes in them, presumably for accessing the mounting hardware. This impromptu patch naturally intruded into the one opening. Luckily enough, my cut-off wheels are an exact match to the size of those openings, serving as the perfect template.
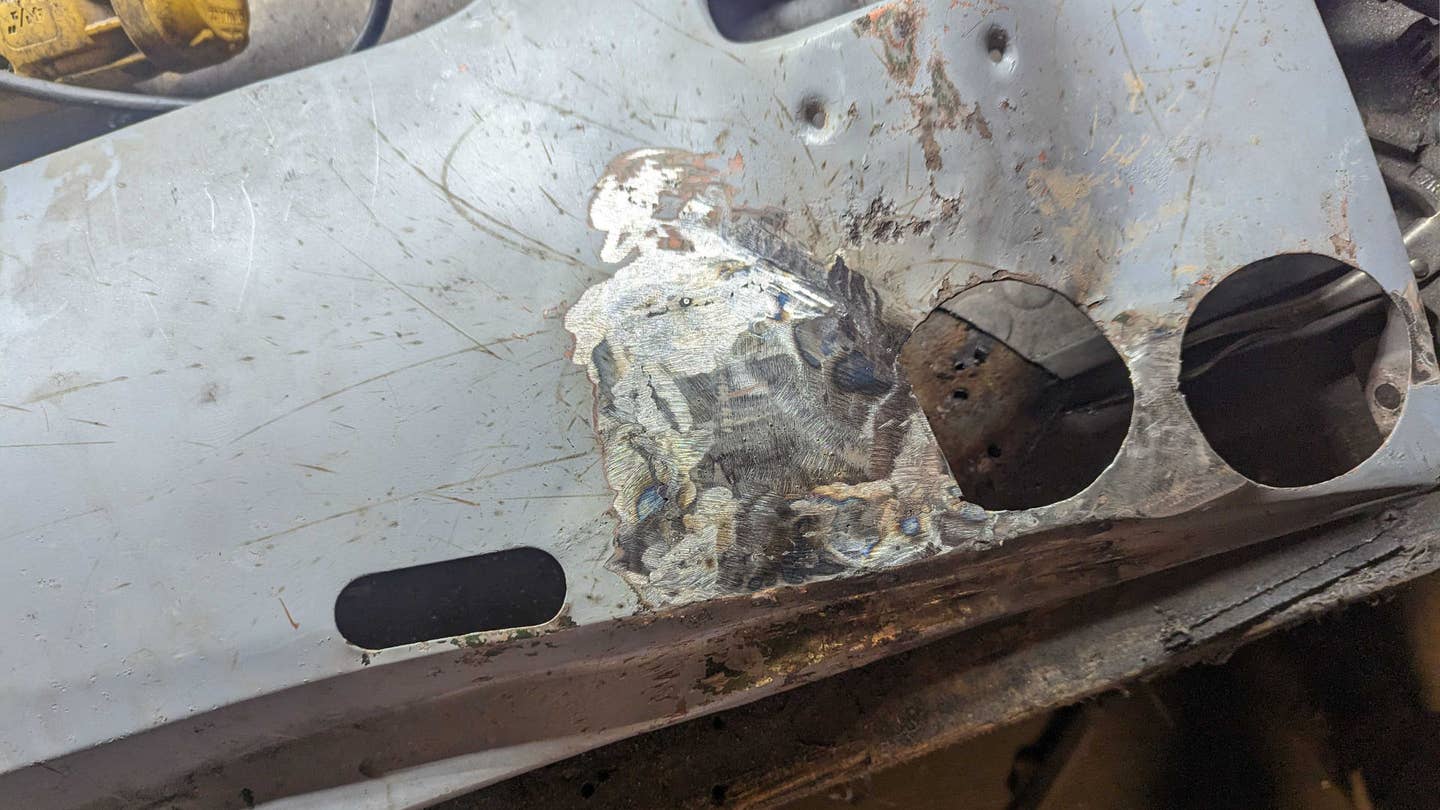
Even after a ton of grinding it’s obvious that repair work was done to the valance. I don't expect filler to hide much either. I’m not going to lie, I’m glad it’s going to be tucked under the car only to be seen on rare occasions. I actually can’t think of many situations where I’ll actually see it, which wouldn’t be the case had I left it alone. Before all of this, the car looked like it had a fat lip. Even if imperfect, it reduced the swelling and it saved me $200. What more could I want from a free patch?
What’s Next?
At this time, very little rust remains on the car and the original to-do list is almost too short to be intimidating. It should actually only take me a few hours to actually patch in the sheet metal where it's needed. However, there are still some massive steps I need to take before I can deal with it.
Body Checklist
DoorsDoor jamsRocker PanelsFender PatchesRoof SupportsRoof SkinTrunk- Inner Fender
- Firewall
- Paint
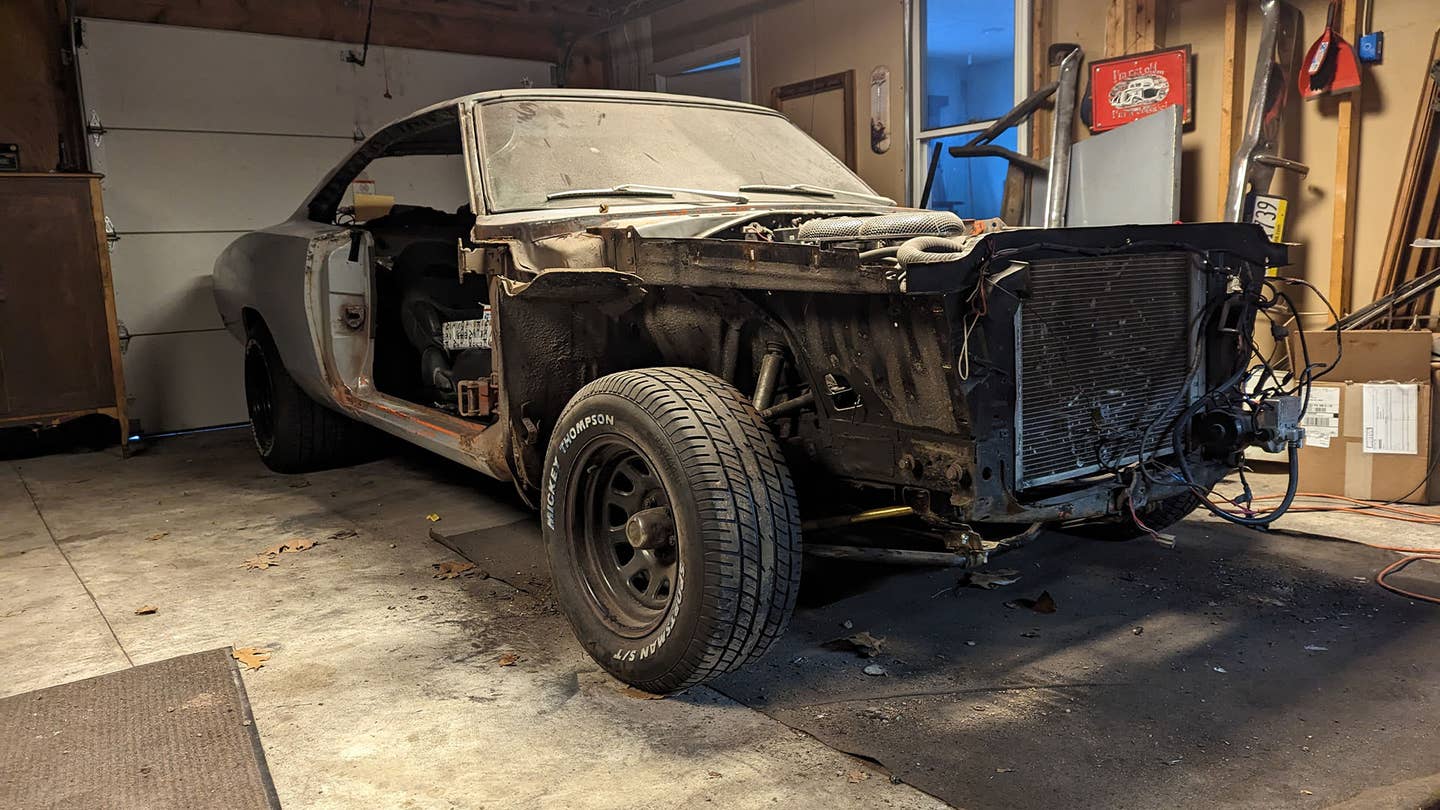
The last of the rust lives in the engine bay. I'm not kidding when I say a 3/8-inch hole in the firewall is the primary reason I need to pull the engine from the car to finish it up. I know fillers could probably do the trick for this situation, but gutting the car will make repairing the inner fender and core support easier, and I might as well do it all the right way. The good news is that it's all nuts and bolts work that I know like the back of my hand. It won't be long until I'm preparing for paint.
The Drive and its partners may earn a commission if you purchase a product through one of our links. Read more.