VW Jetta Smyth Ute Conversion: Dismantling, Measuring, and Marking the Cuts
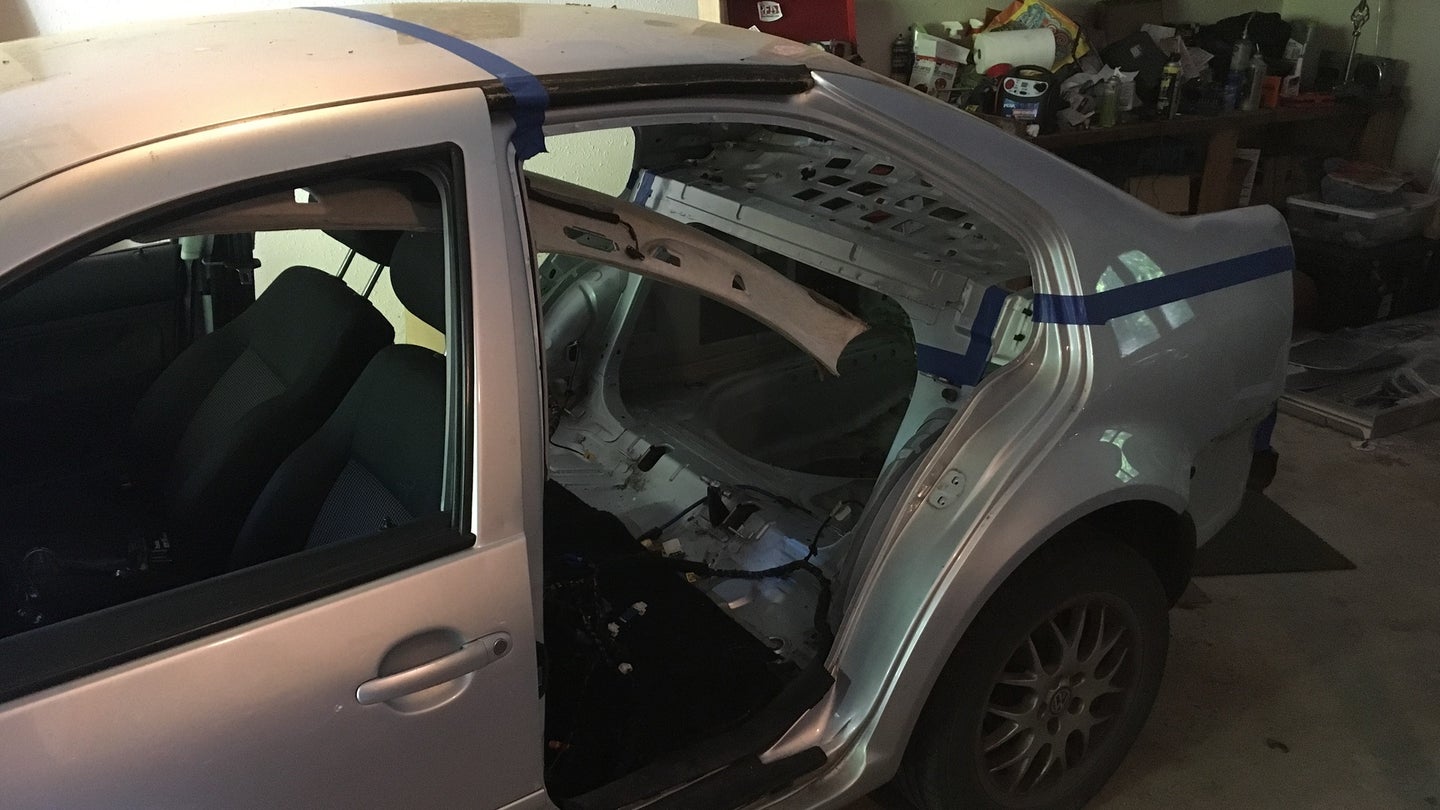
Disassembly is complete and I’ve marked where I will be cutting the car.

Smyth Performance offers Ute conversion kits for a growing number of sedans that the average shade tree mechanic—like myself—can assemble in their garage. I've decided to put that claim to the test by making a Ute out of my own 2003 Volkswagen Jetta. Here's how far I've come, and what I have in store.
So far I've received the kit and started stripping the back half of the car. Since then I've finished stripping the rear end bare. The bumper cover was the next major part to go. Surprisingly for a New England car, all of the bolts were easy to access and remove, not rusted into place as usual. The bumper cover was in pretty bad shape with a huge crack I had duct taped together to get away with state inspection. I bought the car knowing we would be turning it into a Ute, which includes replacing this part, so I didn't care about this damage, and got a good deal on the car as a result.
The back doors came off easily once I had the proper triple square sockets. After removing the standalone amplifier for the Monsoon sound system, I continued to unplug and label the wiring harnesses that run down either side of the car. Once everything was unplugged, I pulled the wiring out of the trunk and into the back seat area to keep it out of harm's way once the saw blades start flying.
An additional step, which doesn't apply to early Mk4 cars, was to remove the side curtain airbags that my later Mk4 has. These extend all the way through the passenger compartment from the A-pillar, across the roof, and down the C-pillar. You can see the problem with having these in place when half of the structure is about to get cut away. Even if you get some professional help with the kit, you will need to remove these airbags yourself, since it is typically illegal for a business to remove airbags. It is legal for you, as the owner, to remove them yourself. You can then use a VAG COM or similar computer to disable the airbag warning light on the dashboard, or remove the bags and plug in the inflators to fool it into thinking they are still there. Then, after removing the radio antenna from the roof, I was done stripping the car.
With all of the weight I removed, the back of the car now sits a good three inches higher than the front, and I haven't even cut it yet. I'd actually like the back to sit higher than stock once it's a Ute to make it look tougher. I'll swap stronger VR6 springs into the 1.8T's front end to raise it to match.
Finally, I measured and marked where I will actually cut the car. This is spelled out in the build manual. For a rough cut, I marked the rear quarter panels 14 inches above the wheel arch for the initial rough cut. Various seams in the rear package tray and across the back of the car make the cut lines easy to follow. The roof gets cut 3.25 inches behind the front doors. This is the most critical cut since it will be the only one visible where it overlaps the fiberglass panel for the rear of the "cab."
With that, it's time to stock up on saw blades and take a deep breath. We're ready to cut. These measurements leave plenty of excess metal to trim down to the proper fit later, but it's still a little scary to think I'm about to cut up a perfectly good car. But I'll get over it, and let the saws fly soon.
